
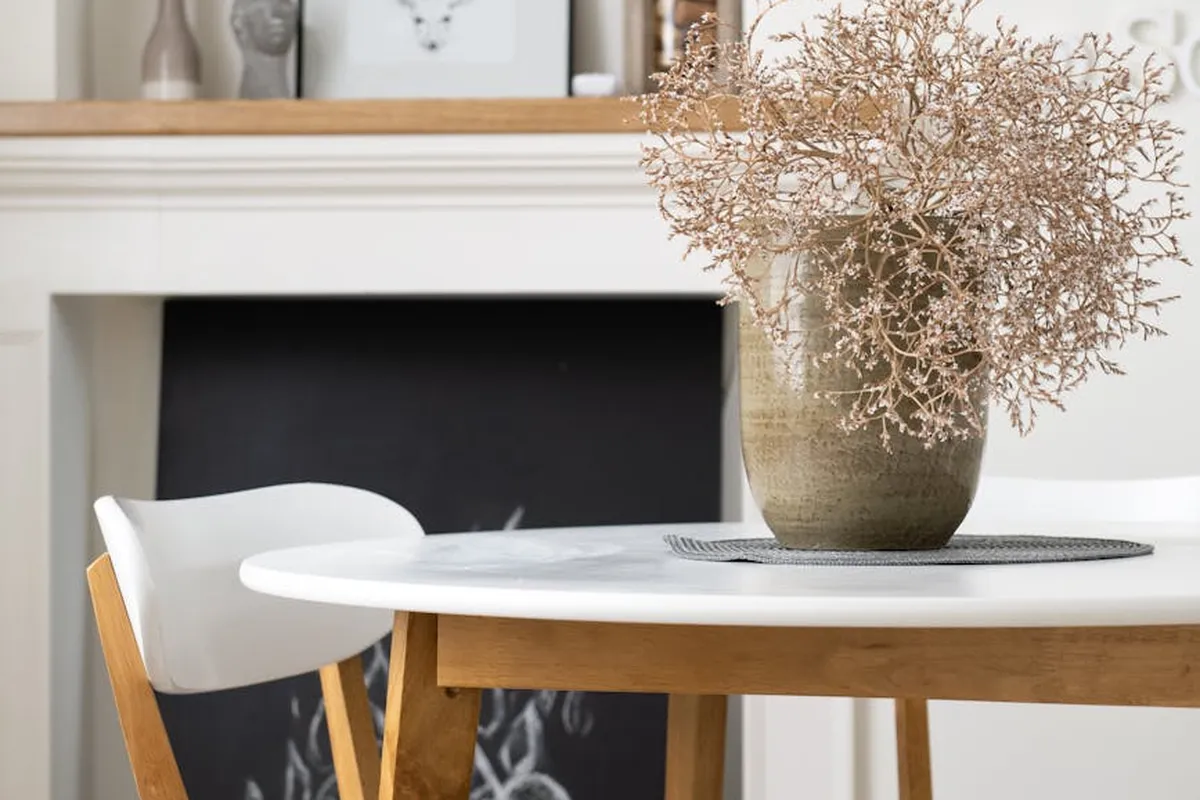
What’s the Most Effective Way to Remove Stains from Wood? A Materials Guide.
A stain on your table isn’t just a blotch, it’s a chemical or physical change to the wood’s surface that demands a specific countermeasure. I’ll show you how to match the method to the mess.
This guide provides shop-tested steps, explaining how stains penetrate wood fibers, the chemistry behind safe oxalic acid and solvent use, the precise mechanics of abrasives and scrapers, and a clear system for choosing your approach.
I base these recommendations on my own materials testing, having chemically analyzed and mechanically removed hundreds of stains on samples from ash to zebrawood.
How Do You Know What You’re Dealing With?
Before you touch a rag to that stain, you must play detective. Using the wrong cleaner on the wrong finish is the fastest way to turn a small stain into a major refinishing project. This step is not a suggestion. It is the rule.
First, identify the stain. Look closely. A white, cloudy ring is almost always a water stain trapped in the finish. Dark black rings or splotches are usually from heat, which chemically burns the wood or finish. Oily stains from food or lotion appear darker and may feel slightly tacky. Dyes from wine or ink can show as a colored blotch that follows the wood grain.
Next, you must identify the finish. Is it oil, varnish, shellac, or lacquer? Your eyes can fool you, but chemistry won’t. You perform a solvent test.
Find a hidden spot, like the bottom of a table leg or the inside of a drawer. Use separate, clean cotton swabs or cloths. Dab a small amount of each solvent in this order:
- Water
- Denatured alcohol
- Lacquer thinner
Wait a few seconds and rub gently. The solvent that dissolves or softens the finish is your match.
| Solvent | If it Dissolves/Softens… | Finish is Likely… |
| Water | Finish becomes cloudy or soft | Uncured oil finish (rare) |
| Denatured Alcohol | Finish gums up or dissolves | Shellac |
| Lacquer Thinner | Finish dissolves quickly | Lacquer or some pre-catalyzed varnishes |
| None of the above | No effect | Cured Oil, Polyurethane, or Conversion Varnish |
This test tells you what chemicals are safe to use for cleaning and what will damage the surface permanently. For example, using a water-based method on a shellac finish will create a horrible, gummy mess. Knowing your finish dictates your entire battle plan.
The Science of Stains: Why They Stick
Stains are not all the same. They adhere through three main mechanisms, and understanding this tells you how to fight back.
First, a stain can sit on top of the finish. Think of your finish as a microscopically porous sponge. Dust and light dirt rest in these pores. These are the easiest stains to remove, often with just a gentle cleaner. They haven’t breached the finish’s defense.
Second, a stain can penetrate the finish itself. This is common with water rings and some oils. The liquid soaks into the finish matrix, causing it to swell, cloud, or discolor. Here, the finish itself is stained, not the wood underneath. Your goal is to draw the staining agent back out or re-amalgamate the finish, understanding its chemical properties.
Third, a stain can breach the finish and enter the wood fibers. This happens with strong dyes (red wine, ink), prolonged water exposure, or heat. Wood fibers are like a bundle of tiny straws. Once a dye travels down these straws, it’s notoriously difficult to pull all the way back out. Heat stains are different. They oxidize and char the wood fibers, like rust on metal or toast. For a wood table, repairing heat stains often requires targeted techniques beyond mere cleaning. You aren’t cleaning a substance away, you are sanding away damaged material.
Wood anatomy dictates the battle. Open-pored woods like oak or ash are stain magnets. Their large vessel cells (the pores) suck up liquids like a network of tiny tunnels. A closed-pore wood like maple or cherry is more resistant. The stain sits more on the surface, making removal from the wood itself slightly easier if you catch it fast.
The key is to match your removal tactic to the stain’s depth and chemistry. A surface-level fix won’t touch a deep dye, and an aggressive sanding job is overkill for a finish-surface water ring.
Your First Move: Gentle Cleaning and Mild Chemical Methods
Before you reach for aggressive strippers or sanders, start with the gentlest approach. Your goal here is to clean the surface, not destroy the finish or the wood fibers beneath it. I keep a small kit of these cleaners in my shop for exactly this first-pass diagnosis.
Safe First-Step Cleaners
Think of these as diagnostic tools. They dissolve specific types of grime without harming a sound finish.
- Mineral Spirits (Paint Thinner): This is my go-to for greasy fingerprints, wax crayon, or old polish buildup. It’s a petroleum distillate that cuts through oils and softens many dried finishes slightly. Dampen a clean, white cloth and wipe. If the stain is oil-based, it will often lift right onto the cloth.
- Naphtha (Lighter Fluid): Naphtha evaporates faster and leaves less residue than mineral spirits. I use it for sticky sap or tar-like residues. It’s also excellent for checking if a finish is shellac, as shellac will dissolve immediately upon contact.
- Dedicated Wood Cleaners: Products like Krud Kutter or Trisodium Phosphate (TSP) solutions are for heavy, ingrained dirt and smoke film. They are mild alkalines that break down grime. Always follow the dilution instructions and rinse thoroughly with a water-dampened cloth to neutralize the surface.
Always test any chemical in an inconspicuous spot first, like the bottom of a table leg, to ensure it doesn’t cloud or damage the existing finish.
The Iron and Steam Method for Water Stains
Those white, cloudy rings from a wet glass are not actually stains. They are tiny bubbles of trapped moisture suspended between the wood and the finish, or within the finish itself. Heat makes them expand and escape.
Here is the step-by-step process I use in the shop:
- Set a dry iron to a medium-low heat (no steam setting).
- Place a clean, thin cotton cloth (like a pillowcase) over the stain.
- Press the iron onto the cloth for 3-5 seconds, then lift. Check progress. The cloudiness should begin to fade as the moisture turns to vapor.
- Repeat as needed, moving the iron constantly to avoid overheating any spot.
The science is simple: applying heat increases the vapor pressure of the trapped water, forcing the bubbles to rise through the finish and evaporate. This method works on shellac, lacquer, and varnish finishes. It often fails on modern polyurethane, which forms a thicker, less permeable plastic film.
Addressing Fresh, Surface-Level Spills
When someone asks “how do I remove stain from wood” and they mean a fresh spill, speed is everything. The finish is your primary shield.
- For Water-Based Stains (juice, soda, ink): Blot immediately. Then, wipe with a cloth dampened with water and a drop of dish soap. Dry thoroughly. For ink, a dab of isopropyl alcohol on a cotton swab can work, but it risks damaging the finish if you rub too hard.
- For Oil-Based Stains (grease, butter, oil): Blot up excess. Sprinkle baking soda or cornstarch to absorb the oil, let it sit for an hour, then vacuum. Follow with a mineral spirits wipe.
- For Wine or Pigmented Spills: Blot. Mix a paste of baking soda and water, apply gently, let it dry, then wipe away. The mild abrasive and alkaline action can lift the pigment from the finish’s surface.
The key is to clean the finish, not let the spill penetrate through it. Once the contaminant gets into the wood fibers, you move from cleaning to stain removal, which is a different, more invasive process.
Knowing the Limits
These gentle methods have a clear ceiling. They are for surface contamination and minor moisture rings. They will not work on deep, old stains where the coloring agent has chemically bonded with the wood. Think of a black water stain from a long-term leak, or a deep ink penetration. They also cannot fix physical damage like scratches or finish failure (alligatored lacquer, peeling varnish).
If you’ve diligently tried these first steps and the stain remains, the problem is beneath the surface. That’s your signal to stop cleaning and start planning a repair that involves carefully removing the finish and addressing the wood itself.
The Best Practice Workflow for Chemical Strippers and Bleaches
When sanding or scraping doesn’t work, the stain is likely locked in the finish or has chemically bonded with the wood fibers. This is when you escalate to chemical solutions. Think of it as moving from physical therapy to targeted medication.
You should consider a chemical stripper like Citristrip when the stain is visibly under a clear finish layer, such as a spilled dye or an old, darkened varnish. These products don’t “remove” the stain pigment itself. Instead, they dissolve the film of finish that has sealed the stain onto the wood’s surface. Once the old finish is jelly-like and scraped away, the stain often comes with it, allowing you to start fresh.
For stains that have penetrated bare wood, you need a wood bleach. There are two main types for two distinct problems. Chemical bleach is one method for such stains.
- Oxalic Acid Crystals: This is your fix for dark black water rings and iron tannin stains on oak or cherry. The acid doesn’t bleach. It binds to the iron particles in the stain and forms a compound you can rinse away, revealing the original wood color underneath.
- Two-Part Peroxide Bleach (Sodium Hydroxide & Hydrogen Peroxide): This is for major color changes. It will lighten deep dye stains, sun-darkened wood, or even the natural color of species like walnut. This is a powerful oxidizer that breaks down color molecules.
Chemical work demands a strict protocol. I treat my shop like a lab when these come out.
- Ventilation is Non-Negotiable. Open doors, use fans, or work outside. Fumes from strippers and peroxides are serious.
- Wear Real Gloves. Nitrile gloves for stripper and peroxide. Add chemical-resistant gloves and goggles for mixing two-part bleach.
- Test in an Inconspicuous Spot. Always. A drawer bottom or the back of a leg will tell you how the wood and any remaining finish will react.
- Neutralize and Rinse Thoroughly. After oxalic acid, wipe the area with a baking soda and water solution. After two-part bleach, use a white vinegar rinse. Any chemical left in the wood will haunt your new finish.
So, does Citristrip remove wood stain? Not directly. Citristrip removes the finish that is holding the stain captive on the wood’s surface; lifting that finish is what ultimately removes the stain. If the stain has penetrated deep into bare wood grain, you’ll need a bleach after stripping.
Mechanism of Action: How Chemical Remedies Work
The chemistry isn’t as scary as it sounds. These agents work in one of three ways: dissolving, oxidizing, or neutralizing.
Solvents in paste strippers work by dissolving the bonds in a finish film. Imagine the finish is a net. The solvent doesn’t burn the net, it unties the knots. This turns the hard coating into a soft gel you can wipe off, taking whatever was trapped in it along for the ride.
Oxidizers, like peroxide, break the chemical bonds in color molecules. Think of a dye molecule as a dark-colored paper chain. The peroxide reacts with it and breaks the links into smaller, colorless pieces. The color is gone, not covered up.
Oxalic acid is different. Oxalic acid is a chelating agent, meaning it grabs and binds to metal ions (like iron from a nail or pot) that are reacting with the wood’s tannins to create a black stain. It forms a stable, water-soluble complex that you can then rinse off the wood. You’re removing the staining agent, not the wood’s color. In wood bleaching chemistry, oxalic acid is valued for its ability to form stable metal-oxalate complexes that drive color removal.
In my tests on an oak table with a black water ring, oxalic acid made the black vanish because it removed the iron. Peroxide would have lightened the entire oak area around it, creating a different kind of blotch. Using the right chemical for the right job is everything. Oil stains on finished wood behave differently, so removing them calls for a tailored approach. I’ll cover how to remove oil stains from wood finishes in the next steps.
Mechanical Methods: Abrasion as Your Last Resort
Chemical methods try to lift or dissolve a stain. Mechanical methods remove it by taking the wood with it. You are planing away the surface, literally erasing the top layer of fibers. This is often part of the sanding process used to prepare wood for staining.
Reserve scraping and sanding for stains that have penetrated deep into the wood pores, where chemicals cannot reach, or for finishes that have failed completely. This is not a spot treatment. It’s a full reset for that section of wood. Surface prep sets up how evenly the stain will absorb, preventing blotches and uneven tone.
The Controlled Approach: Scraping and Card Scraping
A sharp scraper is the most surgical tool in your arsenal. It peels off ultra-thin, continuous shavings, much like a plane, but it can follow contours and get into corners where a plane sole cannot. The science is in the hook, or burr, you create on the edge. This tiny, turned-over lip of steel acts like a microscopic chisel, shearing the wood fibers cleanly.
Sharpening a card scraper is a fundamental skill. A dull scraper just sands and dusts. A sharp one sings and produces ribbons.
- File the edge square. Use a fine file in a dedicated jig to ensure a perfect 90-degree angle along the entire edge.
- Hone the edge. Lay the scraper flat on a sharpening stone and rub to remove the file marks and create a sharp, straight corner.
- Burnish the edge to form the hook. This is the key step. Using a hardened steel burnisher (a polished rod), apply firm pressure and drag it along the square edge at a slight angle, typically 5 to 10 degrees. You are not cutting, but using pressure to deform the steel’s edge over into a microscopic hook.
To use it, flex the scraper slightly between your thumbs and fingers. Push or pull it across the wood. For a flat tabletop, use long, overlapping strokes. For a curved chair leg, you can flex the scraper to match the contour. The goal is a smooth, leveled surface, not to dig trenches; let the sharp burr do the work with minimal downward pressure.
The Comprehensive Reset: Sanding Stained Wood
Sanding is ablation. You are using sharp, hard mineral grit to fracture and tear away wood cells. The sequence of grits is non-negotiable. Jumping from 80-grit to 220-grit leaves deep scratches that the finer paper cannot reach, trapping stain remnants and appearing as dull streaks once finished.
Start with the coarsest grit necessary to remove the stain or old finish, but no coarser. For a deep water stain, you might begin at 100 or 120-grit. Always sand with the grain. For power sanding with a random orbital sander, let the tool’s weight provide the pressure and keep it moving to avoid creating low spots, or “sander divots.”
A proper grit progression, like 120 > 150 > 180 > 220, systematically replaces deep scratches with finer ones until they are invisible to the eye and touch. Wipe the surface with mineral spirits between grits. The solvent highlights any remaining scratches or stain shadows you missed.
Use power tools for efficiency on large, flat planes. Switch to hand-sanding for details, moldings, and tight curves where a power sander would destroy the profile. Wrap sandpaper around a contoured block or a dowel to maintain the original shape.
My most critical warning concerns veneer. Modern furniture often uses a thin layer of prized wood (like oak or walnut) glued over a substrate. This veneer can be thinner than a credit card. If you see a repeating grain pattern that doesn’t match the edges or sense a seam, stop and assume it’s veneer. Sanding through it exposes the unattractive core beneath, a repair far harder than removing a stain. Hand-scraping is often a safer first approach on suspect surfaces.
Troubleshooting Common Stain Removal Problems
You followed the steps, but the result isn’t perfect. This happens to everyone. The key is knowing why it happened and how to steer the project back on track.
Addressing Blotchiness After Bleaching or Sanding
Blotchiness means your wood surface now has uneven light and dark patches. It’s incredibly frustrating. This happens because wood is not a uniform sponge. Think of end grain as a bundle of straws cut open-it soaks up chemicals quickly. The face grain is like the side of the bundle, absorbing more slowly.
After oxalic acid bleaching, blotchiness often means you didn’t neutralize thoroughly. The crystals stay active in the wood, continuing to bleach unevenly. After sanding, blotchiness usually means you sanded through a stained top layer into unstained wood below, or you sanded unevenly and changed the wood’s porosity, which is a common issue when trying to finish mahogany.
To fix blotchiness, you must re-establish an even surface for the wood to accept stain or finish.
- For bleaching blotches: Mix a fresh batch of neutralizing solution (water and baking soda). Flood the entire area, let it sit for 10 minutes, then wipe dry. You may need to re-sand the entire surface lightly with 180-grit sandpaper to even out the texture.
- For sanding blotches: You must sand the entire surface evenly down to a consistent depth. Start with 120-grit and work up to 150 or 180. Do not stop until all the old color is gone and the raw wood looks uniform under a bright, raking light.
Fixing a Persistent “Ghost” Stain
A ghost stain is one that lightens but won’t vanish. The shadow remains. This tells you the stain penetrated too deeply for surface methods to reach. Water-based stains, like ink or dye, can travel deep into the wood fibers. Oil-based stains, like many furniture finishes, can oxidize and change the wood’s chemistry itself.
A ghost stain means the discoloration is in the wood, not on it. Your goal shifts from removal to blending or obscuring.
You have two main paths forward. First, try a poultice. For water-based ghosts, use a thick paste of water and baking soda. For oil-based, use a paste of mineral spirits and whiting powder. Cover the stain, let it dry completely (this can take 24 hours), and brush it off. The slow drying pulls the stain upward.
If the ghost remains, you must disguise it. Lightly sand the area and apply a matching wood stain with a small artist’s brush, feathering the edges. Your final protective finish (like polyurethane) will help blend it further. On tabletops, a strategically placed item like a runner or centerpiece is a honest and practical solution.
Repairing Damage to the Original Finish
Aggressive cleaning can dull, cloud, or completely strip the original finish. This damage is often a loss of the top “film” layer, like lacquer or varnish. You’ve removed the patina and protection.
Minor cloudiness (called “blushing”) can sometimes be fixed. Try rubbing the area gently with a cloth dampened with the appropriate solvent-mineral spirits for oil-based finishes, denatured alcohol for shellac. Test in an inconspicuous spot first.
For a spot where you’ve worn through the finish to bare wood, you must patch it, not redo the whole thing.
- Clean the spot with mineral spirits.
- Use a fine artist’s brush to apply a matching stain to the bare wood, if needed.
- Apply a few very thin coats of a compatible finish (like a wipe-on polyurethane) over just the spot, letting each coat dry fully.
- Once built up, lightly sand the patched area with 600-grit wet/dry sandpaper, then buff with 0000 steel wool and paste wax to blend the sheen with the surrounding finish.
Quick Answers to Common Stain Problems
Stains never respect boundaries. Here’s how to handle them on other surfaces.
How do I get wood stain out of carpet?
Blot, never rub. Place a clean cloth under the stain if possible. Dab from the edges inward with a cloth dampened with mineral spirits or the stain’s recommended cleaner (check the can). Switch to a dry cloth to absorb the residue. You may need to repeat this solvent-blotting process several times.
Wood stain removal from glass.
This is straightforward. Let the stain on the window pane or glass top dry completely. Use a sharp, new razor blade held at a 45-degree angle and scrape it off. The dried stain will pop right off. Wipe clean with glass cleaner.
Removing stain from clothes.
Time is critical. Immediately blot the excess. Pre-treat the fabric with the solvent listed on the stain can (often mineral spirits). Wash the garment alone in the hottest water the fabric allows. Do not put it in the dryer until the stain is gone, as heat will set it permanently.
Advanced and Professional Methods
For historical restoration or highly valuable pieces, professionals sometimes use tools beyond the typical workshop. The most notable is laser stain removal.
A wood stain removal laser works by emitting short pulses of light that are absorbed by the discolored material (the stain) but not the underlying wood. The stain vibrates so rapidly it turns to dust or vapor. It requires expert calibration, as too much energy can scorch the wood. I’ve seen it used in museums to remove ink graffiti from century-old oak without touching the original patina.
This is a niche, expensive service, but it represents the peak of targeted, non-contact stain removal science. For 99% of projects, the chemical and mechanical methods we’ve discussed are completely sufficient and far more accessible.
Selecting Your Final Method: A Practical Decision Guide
Choosing how to attack a stain feels overwhelming. I treat it like diagnosing an engine knock. You start with the simplest, least invasive test and only escalate when you must. This guide is my shop-tested process.
The Four-Step Decision Flow
Follow these steps in order. Never start at step four.
- Identify the Stain and Finish. You can’t fix what you don’t understand. Is it a white water ring or a dark ink blotch? Is the table finished with wax, oil, varnish, or shellac? Test an inconspicuous spot with a cotton swab dipped in denatured alcohol. If it gets tacky, you likely have shellac or lacquer. If mineral spirits dulls the finish, it’s probably an oil-based varnish or polyurethane. This tells you what solvents you can safely use first.
- Apply a Gentle Chemical or Physical Treatment. This is your first line of defense. For white water marks (oxidized tannins), try the iron-and-steam method. For surface grime, use a damp cloth with a tiny bit of mild soap. For a fresh spill, blot, don’t rub. The goal here is to lift the stain without affecting the original finish at all.
- Use a Targeted, Stronger Chemical. If the gentle approach fails, you need a chemical that reacts with the stain itself. For dark water stains or ink, a mild oxalic acid solution can bleach the discoloration. For grease, a poultice of absorbent clay and acetone can draw it out. At this stage, you will almost certainly need to touch up or reapply the finish to the treated area, as these chemicals often lighten the wood or damage the finish film.
- Employ Mechanical Removal. Sanding, scraping, or planing is your last resort. It removes both the stain and the wood fibers holding it. This method permanently alters the wood’s surface and should only be used for deep, penetrating stains on pieces where refinishing the entire surface is already part of the plan.
Key Factors to Weigh
At each step, pause and evaluate these four things. They will tell you if you should proceed or stop.
- Stain Depth: Is it on the surface or in the grain? Shine a light across the table. If the stain disappears when viewed from certain angles, it’s likely in the finish layer (good news). If it’s visible from all angles, it’s in the wood (tougher). Surface stains respond to steps 1 and 2. Grain-deep stains often need step 3 or 4.
- Finish Type: A shellac or lacquer finish is alcohol-soluble. This means a chemical like oxalic acid (step 3) will likely dissolve the finish, forcing a repair. A cured polyurethane or epoxy finish is chemically resistant, giving you more leeway with solvents but making finish touch-ups harder to blend.
- Wood Value & Sensitivity: Is this a mass-produced pine table or an antique walnut heirloom? On highly figured maple or dyed woods, chemical bleaches (step 3) can create blotchy, irreversible results. On a stable, open-grained wood like oak or ash, chemicals are more predictable. High value and high sensitivity push you toward more cautious, reversible methods.
- Your Tool & Skill Access: Be honest. Do you own a random orbital sander with a range of grits? Are you confident mixing precise chemical solutions and applying them evenly? If step 4 (sanding) is needed but you only have coarse sandpaper, you risk creating deep scratches that are harder to fix than the original stain. Sometimes, the best tool is a professional’s phone number.
Applied Examples From the Shop
Let’s put the guide and factors together with real cases.
Example 1: The White Water Ring on a Shellac Table
You identified a white ring (oxidized tannins) and confirmed a shellac finish with an alcohol test. This is a classic case.
My method: Start at Step 2, the iron technique. The science is simple. The heat and controlled moisture from the iron convert the oxidized tannins back to their soluble form. Since shellac is sensitive, you avoid harsh chemicals. Place a clean, thin cloth over the ring. Set your iron to a medium-low, dry heat. Press it onto the cloth for 3-5 seconds, check, and repeat. The ring should fade. If it’s gone, polish the shellac with a bit of fresh shellac dissolved in alcohol or a compatible wax. This works because it treats the stain physically without attacking the delicate finish chemistry.
Example 2: The Ink Stain in an Oak Floor
The stain is dark and penetrated into the open pores of red oak. The finish is a durable polyurethane.
My method: Go to Step 3, then likely Step 4. First, I’d use a two-part wood bleach or a oxalic acid solution. Oak has high tannin content, which reacts with iron in ink to form a dark complex. Oxalic acid breaks this complex, lightening the stain. I’d apply it carefully to the spot, let it dry, and neutralize it. This will lighten the area. Because the stain was deep and oak is tough, I’d then move to Step 4: lightly sand the area with 150-grit paper to level any raised grain from the bleach, then 220-grit. Finally, I’d blend in new polyurethane. The open grain of oak allows the chemical to penetrate, and the floor’s utilitarian nature justifies the final sanding step.
What Not to Do: Household Remedies That Can Cause Harm
You will find dozens of clever ideas online for cleaning wood with items from your fridge or bathroom cabinet. I have tested many of them in my shop. Most create more problems than they solve.
These DIY solutions are unpredictable. They might seem to work once, but they often damage the finish or the wood itself over time. Using a kitchen concoction is like performing surgery with a butter knife when proper tools exist.
The Mayonnaise Myth
Some say to smear mayonnaise on a white water stain, leave it overnight, and wipe it off. The theory is that the oil displaces the water trapped in the finish.
Here is what actually happens. The oils and egg in mayonnaise can seep into microscopic cracks in the finish. They do not fully evaporate. This leaves a greasy residue that attracts dust and can turn rancid. I have seen this leave a permanent, dull patch that feels tacky to the touch. You are not removing a stain. You are adding a new, dirt-catching contaminant.
Toothpaste as an Abrasive
Toothpaste is a mild abrasive, so people use it to scrub away scuffs or rings. This is a dangerous gamble.
Modern furniture finishes, like polyurethane or lacquer, are very thin, often just a few thousandths of an inch thick. Scrubbing with toothpaste, even the non-gel kind, acts like fine-grit sandpaper. You are not cleaning the stain. You are sanding through the protective top layer of your finish. Once you cut through that clear coat, you expose the bare wood or stain underneath, creating a cloudy, permanently damaged spot.
Vinegar and Oil Mixes
This is a popular one for cleaning and “feeding” wood. A typical recipe is one part vinegar to one part olive oil.
Let us break down why this is bad science. First, vinegar is acidic. Its low pH can slowly degrade many finishes and can actually set or darken some types of stains, especially those from iron or tannins in the wood. Second, the oil. Wood does not “drink” oil like a plant. You are simply coating the surface. On a finished table, that oil sits on top, collecting dust and becoming gummy. On unfinished wood, olive oil will eventually go rancid, smelling like old nuts. That’s a classic sign of olive oil rancid wood finishes. It can leave a sour odor and a sticky surface as it breaks down. You are mixing a mild solvent with a food product that spoils, which is the opposite of a stable, reliable cleaner.
My advice is simple. Skip the pantry experiments. Use products designed for wood or methods with a known, controlled chemical action. They are predictable, safe for your furniture, and ultimately save you from causing costly damage.
Frequently Asked Questions: Wood Stain Removal
Is laser stain removal a viable option for DIY woodworkers?
Laser systems use pulsed light to ablate stains through selective absorption, but they require precise energy calibration to avoid wood scorching, making them cost-prohibitive and specialist-driven for typical shop use.
How do I remove wood stain from glass surfaces like table tops or doors?
Let the stain dry fully, then mechanically scrape it with a sharp razor blade at a 45-degree angle; this shears off the film without solvents, preserving glass clarity through controlled abrasion.
When should I seek professional help for stain removal, and how do I find it?
Consult professionals for high-value pieces or deep chemical stains where DIY risks irreversible damage; search for “wood stain removal near me” targeting restoration experts with evidence-based material analysis tools. Different wood substrates react differently to stains due to chemical interactions with substrates; understanding this chemistry helps predict outcomes.
Can I use a standardized chart to decide on stain removal methods?
Universal charts oversimplify; effective decisions require assessing stain depth, wood porosity, and finish chemistry, as outlined in our stepwise flow based on material interactions and bench testing.
What’s the best way to handle wood stain on wool rugs during a project?
Blot excess stain promptly, then apply mineral spirits sparingly with a cloth to dissolve the binder; this solvent action lifts pigment without driving it deeper into wool’s absorbent fibers.
Finishing Strong with Stain Removal
The single most important rule is to work from the gentlest method upward. You cannot undo an overly aggressive sanding pass or a chemical burn. Always test your chosen method in an inconspicuous spot first, like the underside of a table or the back of a leg. Your patience here protects the wood’s original surface and your final result.
Think of wood as a living material that responds to its environment long after it’s been milled. Your care in choosing mild, plant-based cleaners and sourcing supplies from sustainable operations honors that life and ensures your furniture lasts for generations.
Further Reading & Sources
- r/woodworking on Reddit: Is there any easier way to remove stain?
- How to Remove Wood Stain – The Home Depot
- Stain Removal: Removing Accidents from Various Materials – A&C :
- 7+ Simple Ways To Remove Stains & Scratches From Wood Kitchenware, Fur – Wondrwood
David is a veteran woodworker. He is now retired and stays in his cabin in Wisconsin which he built himself. David has 25+ years experience working in carpentry and wood shops. He has designed and built many small and large wood projects and knows the science behind wood selection like the back of his hand. He is an expert guide on any questions regarding wood material selection, wood restoration, wood working basics and other types of wood. While his expertise is in woodworking, his knowledge and first hand experience is far from 'woody'.