
How Do You Tell Mahogany from Pine? A Materials-Based Guide to Wood ID
You need to know what wood you’re holding to choose the right tool, finish, or source it ethically. I still check grain and heft on every board that comes into my shop.
We will move past guesswork to reliable, shop-tested methods. This article covers reading grain patterns, performing simple density tests, understanding the hardwood versus softwood science, and spotting the telltale signs of mahogany, pine, and ash.
My advice comes from cross-referencing lumberyard samples with materials data in my own workshop.
Start Here: Your Five-Minute Wood ID Method
Forget the textbooks for a minute. When you’re in the shop or at the lumberyard, you need a fast, practical test. I use this three-step method on every mystery board I find.
First, look at the end grain. This cross-section shows you the tree’s growth rings and pore structure. Hardwoods like oak and ash have open pores you can see and feel. Most softwoods, like pine, have no visible pores, just tight growth lines.
Next, feel the weight. Pick the board up. Density is a huge clue. A heavy board for its size points to species like maple or oak. A very light one might be pine or poplar. Comparing weight in your hands quickly separates light softwoods from dense hardwoods.
Finally, test the hardness with your fingernail. Find an inconspicuous spot and press your nail into it. On softwoods like pine, you’ll leave a dent. On hardwoods like ash or maple, you won’t. It’s that simple.
Last month, I found a dusty board in my pile. It was medium weight, with a tight, pore-less end grain. My nail left a slight mark. That told me it was a softwood, and the color pointed straight to pine. This test isn’t perfect, but it gets you 90% of the way there without a microscope.
Hardwood or Softwood? It’s Not About Hardness
This is the biggest mix-up in woodworking. The terms are botanical, not descriptive. Hardwoods come from deciduous trees that lose their leaves. Softwoods come from conifers, which are usually evergreen and have cones.
This is why the names are misleading. Balsa wood, one of the lightest and softest woods on Earth, is technically a hardwood. Yew, which is dense and hard enough for bows, is a softwood. The label tells you about the tree’s seeds, not the lumber’s actual hardness.
So when you identify pine as a softwood, you’re noting it’s from a conifer. Those pine cones on the forest floor? They are the tree’s seed structures. The lumber for your project comes from the tree’s trunk, but the cone tells you its family. This classification helps you predict other traits, like how the wood will absorb finish or respond to carving tools.
Reading the Grain: Your Visual Cheat Sheet
Think of wood grain as a tree’s personal barcode. It holds the secrets to its identity. I used to mix up ash and oak until I learned to read the grain like a map. Let’s break down the key terms so you can do the same.
Grain Speak: Pores and Patterns Decoded
All wood has pores. These are tiny tubes that carried water up the tree. Their size and how they’re arranged are your first big clues.
Open grain and closed grain refer to pore size. Open-grain woods have large, visible pores. Run your fingernail across a piece of red oak. You will feel ridges. Closed-grain woods have pores too small to see or feel easily. Maple feels like glass under your hand.
The arrangement matters just as much. Ring-porous woods, like ash and oak, grow with their pores in distinct rings. Each new growth ring starts with a band of large pores for spring, followed by a band of tight, small pores for summer. This creates a strong, flexible structure-perfect for a baseball bat.
Diffuse-porous woods, like maple and cherry, spread their pores evenly throughout the growth ring. The pattern is uniform, which is why these woods often have a smoother, more consistent look when finished.
Your Three-Angle Inspection Plan
Don’t just look at the pretty face. To really know a wood, you need to examine it from all sides. Here is my shop routine.
Face grain is the wide, show surface of a board. This is where you see the big picture patterns. Look for straight lines, cathedral shapes, or wild curls. Pine shows simple, repeating arches. Mahogany often has a striped, ribbon-like figure.
End grain is the most important view for identification. This is the wood cut across the growth rings. Sand it smooth and look with a 10x hand lens. You will clearly see if the pores form rings or are scattered. I keep a cheap jeweler’s loupe on my bench. It turns guessing into knowing.
Side grain shows you how the board was sawn from the log. Look at the edge. If the grain lines run straight up and down, it’s quartersawn. This wood is stable. If the lines form big curves, it’s flatsawn. It moves more with seasonal humidity but has bolder patterns.
Grain in Action: Pine Versus Mahogany
Let’s compare two common woods with very different stories. This shows why grain reading works.
Pine has a simple, predictable grain structure. As a softwood, it doesn’t have true pores like hardwoods. Its face grain shows clear, parallel growth lines with little drama. The end grain reveals small, uniform cells. This simplicity makes it easy to work. I can plane a pine board quickly with minimal tear-out. These traits translate to a range of pine wood applications and uses. It’s widely chosen for furniture, shelving, and framing.
Mahogany has a complex, interlocked grain. This hardwood grows with its fibers twisting around each other. On the face, this creates that prized ribbon stripe. On the end grain, you’ll see diffuse pores. That interlocking makes it stable and durable, but it can be tricky. If you plane against the grain, it will splinter. I test my planing direction on a scrap piece every time.
Ash fits between them. Its ring-porous grain creates bold, straight stripes on the face. It feels heavier than pine and has a more pronounced texture than mahogany. Hold a piece of each. The weight and the visual texture tell you more than any label could.
The Weight and Hardness Test: Density in Your Hands
Think of wood density as how tightly packed the wood fibers are. In the shop, we use a number called specific gravity. If a wood has a specific gravity of 0.50, it’s half as dense as water. Pick up a block of it, and it will feel surprisingly light.
Hardness is different. It tells you how well the wood resists dents and wear. The standard test is the Janka hardness test. It measures the force needed to embed a small steel ball halfway into the wood. We get a number in pounds-force (lbf). A higher number means a harder wood.
The best tool you have is your own hands. I call it the “heft test.” Lift a board. Does it feel heavier or lighter than you expected for its size? A dense wood like oak or maple has a solid, substantial feel. A lighter wood like pine or poplar feels, well, lighter. Keep a few known offcuts in your shop for quick comparison.
So, how hard is ash wood? Ash is a hard, stiff wood. Its Janka hardness is typically around 1,320 lbf. For perspective, red oak is about 1,290 lbf, and white oak is 1,360 lbf. Ash sits right between them. It’s tough enough for baseball bats and tool handles, but it’s still very workable with tools.
Technical Spec Sheet: Mahogany, Pine, and Ash at a Glance
This table puts the numbers and my shop experience side-by-side. Remember, these figures are averages. Real wood has natural variation.
| Species | Janka Hardness (lbf) | Specific Gravity | General Workability | Common Uses |
|---|---|---|---|---|
| Mahogany (Genuine) | 800 – 900 | 0.50 – 0.60 | Excellent. It cuts, planes, and sands beautifully with minimal tearout. Glues and finishes very well. | Fine furniture, cabinetry, boatbuilding, veneer. |
| Pine (Eastern White) | 380 – 400 | 0.34 – 0.40 | Very Easy. It’s soft, so it dents easily. It can be “stringy” when planing. Takes stain unevenly, so use a pre-stain conditioner. | Framing, interior trim, rustic furniture, shelving. |
| Ash (White) | 1,300 – 1,320 | 0.55 – 0.60 | Good. It machines well but can be splitty when nailing near edges. Open grain requires a filler for a glass-smooth finish. | Tool handles, sports equipment, furniture, flooring. |
A quick safety note: The dust from many woods, including some mahoganies, can be an irritant. Always wear a good dust mask or respirator when sanding or machining any wood. It’s a simple step that makes the craft sustainable for you, too.
Spotting Mahogany: Color, Grain, and the Scent Test
Genuine mahogany has a warm, inviting color that starts as a pale pinkish-tan. Over time, and especially when exposed to light, it matures into a rich, deep reddish-brown. This predictable darkening is a reliable clue; if a wood claiming to be mahogany doesn’t change color over years, it’s likely a lookalike like Lauan or Sapele. In my shop, I keep a sample block of fresh-cut mahogany next to a 10-year-old finished piece. The contrast tells the whole story.
The most definitive visual identifier is its grain. When mahogany is quartersawn, the growth rings are sliced at a sharp angle, revealing a stunning pattern of alternating light and dark bands. This signature ribbon-stripe or “roe” figure looks like stacked chevrons or a series of parallel, shimmering lines, and it’s a dead giveaway for true mahogany. Plain-sawn boards will show a simpler, interlocked grain pattern that can still be distinguished by its uniform, medium texture without dramatic pores or wild figuring.
Your hands and nose are just as important as your eyes here. Pick up a board. Mahogany has a moderate heft, typically around 40 lbs per cubic foot. It feels solid but not rock-hard. Run your fingers across the surface. The texture should be consistently fine and even, not coarse or oily.
To separate it from a common imposter like teak, focus on three things: weight, texture, and smell. Teak is significantly heavier and denser, often over 45 lbs per cubic foot, and its surface has a distinctly oily or waxy feel from its natural resins. The final test is the scent. Lightly sand a hidden spot. Fresh mahogany has a subtle, sweet, almost spicy scent. Teak smells strongly of leather or old books. I use this sanding test on every unfamiliar board in my lumber pile.
Identifying Pine: Growth Rings, Softness, and Sap
Pine is the friendly neighbor of the lumber world. You can find it anywhere. Its most obvious calling card is its bold grain pattern. Look for wide, alternating bands of light and darker color; these are the growth rings, and in pine they are exceptionally pronounced. The light band is the fast-growing, porous springwood (earlywood). The darker band is the dense, slow-growing summerwood (latewood). This stark contrast is a quick visual giveaway. However, it’s important to note that not all woods with pronounced grain are pine, especially when it comes to woods that resemble pine in joinery.
Now, pick up a sample. Pine is a softwood, and it lives up to the name. The “fingernail test” is a reliable field check: press your thumbnail firmly into the wood on a hidden edge or surface. On most pine, you will leave a visible dent. This is because its cell structure is less dense than hardwoods. For context, Eastern White Pine has a Janka hardness rating of about 380 lbf, while a hardwood like Red Oak is nearly 1,290 lbf. Your thumbnail confirms that science. That science ties to pine wood Janka hardness density—the measure of how resistant pine is to denting. It explains why pine dents more easily than harder woods.
There are two main types you’ll encounter. White Pine is the pale, uniform choice. It has a creamy, almost pure white to light brown color with very subtle grain contrast. White pine is my go-to for hand tool projects because it cuts like butter and has a consistently smooth texture with few resin pockets. Yellow Pine, often called Southern Yellow Pine, is stronger and heavier. Its heartwood has a rich, yellowish to reddish-brown hue, the growth rings are even more distinct, and it’s famously full of resin.
You must also account for knots. Pine is a knotty wood, and that’s not a flaw but a feature of its growth. Expect small, tight “black” knots in clearer grades and large, loose “red” knots in construction lumber. These knots are harder than the surrounding wood and can tear out during planing. They also contain sap that can bleed through finishes. A quick sanding test on a knot will often release a faint, sweet, turpentine-like smell, another classic pine identifier.
Recognizing Ash: Pores, Flexibility, and Pale Color
If you run your hand across a piece of ash, you’ll feel it before you see it. The surface has a distinctive texture, like very fine corduroy. This comes from its large, open pores.
Ash is a ring-porous hardwood. This means its earlywood (the wood grown in spring) contains a band of large-diameter vessel cells for moving water. These create visible lines of open pores. In oak, these pores are also large but often plugged with tyloses. In ash, they are typically wide open.
To identify it, drag a fingernail across the grain; if it catches noticeably on the open pore lines, you’re likely looking at ash.
The Classic Ash Palette
The heartwood of ash is usually a pale, creamy beige-brown. It lacks the strong red or pink tones of cherry or the deep brown of walnut. The sapwood is even lighter, often a whitish color, and can be very wide.
This light color is a great canvas for stains. However, it’s also a source of confusion. You can mistake plain-sawn ash for white oak, especially if it has a similar coarse texture. The key difference is in the ray fleck. White oak shows prominent ray flakes on quarter-sawn faces. Ash does not; its rays are mostly invisible to the naked eye.
If you see a light wood with a coarse, textured grain but no shimmering ray patterns, ash is your prime suspect.
Built to Bend: The Physics of Flexibility
Ash is famous for its shock resistance and bending strength. This isn’t magic; it’s anatomy. Those long, straight grain lines and open pores create a structure that can absorb tremendous energy without snapping.
Think of a bundle of drinking straws versus a solid rod of the same material. The bundle (like ash’s structure) flexes and returns to shape. The solid rod is more likely to crack under the same stress. This is why ash has been the choice for tool handles, baseball bats, and bentwood furniture for centuries.
In the shop, this translates to a wood that is tough to hand-saw but machines cleanly. If you’re steam-bending, ash is a top-tier choice. It accepts the steam well and holds its new shape reliably after drying. Beyond steam-bending, wood ash woodworking uses include finishing and fillers that take advantage of ash’s grain and texture. These wood ash woodworking uses help explain why ash remains a go-to choice in many shops.
When you need a wood that can take a hit and spring back, the combination of pale color, open pores, and legendary flexibility points squarely to ash.
The Science of the Difference: Cellular Mechanism of Action
To truly know your woods, you need to peek under the hood. I think of wood not as a solid block, but as a bundle of microscopic straws. How those straws are built defines everything you feel and see at the bench.
Vessel Elements: The Key to Open vs. Closed Grain
Hardwoods have specialized water-carrying cells called vessels. Their size is the main event. In woods like ash or oak, these vessels are wide and form obvious pores. When you cut the wood, you leave these pores open, creating a textured surface we call open grain.
Mahogany is a perfect middle-ground example. Its vessels are medium-sized. They create a distinct pore structure you can see and feel, but it’s generally finer and more uniform than the aggressive grain of oak.
Now, take maple or cherry. Their vessels are incredibly narrow, packed tightly together with other fibers. This dense packing of tiny vessels is what gives “closed grain” woods their famously smooth, almost featureless surface when planed. Your hand glides over it. That’s not just sanding, that’s cellular architecture.
Growth Rings and the Story in Pine
Softwoods like pine don’t have those big vessel elements. They move water through simpler, smaller cells called tracheids. The story of pine is told in its growth rings.
Each ring has two parts. The light-colored, wider band (earlywood) forms in spring. These tracheid cells are thin-walled and built for fast water transport. They are soft and crush easily.
The darker, narrow band (latewood) forms in summer. Here, the tree builds thick-walled, reinforced tracheids for strength. This switch from thin-walled to thick-walled cells each year is why pine has alternating soft and hard bands you can feel with a fingernail. A fast-grown pine with wide rings will have more of that soft earlywood, making it less dense overall.
Density and Hardness: It’s All in the Walls
Density (weight per volume) and hardness (resistance to indentation) come down to one thing: cell wall thickness. Think of it like a building.
A wood with thin cell walls, like basswood, has lots of empty space (the cell lumen) inside each straw. It’s lightweight and soft. A wood with thick cell walls, like hickory, has less empty space and more solid material. It’s heavy and hard.
The Janka hardness test, which measures the force needed to embed a steel ball, is essentially measuring the collective thickness of all the cell walls in its path. This test, as explained in Janka hardness for woodworking, is why specific gravity (the density of wood compared to water) is such a reliable predictor of how a wood will behave. Higher specific gravity means thicker cell walls, which means more durability, more resistance to wear, and more challenge to your tools.
This is the science you use every time you plane a board. Planing against the grain on a thick-walled wood like ash often tears out those big, open vessels. The same technique on thin-walled, closed-grain maple gives you a glassy surface. You’re not just cutting wood, you’re navigating a cellular landscape.
Practical ID Drills and Troubleshooting
Books and charts are helpful, but your hands and eyes need training. The best way to learn is by doing.
Build Your Own Physical Sample Library
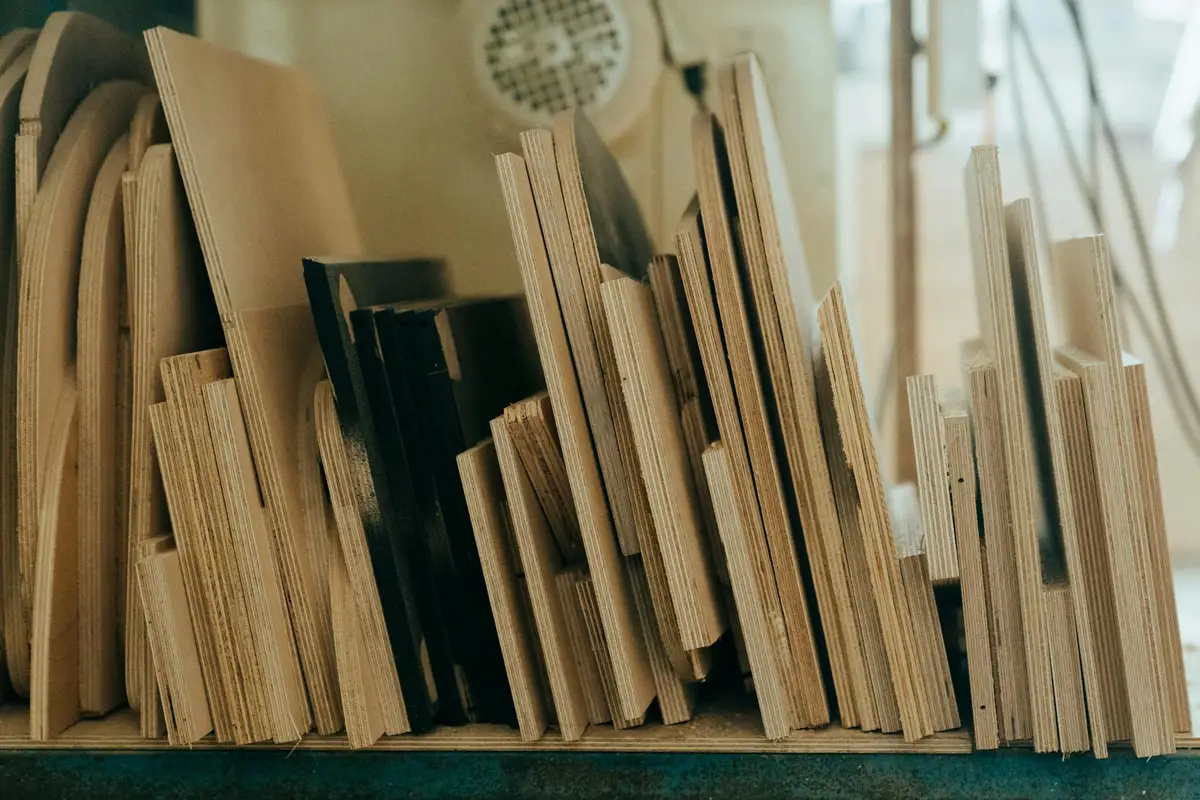
This is the single most effective tool for learning. Every woodworker generates cutoff scraps. Don’t throw them away. I keep a dedicated rack of labeled samples, each about the size of a paint stir stick.
- Label clearly and permanently. Use a fine-point marker or an engraved tag. Write both the common name (e.g., White Ash) and, if you know it, the scientific name (Fraxinus americana).
- Include working notes. Glue a small tag on the back or write directly on it. Note the planer tear-out, how it sands, or how a finish soaks in.
- Organize by feel. Group your samples. Put all your coarse, open-grained woods (oak, ash) together. Keep your fine-grained, buttery woods (maple, cherry) in another section. This tactile sorting builds instinct faster than any book.
When you encounter an unknown wood, you can hold it next to your known samples for a direct side-by-side comparison of grain, color, and weight-this is irreplaceable.
Addressing Common Confusions
Even with practice, some species look similar. Here’s how to tell them apart in the shop.
Mahogany vs. Sapele
Both are used in furniture and sold as “mahogany.” True mahogany (Swietenia macrophylla) feels silkier under a hand plane. Sapele has a more pronounced, uniform ribbon stripe that shimmers. The dead giveaway is the end grain: sapele has interlocked grain that looks like stacked chevrons, while genuine mahogany’s end grain is more straightforward and less patterned. Sapele is also denser and harder on average.
Ash vs. Oak (White)
Their grain is similarly open and porous. The key difference is in the pore arrangement. Run your finger across the face grain. Ash has large, distinct pores that follow the growth rings, creating a clean, lined texture. Oak has those same large pores, but it also features prominent medullary rays-those shiny silver flecks or dashes that run perpendicular to the growth rings. If you see those shimmering rays, you’re almost certainly looking at oak. Ash lacks them entirely.
Stained Pine vs. Cherry
A dark stain on pine tries to mimic cherry’s rich color, but it can’t replicate the wood’s underlying structure. Pine is a softwood with minimal grain variation; its growth rings are defined by a sharp color contrast between earlywood and latewood. Cherry is a hardwood with a much finer, smoother texture and small, distinct pores. Look at an unsealed edge or the underside of a board. If you see the stark, alternating soft and hard bands of a softwood ring, it’s pine. If you see a uniform, fine texture with tiny pores, it’s likely cherry.
FAQs: Apps, Charts, and When to Call a Lab
Are Wood Identification Apps and Photo Charts Useful?
They can be a good starting point, but treat them as a guide, not a final answer. An app that matches a photo works well for classic, clear examples of common wood. The problem is that wood is variable. A photo of quarter-sawn oak looks nothing like plain-sawn oak. A piece of sapwood (the lighter outer wood) looks different from the heartwood. These tools often fail with finished wood, atypical cuts, or weathered samples. Use them to generate a shortlist of possibilities, then verify with your physical senses and sample library.
When Should You Seek a Wood Species Identification Laboratory?
For most shop projects, you don’t need a lab. Reserve it for high-stakes situations. I’ve used a lab only twice in my career.
- Legal or Insurance Matters: Proving a vintage piece is made of a protected species like Brazilian Rosewood.
- Critical Material Verification: Ensuring structural timber in a historic building is the specific grade and species assumed for a restoration.
- Scientific Curiosity: Positively identifying a rare or imported wood where the consequences of a mistake are high.
Labs use microscopic analysis of cell structure, which is definitive. It’s a fantastic service, but for identifying a board for your next table, your trained eye and a sharp chisel to examine the end grain are more practical tools.
Your Next Steps in the Lumberyard
Your ability to identify wood starts with a simple habit at the point of sale. Do not be shy. Ask the person at the counter exactly what species you are looking at and where it was harvested. This single question separates a casual buyer from an informed woodworker who values ethical sourcing and material performance. I ask every time, and it has revealed that boards labeled “mahogany” are sometimes cheaper substitutes like khaya. A reputable seller should know their stock’s origin. To source genuine mahogany wood, request documentation of provenance and species certification. Knowing the wood’s origin helps you avoid cheaper substitutes and ensures you’re buying authentic mahogany.
Request the wood’s scientific name and its country of origin. For instance, genuine mahogany is Swietenia macrophylla, often from FSC-certified forests in Latin America. This level of detail is your best defense against accidentally supporting unsustainable logging practices. That level of detail also informs wood selection for woodturning species, guiding you toward turning-friendly woods. Choosing the right species can improve workability, finish, and stability on the lathe. A common pitfall is trusting a generic label like “Asian hardwood,” which tells you nothing about its durability or environmental impact.
The best way to learn is by handling wood you can trust. Before you try to name that mystery board, spend time with samples of known species. Create a reference set in your shop with small, labeled blocks of pine, ash, and mahogany. I did this years ago, and it transformed my guessing into knowing. Feel the difference in heft between lightweight pine (about 25 lbs per cubic foot) and dense ash (over 40 lbs per cubic foot).
Make practice systematic. Run a hand plane over each sample and listen. Pine cuts with a soft, quiet whisper, while ash offers a crisp, fibrous resistance. This tactile and auditory feedback is more reliable than color, which changes with light and age. A troubleshooting note: if your pine sample seems unusually hard and heavy, you might have yellow pine, not the softer white pine used for furniture.
Every piece of lumber holds a record of its life in its physical traits. The wide, spaced growth rings in pine tell of fast growth in a sunny plantation. The strong, straight grain of ash speaks of a tree that reached steadily for light. When you assess grain, weight, and hardness, you are reading a story written by biology and climate. I find that this perspective turns every project into a more thoughtful collaboration with the material.
Wood Identification: Methods, Tools, and Expert Verification
Can a wood species identification app provide a reliable result?
Apps can suggest possibilities by matching your photo to a database, but they often fail with atypical cuts, finished surfaces, or species with high natural variation. For a definitive ID, you must verify their suggestion with physical tests for grain, weight, and hardness against known samples.
How useful is a printed wood species identification chart?
A well-designed chart is an excellent shop reference for comparing key traits like pore arrangement and color ranges among common species. Its limitation is the inability to convey the critical tactile properties of density and texture, which you must assess hands-on.
What are the pitfalls of identifying wood species by a single picture?
A single picture cannot communicate density, hardness, or the subtle texture of end grain-all essential diagnostic features. Furthermore, lighting, stain, and photographic quality can drastically alter the perceived color and grain pattern, leading to misidentification.
When is it necessary to use a wood species identification laboratory?
Engage a professional lab for high-stakes situations like verifying protected species in antique furniture or confirming structural timber in legal/insurance cases. Their microscopic analysis of cellular anatomy provides a definitive, scientific identification that visual inspection cannot match.
Should I buy a commercial wood species identification kit?
Commercial kits are generally impractical; identification relies on comparing multiple physical properties, not a single chemical test. You will gain far more accurate and practical knowledge by building your own reference library of labeled, sanded samples for direct comparison.
Trust Your Hands, Respect the Tree
The most reliable way to identify wood is to build a tactile memory in your workshop, not just a visual catalog. Memorizing charts is less useful than remembering how pine smells when you cut it or how heavy a piece of ash feels in your hand. Your senses of touch, sight, and even smell are your best tools. Practice on known samples first, and the unknowns will start to reveal themselves.
Every board you correctly identify and use appropriately honors the tree it came from and reduces waste. This mindful practice is the foundation of both skilled woodworking and sustainable material use.
Expert Resources and Citations
- Wood Selection: Oak vs. Pine vs. Mahogany | Marvin
- Is mahogany better than pine? – Quora
- Mahogany vs. Pine: Which One to Use? – Handyman’s World
- 7 Common Types of Solid Wood Used in Furniture: A Comparative Guide
- How to Choose the Best Type of Wood for Your Next Project – Vintage Millwork and Restoration
David Ernst
David is a veteran woodworker. He is now retired and stays in his cabin in Wisconsin which he built himself. David has 25+ years experience working in carpentry and wood shops. He has designed and built many small and large wood projects and knows the science behind wood selection like the back of his hand. He is an expert guide on any questions regarding wood material selection, wood restoration, wood working basics and other types of wood. While his expertise is in woodworking, his knowledge and first hand experience is far from 'woody'.