
How Do You Remove White Rings, Dark Spots, and Water Stains from Wood?
You just found a white ring on your favorite table. That mark isn’t always deep damage; it’s often a simple finish problem you can fix.
This guide will walk you through the materials science behind why stains form, shop-tested removal techniques for furniture and floors, and the correct approach for teak and veneer.
I’ve tested every method here in my workshop, blending hands-on woodworking with finish chemistry.
What a Water Stain Really Is: The Shop-Science Explanation
You see a stain. I see a failed experiment. Every water mark tells a story about what happened to the wood and its finish. There are two main characters in this story, and you must know which one you’re dealing with.
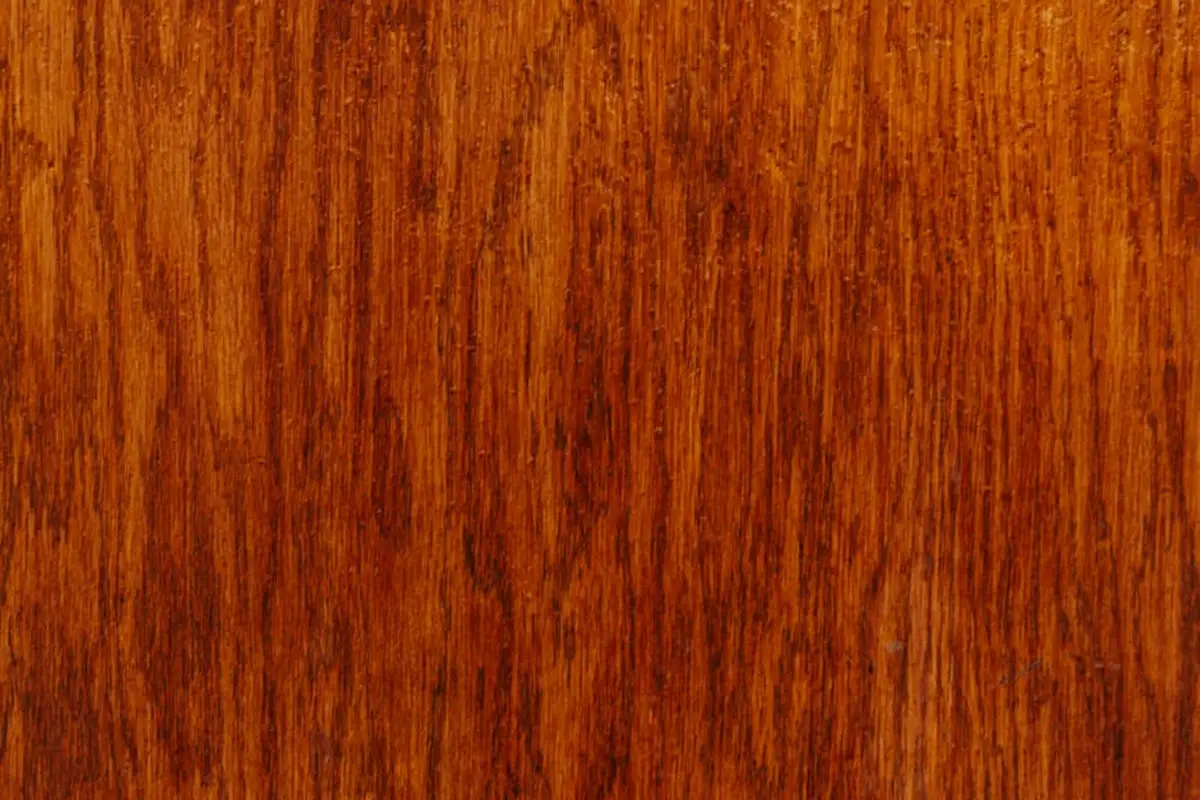
White rings or haze are almost always a problem with the finish, not the wood itself. Think of your table’s finish-whether it’s lacquer, shellac, or varnish-as a clear, thin plastic sheet glued on top. When a cold, wet glass sits there, moisture can’t evaporate through that plastic. It gets trapped. The wood fibers underneath swell from the water. This swelling creates microscopic stress fractures in that plastic sheet. Light hits those tiny cracks and scatters, which your eye sees as a white, cloudy haze.
Dark spots or black rings are a wood problem. Here, water has penetrated the finish, likely through a crack or thin spot, and soaked into the raw wood. Two things happen. First, the water reacts with natural tannins in the wood (especially high-tannin woods like oak, walnut, or teak), oxidizing them and creating a dark stain, like a tea bag left on a counter. Second, if the wood stays damp, you can get microbial growth, which creates those ugly black splotches.
So, are water stains permanent? Can they be removed? For white rings, the answer is often yes, you can fix them without refinishing the whole piece. The moisture eventually leaves, and the goal is to heal those microscopic fractures. For dark stains, removal is trickier because you’re dealing with a chemical change or biological growth in the wood fibers. You can often lighten them significantly, but complete removal usually means sanding and refinishing.
First, Diagnose Your Stain: A Simple Two-Step Test
Before you grab a rag, grab your senses. A two-minute diagnosis saves hours of wasted effort.
Step one is visual: is the stain white/hazy or dark/black? This tells you if you’re fixing the finish or cleaning the wood.
Step two is the fingertip test. Close your eyes and gently run your fingertip across the stain and the surrounding good finish.
- Does the stained area feel raised, rough, or gritty compared to the smooth area? This means the finish itself is damaged and textured. You have a white ring to repair.
- Does it feel perfectly smooth, as if the discoloration is *under* a glassy surface? The finish is intact, but the wood beneath is stained. You have a dark spot to treat.
Now, identify the finish. This is critical because the wrong solvent can melt it. Find an inconspicuous spot, like the bottom of a table leg.
- Put a drop of denatured alcohol on a cotton swab and rub gently. If the finish dissolves or becomes sticky, it’s shellac.
- If nothing happens with alcohol, try a drop of lacquer thinner. If it dissolves, it’s lacquer.
- If neither alcohol nor lacquer thinner affects it, you likely have a cured varnish (like polyurethane) or a conversion finish.
This diagnosis prevents disaster. Using a shellac technique on polyurethane won’t work, and using an abrasive on a dark stain over a thin veneer will burn right through it.
Mechanism of Action: Why Your Finish Clouds Up
Let’s get into the shop science. Wood is hygroscopic. It constantly absorbs and releases moisture from the air, swelling and shrinking. A good finish slows this exchange to a crawl, stabilizing the wood.
When liquid water is trapped on the surface, the wood fibers directly underneath swell rapidly. They push against the rigid, cured “plastic sheet” of the finish. This localized pressure creates a network of micro-fractures in the finish film, often called “crazing.” These fractures are filled with tiny air pockets. It’s this air that scatters light and causes the white, opaque appearance.
The chemistry of the finish determines how this plays out. Shellac and lacquer dry through solvent evaporation and can re-dissolve in their original solvents. This means you can often “re-flow” the finish to heal those fractures. A modern polyurethane varnish, however, cures through an irreversible chemical reaction. Once it’s fractured, you can’t melt it back together. You must either polish the fractures away or fill them with new finish. That’s why knowing your finish isn’t just trivia-it’s the key to your repair strategy.
Fixing the Dreaded White Ring or Cloudy Haze
A white ring is a moisture mark, not a stain. It is a sign that trapped water has created micro-bubbles in the finish, scattering light. The good news is the wood underneath is often untouched. The best repair strategy is to use the least invasive method first. We escalate only if the gentler approach fails. This is different from heat stains on wood tables, which require a different repair technique.
Method 1: The Mayo or Oil & Ash Trick
This is a gentle first step for fresh, shallow moisture rings, typically under a week old. Forget the myth that mayonnaise “feeds” the wood. The science is simple. The oil in mayonnaise (or a mix of mineral oil and cigar ash) slowly penetrates the cloudy finish by capillary action. The oil fills the microscopic gaps between the finish and the wood, or the tiny blisters in the finish itself, restoring optical clarity. It works best on solvent-based finishes like lacquer and shellac.
Clean the surface first with a damp cloth. Apply a small dab of real mayonnaise or a paste of mineral oil and fine ash. Rub it over the ring in a circular motion with a soft cloth. Let it sit for several hours, or overnight. Wipe it clean. If the cloudiness is gone, polish the area. This method has about a 50% success rate in my shop, but it costs nothing to try.
Method 2: The Heat Iron Method
Heat can reflow some thermoplastic finishes, allowing the trapped moisture to escape and the finish to level back out. This method is effective on shellac and many lacquers, which soften with heat. It is a high-risk, high-reward technique that requires absolute caution on veneer, as excess heat will melt the adhesive. Do not use this on modern polyurethane or water-based finishes; they will not reflow and may blister.
- Set a household iron to a low or medium setting with NO steam.
- Place a thin, clean cotton cloth (like a pillowcase) over the white ring.
- Press the warm iron onto the cloth for 2-3 seconds, then lift it immediately to check. You should see the cloudiness vanish as if by magic. If not, try one more brief application.
- Stop immediately if you smell burning or see the finish bubbling. Buff the area with a clean cloth once it cools.
Method 3: Abrasive Polishes
When moisture has etched or scratched the very top layer of the finish, you need to remove that damaged layer. This is where fine abrasives come in. Products like non-gel toothpaste or automotive polishing compound work by cutting away a micron-thin layer of finish to reveal the undamaged material beneath. Think of it as sanding, but at a microscopic level.
Apply a small amount of paste to a soft, damp cloth. Rub firmly in the direction of the wood grain over the stain for 60-90 seconds. Wipe clean and inspect. You may need to repeat this 3-4 times. The risk is creating a low spot or “dish” in the finish. To avoid this, always blend your polishing well beyond the stain’s edges. Finish by waxing the entire surface to restore uniform sheen. This is one approach within wood stain finishing application methods. Reviewing wood stain finishing application methods can help you choose the best technique for your project.
Method 4: Solvent “Amalgamation” for Shellac and Lacquer
This is the most aggressive spot-repair for traditional finishes. The goal is to use a solvent to partially dissolve the existing finish, allowing it to flow and re-harden into a smooth, continuous film. It works brilliantly on shellac (with denatured alcohol) and lacquer (with lacquer thinner). This technique will ruin polyurethane, varnish, or most modern factory finishes, so test in an inconspicuous area first.
My exact workflow is as follows:
- Ventilate your space. Wear nitrile gloves.
- Dip a piece of #0000 steel wool into a small container of the appropriate solvent.
- Gently rub the white ring with the grain, using light, even pressure. You will see the finish become tacky and the cloudiness disappear.
- Stop rubbing the instant the stain is gone. Let the area dry for 15 minutes.
- Buff lightly with a clean cloth. The dissolved finish will harden again, often leaving a seamless repair.
If the ring persists after this, the moisture has likely penetrated the wood itself, requiring a different approach involving oxalic acid or light sanding and refinishing.
Removing Dark Water Stains and Black Spots
Dark rings or black spots are a different problem than white rings. A white ring is moisture trapped in the finish. A dark stain means water has penetrated the finish and reacted with the wood itself. You are no longer cleaning the finish; you are chemically altering the wood fibers to remove the discoloration.
For these tannin-based stains, your tool is oxalic acid. This is a crystalline powder you mix with water. It’s often sold as “wood bleach,” which is confusing. Oxalic acid is not chlorine bleach; chlorine bleach can damage wood fibers and does not effectively target the oxidized tannins that cause dark water marks. Oxalic acid works by selectively reducing the dark, iron-tannin complexes in the wood back to a colorless state.
Working with oxalic acid requires care. You must wear gloves and eye protection. A basic respirator is a good idea when handling the powder. Mix it in a glass or plastic container using warm water to help it dissolve, aiming for a saturated solution (about one tablespoon of crystals per cup of water). Apply it liberally to the stained, bare wood with a disposable brush. You will see the stain begin to lighten within minutes. Let it dry completely, which can take a few hours. This is often one of the most effective techniques for lightening wood stain color.
The most critical step is neutralizing the acid after it dries, otherwise it can damage the wood or interfere with your new finish. For future steps, use pH-balanced wood cleaners—mild acidic or alkaline solutions—to protect the finish. These help ensure safe, effective cleaning of the wood. Make a solution of one tablespoon of baking soda per cup of water. Wipe this thoroughly over the treated area, then rinse with clean water and let it dry again.
For the most severe stains, like ink or deep black biological growth, a two-part A/B wood bleach (typically sodium hydroxide and hydrogen peroxide) is stronger. It can lighten the wood’s natural color significantly. I reserve this for extreme cases, as it is more caustic and can raise the grain aggressively compared to other chemical bleaching methods.
After any bleaching process, you will almost always need to lightly sand the area to smooth the raised grain and then apply a touch-up finish to match the surrounding area. The wood is now bare and unprotected.
Best Practice Workflow: The Oxalic Acid Process
- Safety First. Put on nitrile gloves, safety goggles, and old clothes. Work in a well-ventilated space.
- Access the Wood. This process only works on bare wood. If the dark stain is under a finish, you must strip or sand the finish off that area first. You are treating the wood, not the coating on top.
- Mix the Solution. In a glass jar, dissolve one tablespoon of oxalic acid crystals in one cup of warm water. Stir until clear. Label the jar clearly.
- Apply and Observe. Use an inexpensive acid brush or a small paintbrush to apply the solution liberally over the stain, going slightly beyond its edges. You can watch the dark spot begin to fade within 5 to 10 minutes as the chemical reaction takes place.
- Dry Completely. Allow the wood to dry fully. This may take several hours. The stain will continue to lighten as it dries.
- Neutralize. Mix one tablespoon of baking soda into one cup of water. Wipe this solution over the entire treated area to stop the acid’s action.
- Final Rinse. Wipe the area again with a clean cloth dampened with fresh water. Let the wood dry completely overnight.
- Sand and Finish. The grain will likely be raised. Lightly sand with 220-grit paper until smooth. You must now apply stain (if needed) and a protective finish to the repaired spot.
A key tip is to contain the liquid. On vertical surfaces, you can use masking tape to dam the area. On a tabletop, simply keep your application controlled. The goal is to wet the stain, not the entire piece.
Special Considerations for Floors, Teak, and Veneer
Fixing a stain on a table is one thing. Dealing with a floor, or a unique wood like teak, or a fragile veneer requires a different playbook. The core principles are the same, but the execution changes completely, especially when it comes to selecting and applying wood stains.
Wood Floors: Finish Integrity is Everything
You asked, “Can you mop wood floors with water?” The short answer is yes, but with a critical condition. You are not mopping the wood, you are cleaning the finish that seals it. A polyurethane, oil-based, or catalyzed finish is a plastic shield. Water is only a problem if it breaches that shield.
I use a damp-mop technique. “Damp” means a mop wrung out so thoroughly it feels almost dry. I use a pH-neutral wood floor cleaner mixed as directed. The goal is to pick up dirt, not to wet the floor. Standing water, even a small puddle, is the enemy. It can seep into seams, cracks, or microscopic finish flaws and cause stains or cupping.
Fixing White Haze on Floors
A white ring or haze on a floor is almost always in the finish, not the wood. This is good news. You can often polish it out. I’ve had success with a tiny amount of a polishing compound for cars or a dedicated hardwood floor polish applied with a soft cloth. You’re gently abrading the very top layer of the finish to remove the cloudy film. This is a surface fix; aggressive scrubbing will wear through the finish entirely.
Dark Stains Mean Deep Trouble
A dark water stain on a floor signals a failure. The water has penetrated the finish and soaked into the wood fibers, causing them to swell and darken. No home remedy like mayonnaise or toothpaste will pull that out. The damaged finish must be removed to access the wood. For a localized spot, a professional might “screen” (lightly abrade) and recoat the area, but color-matching is hard. Often, the entire board needs to be sanded and refinished, or replaced. This is why I call a pro for dark floor stains.
Teak: It Plays by Its Own Rules
Teak is full of natural oils and silica. This gives it legendary rot resistance, but it changes how stains behave. The oils can repel water, causing it to bead on the surface longer, which sometimes prevents soaking. Other times, the oils can interact with a stain, trapping it differently.
Because of this unique chemistry, always start with a teak-specific cleaner. These cleaners are formulated to lift grime without stripping the natural oils aggressively. I avoid harsh household chemicals on teak. For a white ring, the mayonnaise or oil-and-abrasive method often works well because you’re replenishing oil to the affected spot. For a dark spot, a teak cleaner followed by a light sanding with very fine grit (220+) along the grain can be effective, as the stain is rarely deep.
Veneer: The Gentle Art of Chemistry
Veneered furniture has a paper-thin layer of precious wood glued to a stable core. This is where you must abandon all thoughts of sanding. Sanding through the veneer is instant, irreversible ruin. I’ve seen the core particleboard underneath, and it’s not a pretty fix.
Your only tools here are gentle chemistry and capillary action. For white rings, the hair dryer or iron method is your first, best hope. You are heating the trapped moisture *under* the veneer to vaporize it. For dark stains, you must try a chemical approach. Oxalic acid is often safe for veneer because it doesn’t abrade; it bleaches. You mix a weak solution, apply it only to the stain, let it work, and neutralize it. Always, always test any method in a hidden area first, like the underside of a tabletop. The glue holding the veneer can be sensitive to heat and moisture.
When to Call a Pro: Refinishing vs. Spot Repair

Spot repairs are a fantastic skill. They save time and preserve a finish’s history. But they only work on a sound foundation. Knowing when to stop is what separates a savvy restorer from someone who makes a small problem much worse.
Your DIY fix will fail if the finish itself is compromised or the stain has penetrated too deeply. Here are the clear signs it’s time to put the home remedies away.
- Alligatoring or Cracked Finish: This looks like a dry riverbed or reptile skin across the surface. The finish has lost its elasticity and bonded with itself more than the wood. Applying any liquid will seep into these cracks, swelling the wood underneath and causing more damage. You cannot ‘fix’ this. It must be removed.
- Stained Particleboard or MDF Substrate: Water is the enemy of engineered wood. If a dark spot feels soft or powdery, moisture has likely soaked through the veneer and swelled the core material. This core cannot be sanded or bleached back to normal; it’s permanently expanded and structurally weakened.
- Lifted, Blistered, or Torn Veneer: Veneer is a thin wood skin glued to a substrate. If water has gotten underneath, the glue has failed. Pushing down on a white ring might reveal a spongy feeling. Attempting to sand or aggressively treat this area will often tear the fragile veneer, creating an irreparable hole.
What a Professional Actually Does
When you search “wood stain removal near me,” you’re typically finding professionals who don’t just remove stains-they remove everything. A furniture restorer or floor sander operates on a different principle. For true wood furniture stain removal, the goal is selective cleaning that preserves the finish. When removing stains from wood furniture, you need careful, targeted methods rather than a full refinishing approach.
Their solution is to reset the surface by completely stripping the old finish, sanding the bare wood, and applying a new finish system. This is a multi-day process. For a tabletop, they might use chemical strippers, careful scraping, and a progression of sandpaper from 80-grit up to 180 or 220-grit. This removes the stain *and* all surrounding finish, ensuring a perfectly uniform base. The cost isn’t for a magic eraser. It’s for their guaranteed method, time, and the flawless, durable new finish they apply.
The High-Tech Option: Laser Stain Removal
For museum-level work, there’s another tool. Professional laser systems use focused light energy to literally vaporize stain particles without harming the wood fibers or the original finish.
Think of it like this: the dark tannins in a water stain absorb the specific wavelength of the laser light, heating up instantly and turning to gas. The surrounding wood and clear finish reflect that light and remain cool. This is a surgical, inch-by-inch process for rare, valuable items where preserving the original patina is critical, like an antique violin or a historic document box. It is not a service for a modern dining table. The machines cost tens of thousands of dollars, and the expertise to use them is highly specialized.
Is Your Piece Worth the Cost?
This is a practical and emotional calculation. Start with a blunt question: is this a mass-produced piece from a big-box store? If yes, the cost of professional refinishing will likely exceed its replacement value. The investment only makes sense for true sentiment.
Consider professional help if the piece is a solid-wood heirloom, a well-made mid-century modern item, or has significant personal value you wish to preserve for decades. For floors, the equation is different. Professional sanding and refinishing is the standard, correct method for a whole room. It adds value to your home. For that one treasured dresser your grandfather built, paying a pro to do a full restoration is often an act of preservation, not just repair.
Keeping It Clean: How to Protect Wood After a Repair
You’ve fixed the damage. Now, your goal shifts from repair to prevention. The right cleaning habits are your first line of defense.
Can You Clean Wood Floors with Water?
The short answer is yes, but it’s a careful dance. Water is wood’s enemy because it swells fibers. Your finish is a shield, but a compromised one. Using a soaking wet mop pushes water through microscopic cracks, leading to cloudiness and eventual finish failure.
Use a mop dampened with clean water, then wrung out until it’s almost dry to the touch. I test mine by pressing it to my cheek; if it feels cool and barely damp, it’s ready. This method lifts dirt without flooding the surface. For furniture, the same rule applies: a barely damp cloth, followed immediately by a dry one.
Choosing a Protective Finish
Not all finishes are created equal, and you must match the top coat to the job. Applying the wrong product can trap moisture or create a gummy mess.
- Paste Wax: This is my go-to for heirloom furniture and repaired antiques. It fills microscopic pores with a protective, renewable layer. Apply a thin coat over fully cured oil or shellac finishes, buffing to a soft luster. It won’t hold up to heavy abrasion, but it’s beautiful and easy to touch up.
- Hardwax Oil (e.g., Rubio Monocoat, Osmo): Think of this as a modern hybrid. It soaks in slightly to stabilize the wood and cures to a hard, satin surface on top. This is an excellent choice for floors, countertops, and heavily used tables because it’s durable and easily spot-repaired.
- Tabletop Epoxy or Polyurethane: These are plastic shields. They provide the highest resistance to spills, scratches, and heat. Use these for bar tops, kitchen tables, or any surface you want to be truly bulletproof. Never put wax over these; it will just sit on top and smudge.
The Absolute Rule: Coasters and Trivets
This is non-negotiable, and the science is simple. There are two threats: moisture and heat.
A cold drink glass creates condensation, forming a perfect water seal against the finish. This is how white rings form, even on “water-resistant” polyurethane. Heat from a coffee cup or dinner plate acts like a tiny oven, accelerating moisture movement in the wood and breaking down the chemical bonds in the finish from the top down.
No commercial finish is completely impervious to sustained, direct contact with moisture and heat. Using a coaster is cheaper and easier than repairing a dark heat stain or a cloudy white ring. I keep a stack of simple felt-bottomed coasters on every table in my shop and my home.
Your Immediate Spill Response Protocol
Spills happen. Your reaction in the first 60 seconds dictates the outcome. Here’s the drill:
- Blot, never wipe. Wiping spreads the liquid and grinds any particulates into the finish, acting like sandpaper. Press a clean, absorbent cloth or paper towel straight down to soak it up.
- Dry immediately. Use a separate dry cloth to remove any residual moisture from the surface. The goal is zero standing liquid time.
- For sticky spills (soda, juice), follow steps 1 and 2, then dampen a cloth with water, wring it out completely, and wipe the area clean. Dry it again at once.
This protocol minimizes the time moisture has to penetrate, giving you the best chance of walking away with no mark at all.
FAQ: Wood Stain Removal Science & Methods
Is laser wood stain removal practical for a home workshop?
No, professional laser systems are capital-intensive tools that vaporize stain particles via selective photothermal energy. Their use is reserved for high-value conservation where preserving original patina is paramount, not for general furniture repair.
How does wood stain removal from a glass table differ from wood?
The challenge is adhesive residue, not wood fiber staining. Use a razor blade scraper held at a 45-degree angle to mechanically debond the residue, followed by a solvent like mineral spirits to dissolve remaining film without harming the glass.
Can you remove wood stain from a wool rug?
Yes, but act immediately to prevent dye bonding. Blot, do not scrub, then apply a wool-safe detergent in a dabbing motion; the key is lifting the liquid stain from the wool fibers before it oxidizes and sets permanently.
When searching “wood stain removal near me,” what service should I expect?
Expect a refinishing service, not a spot treatment. Professionals typically strip and sand the entire surface to bare wood, as this guarantees a uniform substrate for a new, durable finish system, which is their core value.
What is the purpose of a wood stain removal chart?
A diagnostic chart provides a decision tree based on stain type, wood species, and finish. Its value lies in streamlining your initial diagnosis, helping you select the correct chemical or mechanical intervention before you touch the surface.
Final Thoughts on Wood and Water
The most reliable way to fix a water stain is to start with the gentlest method. Blotting a fresh spill and using a hair dryer on a fresh white ring prevents most damage. For older stains, always test your chosen remedy in an inconspicuous spot first, as finishes vary widely. This simple step saves more projects than any advanced technique.
Taking care of wood furniture extends its life for generations, which is the ultimate sustainable practice. Learning how wood and finishes react to moisture makes you a more thoughtful craftsperson and steward of the material.
Citations and Authoritative Sources
- r/woodworking on Reddit: Is there any easier way to remove stain?
- How to Remove Wood Stain – The Home Depot
- Stain Removal: Removing Accidents from Various Materials – A&C :
- 7+ Simple Ways To Remove Stains & Scratches From Wood Kitchenware, Fur – Wondrwood
- Wood stain remover for hands before craft show?
- How to Remove Stain From Wood | Sherwin-Williams
- How to remove wood stain – Quora
David is a veteran woodworker. He is now retired and stays in his cabin in Wisconsin which he built himself. David has 25+ years experience working in carpentry and wood shops. He has designed and built many small and large wood projects and knows the science behind wood selection like the back of his hand. He is an expert guide on any questions regarding wood material selection, wood restoration, wood working basics and other types of wood. While his expertise is in woodworking, his knowledge and first hand experience is far from 'woody'.