Brush, Rag, Spray, or Wipe-On: What’s the Best Way to Apply Wood Finish?
Your wood choice matters, but the application method determines if your stain looks even and your finish lasts. I see too many projects fail because of a haphazard approach to putting on the final coat.
We will move past guesswork and look at the material behavior behind each technique. We will cover brush application for viscous finishes, rag wiping for stain control, spray systems for speed and uniformity, and the chemistry that makes wipe-on methods so forgiving.
I base this guidance on my own shop experiments, testing film thickness, adhesion, and color penetration across dozens of wood species and finish brands.
How do I choose the right method for my project?
Choosing a method is about balancing four things: the control you need, the speed you want, the type of finish you’re using, and what’s in your shop. Every tool excels at a specific task.
Think of it this way. A rag gives you precise control over where color goes, letting you manipulate the stain before it sets. A brush is for building a protective film, laying down more material in a controlled layer. A spray gun is for speed and achieving a perfectly smooth, flawless surface on large or complex shapes.
Your goal dictates the tool. If your primary goal is to add color, you are almost always reaching for a rag. For applying a clear protective topcoat, you choose between a brush for thicker build or a sprayer for a professional look.
A common question is “what are the best wood stain methods?” The word “method” here really means two connected things: the physical tool you use (brush, rag, sprayer) and the finish goal you have (penetration into the wood or building a film on top of it). An oil stain is designed to penetrate, so a rag makes sense. A thick varnish is designed to build a film, so a brush or sprayer is necessary. Choosing the right approach is crucial, especially when applying oil finishes.
- Staining a tabletop? Start with a rag.
- Applying varnish to a cabinet door? A quality brush or an HVLP sprayer is your tool.
- Finishing a complex chair with lots of spindles? A spray gun will save you hours and avoid drips.
- Working in a small apartment? Wipe-on finishes and rags are your low-odor, low-mess champions.
Rag and Wipe-On Techniques: For Color and Control
Using a rag for stain and a cloth pad for a wipe-on finish are closely related skills. Both rely on your hands for direct, nuanced control. I keep boxes of clean, white cotton t-shirt rags in my shop just for this.
For a standard pigmented oil stain, the process is “flood, wait, wipe.” You liberally apply the stain with a cloth, completely wetting the surface. Then you wait. This pause, typically 5 to 15 minutes, lets the pigments settle into the wood pores. Finally, you wipe off the excess with a clean cloth. The longer you wait, the darker and more intense the color will be — especially when used for darkening wood stains.
Wipe-on polyurethane isn’t magic, it’s just regular varnish thinned down with mineral spirits. This thinning makes it easy to apply a very thin, even coat with a folded cloth pad. You wipe it on like you’re polishing the wood. Using the right coats—stain for color and polyurethane for protection gives lasting wood protection. Thin, even coats help the stain and polyurethane work together for a durable, beautiful finish. Because each coat is so thin, you need more of them-often three to five-but you avoid brush marks and get a beautifully hand-rubbed build.
Your supplies matter. Use lint-free cloths (old t-shirts are perfect). Always wear nitrile gloves; some stain dyes don’t wash off skin for days. And this is critical: oily rags are a spontaneous combustion hazard. Lay them out flat to dry completely outdoors, or submerge them in a metal can full of water before disposal.
Here’s a shop tip I learned the hard way. For woods with wildly varying pore density like pine, cherry, or ash, a pre-stain wood conditioner applied with a rag is non-negotiable. It partially seals the more porous grain, allowing the stain to color the hard and soft areas more evenly. Without it, you get a blotchy, amateurish result. Even with proper surface preparation, some woods are tricky to stain.
Brush Work: Building a Film, One Stroke at a Time
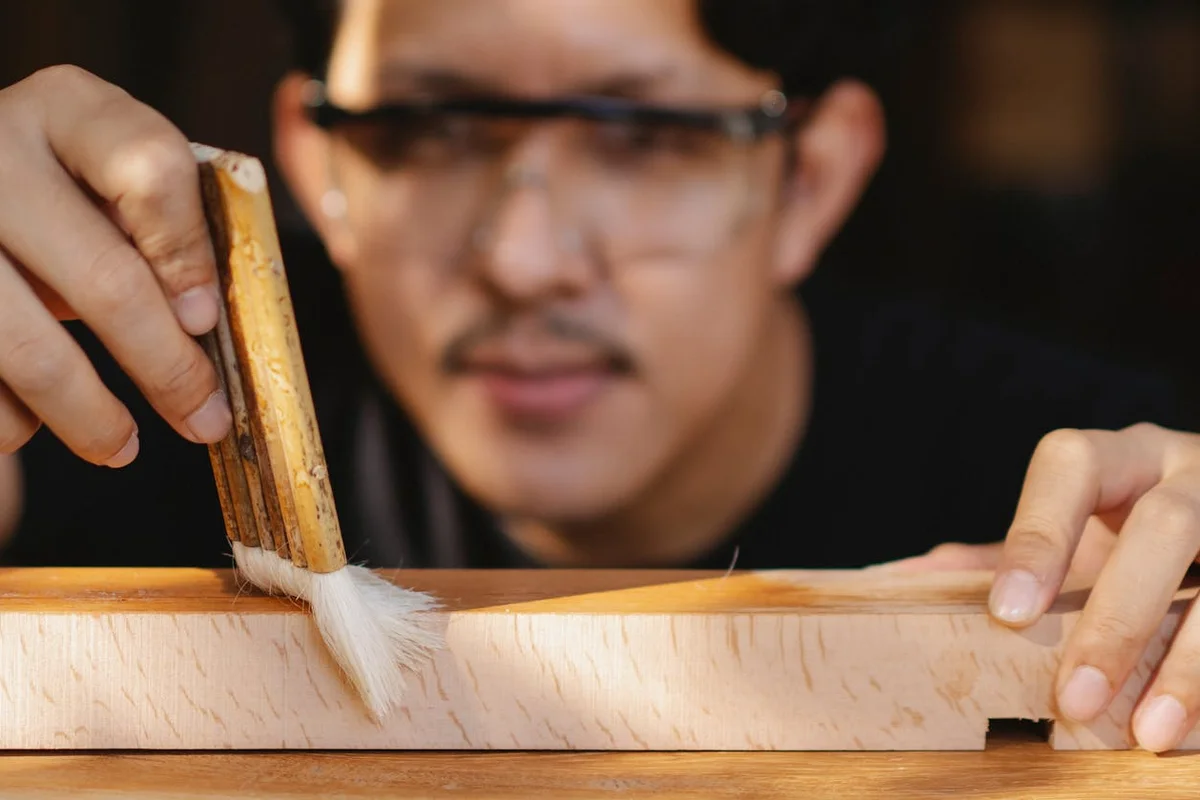
For clear topcoats like polyurethane, shellac, and varnish, a brush is your most versatile tool. It physically moves a thick liquid onto the wood to build a protective layer. Think of it like laying down a series of wet blankets that fuse together as they dry.
Your brush choice is critical and depends on your finish chemistry. Use a natural bristle brush (like China bristle) for oil-based finishes; the bristles are porous and hold the solvent-based liquid well. For water-based polyurethane, you must use a synthetic nylon or polyester brush. Water makes natural bristles swell and go limp, ruining your stroke.
The technique is everything. Here is my shop method:
- Load the brush properly: Dip only the first third of the bristles into the finish. Tap off the excess against the inside of the can, don’t wipe it.
- Apply with the grain: Lay the finish on in long, smooth strokes following the wood’s grain pattern.
- Maintain a ‘wet edge’: Work on manageable sections. Always start your next stroke overlapping the still-wet edge of the previous one to prevent lap marks.
- Tip off: For the final pass, hold the brush nearly vertical and lightly drag just the tips across the wet finish. This action pops any tiny bubbles and smooths the film.
Brush care isn’t optional. A clean, high-quality brush is the secret to a smooth finish. Clean it thoroughly with the appropriate solvent (mineral spirits for oil-based, water for water-based) immediately after use. Spending twenty minutes cleaning a good brush is better than spending an hour sanding out brush marks from a cheap one.
The Spray Gun: Speed and a Factory Finish
Can you spray wood stain? Yes, but it’s a specific process best for large, flat projects or production work. Spraying atomizes the finish into a fine mist, creating an incredibly smooth layer. It’s also the only way to evenly coat complex carvings or turned spindles without drips. However, even when spraying, certain preparation steps like sanding are important to ensure proper adhesion. If you’re curious about alternatives, there are methods for staining wood without sanding.
Equipment varies by need and budget. HVLP (High Volume Low Pressure) sprayers are the hobbyist favorite; they’re efficient and have less overspray. Airless sprayers are for pros, laying down material fast on big jobs. For a small picture frame, a quality aerosol can is perfectly fine.
Success hinges on three non-negotiable steps. First, you must often thin the finish according to the manufacturer’s specs for your sprayer’s needle size. Second, surface prep must be flawless; a spray gun magnifies every scratch and dust nib. Third, you need a dedicated, ventilated space. Overspray gets everywhere, and you must have serious respiratory protection.
The technique is about consistency. Keep the gun moving in straight, overlapping passes (about a 50% overlap). Maintain a consistent distance from the surface, usually 6 to 8 inches. If you see a run start to form, immediately spray a dry pass over it to redistribute the material before it sets.
The Science of Stains and Finishes: Why Methods Matter
Choosing the right method starts with understanding what the product does. Stains are primarily dyes and pigments suspended in a carrier (oil, water, alcohol). They work by penetrating the porous cell walls of the wood to add color. Finishes like varnish or polyurethane are film-formers; they create a continuous plastic-like layer on top of the wood for protection.
The difference is like dyeing a cotton shirt versus painting it. The dye soaks into the fibers, while the paint sits on top. This is why you can wipe or rag a stain (you’re pushing it into the wood) but you must brush or spray a topcoat (you’re building a unified film).
All wood is hygroscopic, meaning it absorbs and releases moisture from the air. This causes it to swell and shrink. Any finish, whether penetrating oil or a surface film, needs a stable, clean base to stick to. That’s the universal first step. Every application method, from a simple wipe to a complex spray, fails if the wood isn’t properly sanded, cleaned of dust, and ready to accept it. The science dictates the prep.
The Universal Best Practice Workflow
Forget the brush versus rag debate for a moment. Your success starts here, with a process that doesn’t change. I treat this like a science lab procedure. Deviate, and your results are not guaranteed.
The sequence is strict: sand, clean, apply, inspect, cure. Skipping a step is the most common reason a finish fails.
Sand (Through the Grits)
Start with a coarse grit to remove mill marks or old finish, then move progressively finer. I stop at 150 or 180 grit for stain and 220 for clear topcoats. Sanding does two things: it levels the surface and opens the wood’s pores. If you don’t sand through the grits, you leave deep scratches that stain will darken and highlight.
Always sand with the grain. Cross-grain scratches are almost impossible to hide later. For hardwoods like maple or cherry, a random orbit sander saves time. For softer woods like pine, hand-sanding with a block prevents swirls and dents.
Clean (Tack Cloth is Non-Negotiable)
After sanding, your wood is a magnet for dust. Blowing it off just moves particles around. Vacuum the piece and your work area thoroughly. Then, go over every inch with a tack cloth-a cheesecloth impregnated with a mild adhesive. It picks up the fine dust a vacuum leaves behind. If you skip this, you will seal dust into your finish. It will feel rough and look contaminated.
Apply (Method Comes Later)
This is where your technique-brush, rag, spray, or wipe-takes over. But the core principle is uniform application. Whether it’s stain or finish, you must maintain a wet edge to avoid lap marks. Work on manageable sections and keep a consistent pace.
Inspect (Under Good Light)
After each coat, inspect your work under a bright, angled light. Look for dust nibs, drips, dry spots, or uneven coverage. Catching a problem here means a simple fix before the next coat. Waiting until the end means stripping and starting over.
Cure (Patience is a Tool)
Drying time is not curing time. A finish may be dry to the touch in hours but takes days or weeks to fully harden (cure). Rushing the cure is how you get dents, scratches, and adhesion failures in your final product. Follow the manufacturer’s full cure time before subjecting the piece to use. For oil-based polyurethane, that’s often 30 days for a full cure. Knowing the wood stain polyurethane dry cure time helps you plan subsequent coats and handling windows. Note that a surface can feel dry before it’s fully cured.
A Note on Sustainable Practice
The solvents in many finishes are derived from petroleum. Where your project allows, choose finishes thinned with plant-based solvents like citrus or seed oils. They work well and have a lower environmental impact. Regardless of what you use, never pour leftover stain, thinner, or finish down a drain. Take them to a hazardous waste disposal facility. It’s a basic responsibility for any workshop. Also consider how easy the finish will be to remove later; solvent selection can influence finish removal. If you anticipate refinishing, look for finishes designed for easier removal and cleanup.
Fixing Common Finish Problems
Problems happen to everyone. The key is diagnosing the symptom correctly. Here’s how to fix the usual suspects.
Blotchy Stain (Especially on Pine or Cherry)
Blotchiness happens because wood absorbs stain unevenly. Soft grain soaks it up; hard grain resists it. The fix is to control absorption. Before your main stain coat, apply a pre-stain wood conditioner (for oil stains) or a thin wash of shellac (1 lb. cut) for any stain type. This partially seals the wood, allowing for a slower, more even color uptake. Wipe the stain off quickly, don’t let it pool.
Stain Not Penetrating the Wood
If the stain just sits on top and wipes right off, the wood is sealed. You might be working on a wood with a natural closed pore structure like maple, or you might have contaminated the surface with oil from your hands. Sand the area lightly with 220-grit to open the pores again and clean it with mineral spirits. Also, ensure you’re not using a gel stain on a project that calls for a penetrating liquid stain.
Grain Raising (A Fuzzy Surface)
This is almost exclusively a water-based product issue. Water causes wood fibers to swell. The fix is proactive. After your final sanding, dampen the wood surface with a wet rag and let it dry completely. The grain will raise. Sand it smooth lightly with 220 or 320-grit paper. Now, when you apply your water-based finish, the grain won’t raise again.
Drips and Runs in a Brush-On Finish
Drips mean you applied too much material too quickly. For a dripped coat that’s still wet, you can sometimes brush it out gently. For a cured drip in polyurethane or varnish, wait for it to harden fully. Then, level it by sanding carefully with a sanding block until the drip is gone and the surface is uniform. You must then recoat the entire surface.
Orange Peel in a Spray Finish
That bumpy, textured surface looks like the skin of an orange. It’s a spraying technique error. Orange peel means your finish is drying before it flows out on the surface. The cause is usually holding the spray gun too far from the workpiece (causing atomized droplets to dry mid-air) or using a finish that’s too thick. Thin your material according to the product’s instructions and practice holding the gun 6 to 8 inches from the surface, moving with a consistent, overlapping motion.
Cloudy or Milky Finish (Blushing)
This hazy white cloud appears in lacquer and shellac, and sometimes in water-based finishes. It’s caused by moisture trapped in the finish as it dries. High humidity is the usual culprit. For lacquer and shellac, you can often spray a very light “mist coat” of the appropriate solvent (lacquer thinner or alcohol) over the blush. This re-dissolves the finish and can allow it to dry clear. Preventing it is better: avoid applying these finishes when humidity is above 70%.
Frequently Asked Questions on Application Methods
Why must I use a specific brush type for oil-based versus water-based finishes?
The choice is dictated by solvent chemistry. Natural bristles are porous and remain supple in oil solvents, while synthetic filaments resist swelling and deformation in water-based finishes, ensuring proper film deposition and flow.
Does the application method affect how deeply a stain penetrates the wood?
Yes, mechanical action influences penetration. Vigorous rag wiping forces more pigment-laden carrier into the pores, while a gentle wipe or spray leaves a shallower color layer, directly impacting color saturation and grain clarity.
Can I successfully spray a finish not specifically labeled “spray grade”?
Often, yes, but it requires precise thinning with the correct solvent to achieve proper atomization viscosity. Consult the finish manufacturer’s data sheets for thinning ratios to avoid orange peel or poor adhesion from a malformed film.
Why are wipe-on finishes more forgiving of application errors than brushed ones?
Their high solvent content and low viscosity allow each applied coat to be extremely thin; any slight unevenness self-levels more easily and is corrected by the subsequent coat, minimizing built-in ridges or marks.
Is a tack cloth compatible with all finish types before application?
No. The mild adhesive on some tack cloths can leave a residue that interferes with the adhesion of non-reactive finishes like shellac or lacquer. For these, use a dry, lint-free cloth lightly dampened with the appropriate thinner to clean the surface.
Final Thoughts on Stain and Finish Application
The single most important advice is to prioritize flawless wood preparation above all else. I consistently find that a surface sanded to 220-grit and treated with a pre-stain conditioner on porous woods guarantees an even stain job. Your choice of brush, rag, spray, or wipe-on method is secondary to this prepared foundation. A controlled, consistent substrate is what transforms a good finish into a great one, regardless of the tool in your hand.
Choose low-VOC, water-based finishes from suppliers committed to sustainable forestry to safeguard your workshop air and our forests. They typically offer lower VOCs and reduced toxicity, helping keep indoor air healthier. Understanding safety data and maintaining good ventilation is part of using these finishes responsibly. I encourage you to keep a sample board for testing new techniques, as hands-on experimentation is the best teacher for understanding how finishes interact with wood grain.
Expert Resources and Citations
- How To Finish Wood – The Home Depot
- Woodworking Finishing 101: Types & Process | The Crucible
- How to Stain & Finish Wood with Easy Steps for Beginners
- A Complete Guide to All Types of Wood Finishes | Octane Seating
- Wood Finishing Tips & Techniques | Family Handyman
- r/woodworking on Reddit: Classic beginner question: how to finish wood? (Walnut)
- Finishing For Beginners | Popular Woodworking
- Wood Furniture Finishes & Finishing Techniques