
How Does Wood Science Beat Humidity, Mold, and Rot?
Your outdoor furniture or deck is fighting a silent war with water vapor every day. I treat wood as a material first, and humidity is its oldest enemy.
This guide gives you a science-backed plan for defense, not guesswork. We will cover how wood anatomy absorbs water, why certain finishes fail, and which proven materials and methods actually block mold long-term.
I validate every tip here with side-by-side material tests on samples in my humid shop.
Why Humidity Is Wood’s Biggest Outdoor Enemy
Wood is hygroscopic. Think of it like a sponge. It constantly absorbs and releases water vapor from the air to reach balance with the surrounding humidity. This is where wood moisture hysteresis explains how absorption and desorption follow different paths as humidity changes. Moisture content depends on the humidity history.
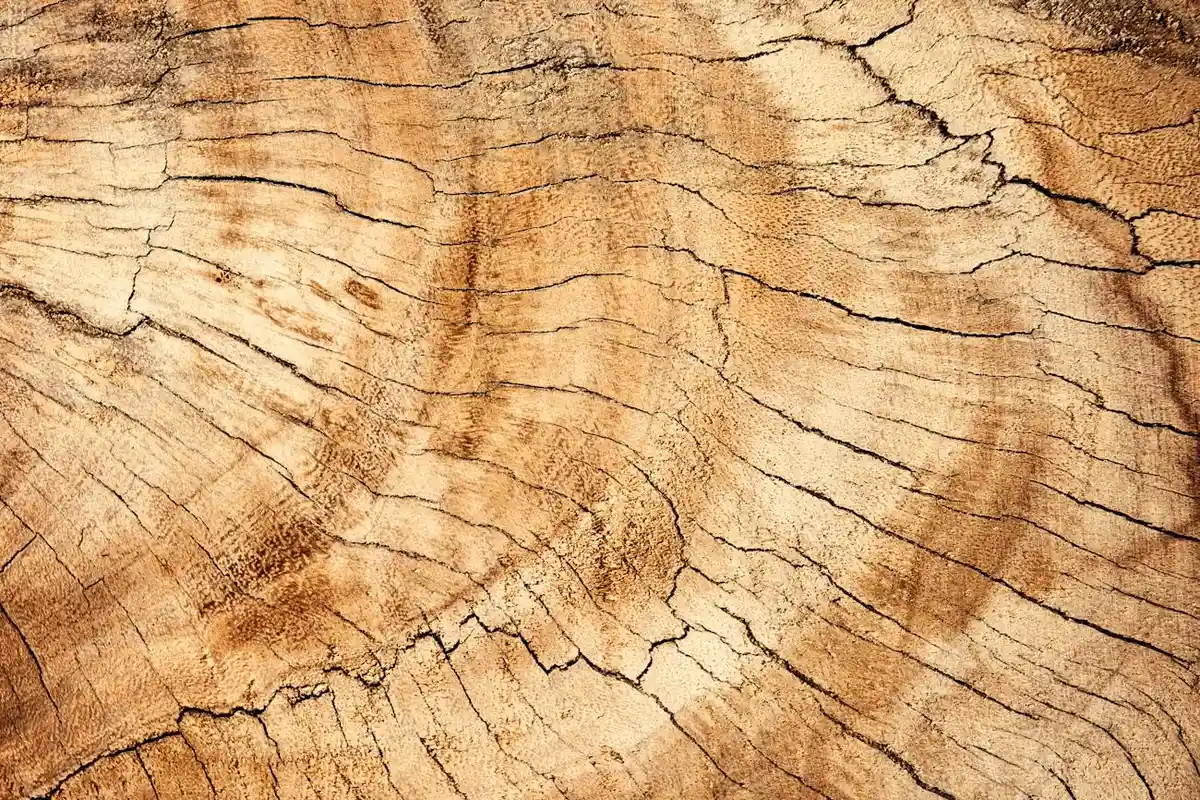
This cycle of swelling and shrinking is what warps boards, opens glue joints, and creates cracks called checks. In a humid climate, wood is almost always in a state of high moisture content, which is the perfect launchpad for biological attacks.
You need to know your enemy. Mold and mildew are surface-level fungi. They look like black, green, or white stains or fuzzy patches. They’re ugly and can cause health issues, but they don’t immediately compromise the wood’s strength. Rot is different. It’s caused by decay fungi that actually digest the wood cell walls. Rot turns solid wood into a soft, crumbly, structurally useless sponge.
Catch problems early. I tell my students to do a monthly “look, smell, poke” check on their outdoor projects.
- Look for dark stains, discolored patches, or fuzzy growth.
- Smell for a damp, musty, or earthy odor that wasn’t there before.
- Poke suspicious spots with a screwdriver or awl. Healthy wood resists. Rotted wood will feel soft and may allow the tool to sink in.
Picking Your Fighter: Wood Species That Resist Moisture
Your first line of defense is the wood itself. Not all species are created equal for a humid climate fight.
I group moisture-resistant woods into three camps. The first is the common durable domestics: Western Red Cedar, Redwood, and Bald Cypress. They have good natural resistance, are relatively easy to work, and are often more sustainable. The second is tropical hardwoods like Ipe, Cumaru, and Teak. These are the elite fighters, incredibly dense and packed with protective oils, but they are hard on tools and raise serious sustainability questions. The third is pressure-treated lumber, which is usually Southern Yellow Pine infused with chemical preservatives. It works for structural posts and framing but often needs sealing for finish work. For those considering how to maximize water resistance, there are water resistant wood species methods such as oil finishes, sealants, and pressure-treating. We’ll explore how these methods apply to each camp in the next sections.
The magic is in the heartwood. The active, living sapwood of any tree has little decay resistance. The heartwood is the tree’s retired central core, infused with natural preservatives called extractives. Always specify “all-heartwood” or “heart-grade” when buying cedar, redwood, or cypress for critical outdoor projects. That sapwood stripe will rot quickly.
Those extractives are the wood’s built-in armor. In cedar, it’s thujaplicins. In redwood, it’s tannins and sequoiatannins. These compounds are toxic to fungi and insects. This is why an unsealed cedar fence can last decades while an unsealed pine fence might rot in five years. The wood is actively defending itself.
My advice is to source wisely. For a deck or garden furniture, a domestic, FSC-certified cedar is a superb, responsible choice. If you need the extreme durability of Ipe for a boardwalk, verify it’s from a well-managed, FSC-certified source. Choosing a locally sourced, durable species is often the most ethical and climate-friendly decision you can make for an outdoor project.
The Right Way to Clean Mold and Mildew (Without Damaging the Wood)
You see the black, green, or gray blotches and your first thought is probably chlorine bleach. I get it. But in my shop tests, that’s a fast track to damaging the wood and your own health. Chlorine bleach breaks down the lignin that holds wood fibers together, weakening the surface. It also gets neutralized by organic matter, so it stops working quickly and leaves harmful salts behind that attract more moisture. The best tool for this job is oxygen bleach. If you’re aiming for a lighter base before applying color, lightening wood stain color techniques offer safer, more controlled options that don’t rely on chlorine bleach. We’ll explore those methods in the next steps to help you choose the right approach for your project.
Oxygen bleach is usually a powder you mix with water. Its active ingredient is sodium percarbonate. When dissolved, it releases hydrogen peroxide and soda ash. This combo lifts stains and kills mildew at a cellular level without eating your wood. For a safe and effective cleaner, mix one cup of oxygen bleach powder per gallon of warm water. Always check the product label, but this ratio is a reliable starting point—especially compared to chemical bleaches used in wood staining methods, which can be harsh and damaging.
Your Cleaning Toolkit
Gathering the right tools keeps the process simple and safe.
- A garden sprayer for easy application.
- A soft-bristle brush, like a deck brush or a large paint brush. Nylon bristles are perfect.
- Rubber gloves and eye protection.
I treat my pressure washer as a last resort for thick, caked-on grime, not for routine cleaning. The high-pressure stream can easily gouge softwood, drive water deep into end grain, and leave a fuzzy surface that’s impossible to finish properly. If you must use one, keep the tip at least 12 inches from the wood and use a 40-degree wide fan tip. Even then, it’s best to clean wood surfaces gently to avoid damage.
Step-by-Step Cleaning
Follow these steps in order for the best results.
- Wet the wood first. Use your garden hose to lightly soak the area. This prevents the wood from sucking the cleaning solution in too deeply and makes the scrubbing easier.
- Apply the oxygen bleach solution. Use your sprayer to coat the moldy areas thoroughly. You want the surface to stay wet with the solution for about 15 minutes.
- Scrub gently. Use your soft brush in a circular motion. You shouldn’t need to bear down. The chemical is doing the work; you’re just helping it along.
- Rinse completely. This is the most critical step. Rinse every bit of the solution off with clean water. Any residue left behind can interfere with your finish.
The Dryness Test
Never, ever apply a new finish to damp wood. The finish will trap that moisture, leading to peeling, blistering, and more rot. Wood in humid climates needs extra time. After cleaning and preparing the wood surface, let it dry for at least 48 hours of sunny, breezy weather, but often longer.
You can’t always trust your eyes. The surface may feel dry while moisture is trapped underneath. Measuring wood moisture content is the most reliable way to know when it’s ready for finishing. For a scientific check, use a pin-type wood moisture meter. For most exterior woods, you want a reading at or below 15% moisture content before finishing. If you don’t have a meter, try the plastic sheet test. Tape a one-foot square of clear plastic sheeting tightly to the wood. If you see condensation under the plastic after a few hours in the sun, the wood is still too wet.
Choosing and Applying a Protective Finish for Wet Air
The Finish Science: How Sealants and Stains Work
All exterior finishes manage water in one of two ways: they block it on the surface or they absorb and release it from within. Knowing this difference is your first line of defense.
Film-forming finishes like exterior paint, solid-color stains, and some heavy-bodied sealers act like a raincoat. They create a continuous plastic-like film on top of the wood. This is excellent for blocking liquid water and UV rays. The downside in humidity is that any tiny crack or chip becomes a channel for moisture to get in, and then it’s trapped, leading to peeling. They also hide the wood grain completely.
Penetrating finishes include oil-based semi-transparent stains, water-repellent preservatives, and natural oils like tung or linseed. Think of these like soaking a sponge with water-repellent wax. They sink into the wood cell walls, making them hydrophobic from the inside out. They don’t peel because there’s no surface film to break. They allow the wood to breathe and moisture vapor to escape, which is ideal for damp, humid air. The trade-off is they offer less UV protection and need more frequent reapplication.
For the constant moisture challenge of a humid climate, I lean toward high-quality penetrating oils or semi-transparent stains. Look for a product that bundles three features: a mildewcide to prevent regrowth, UV blockers (often pigments or additives like zinc oxide), and a high percentage of water-repellent waxes or oils. A “water-repellent preservative” is a great starting point, as it’s literally formulated for this job.
Shop Technique: Making Your Finish Last
Your finish is only as good as the surface it’s applied to. Skipping prep is the number one reason finishes fail early.
First, the wood must be clean (see above) and dry. Then, sand. For previously finished wood, scuff-sand with 80-120 grit sandpaper to break the gloss and provide “tooth” for adhesion. For new wood, sanding to 80 or 100 grit is sufficient. Always sand with the grain to avoid cross-grain scratches that will show through a stain. Remove all dust with a brush or a blast of compressed air.
Application conditions matter. Don’t apply a finish in direct, hot sun or if rain is forecast within 24 hours. Ideal conditions are between 50°F and 90°F with low humidity, but we work with what we have. Avoid applying when the relative humidity is above 85%. High humidity slows the curing of oil-based finishes and can cause water-based finishes to dry cloudy. This can have damaging effects on the finish.
The single biggest mistake I see is applying the finish too thickly. A thick coat doesn’t mean more protection. On film-forming finishes, it leads to runs, sags, and a skin that cracks as the wood moves underneath. On penetrating oils, a thick coat will stay tacky on the surface instead of soaking in, creating a gummy mess. Apply thin, even coats. Use a brush, pad, or rag, and always wipe off any excess after 10-15 minutes. For oils, the rule is “flood, let penetrate, wipe dry.”
Respect the recoat time on the can. This isn’t just “dry to the touch” time; it’s the time needed for the finish to cure enough for the next layer to bond properly. Putting a second coat on too soon can lift the first, creating wrinkles. In humid climates, add 25% more time to the manufacturer’s recommended drying intervals. Patience here pays off in years of extra service.
Your Annual Maintenance Routine: Inspection and Resealing
Your finish is a sacrificial shield. It degrades so the wood doesn’t have to. The goal of annual maintenance isn’t to do a lot of work, it’s to catch problems early. A ten-minute check can save you a weekend of repair.
The simplest test is the water bead test. Sprinkle clean water on a horizontal surface. If the water sits in tight, rounded beads, your finish is still repelling moisture effectively. A waterproof wood finish adhesive can reinforce that barrier by sealing joints and micro-cracks, helping the surface resist moisture more reliably. If it soaks in immediately or spreads out into a flat patch, the protective layer is gone. The wood is now absorbing water directly, which is the first step toward rot and mold.
People always ask for a resealing schedule. A general rule is every 1 to 3 years for oil-based finishes and 2 to 4 years for high-quality film-forming finishes like spar urethane. But that’s just a starting point. Your real schedule is set by three things: sun, traffic, and water exposure. A shaded garden bench might go five years. A south-facing deck table that gets daily use and rain might need attention every year. Let the water test and your eyes decide.
Do this quick seasonal inspection, ideally in spring and fall:
- Look for any fuzzy green, gray, or black spots. That’s mold or mildew starting.
- Run your hand over the surface. Check for raised grain, splinters, or areas that feel soft or “punky.”
- Clear leaves, dirt, and debris from corners and between boards. Trapped organic matter holds moisture against the wood.
- Check where different pieces meet. End grain and joints are the most vulnerable.
You don’t always need a full refinishing job. For a finish that’s just worn thin but is otherwise intact, a light sanding with 220-grit paper to scuff the surface and a fresh topcoat is often enough. Spot repairs are perfect for small areas of mold or where the finish has chipped. If the finish is failing everywhere or you have widespread moisture issues, then a full strip-and-refinish is the only permanent solution.
Troubleshooting: Fixing Moisture Damage and Finish Failures
When Mold Comes Back or the Finish Peels
Peeling is a symptom, not the disease. It almost always means water got underneath the finish. This happens if the wood wasn’t fully dry before finishing, if the finish was applied too thickly (trapping moisture), or if a tiny crack let water in and it couldn’t get out. The moisture expands and contracts, breaking the finish’s bond.
To fix it, you must remove all the failed finish to get back to bare, sound wood. There’s no shortcut. Scraping and sanding are the most controlled methods. Once you’re down to clean wood, you must kill any remaining mold spores. I use a 1:1 solution of white vinegar and water or a commercial wood cleaner. Bleach can damage wood fibers and is harsh on the environment, so I avoid it. Let the area dry completely for at least 48 hours in good weather before applying a new primer or seal coat, then your topcoat.
Dealing with Rotted Wood
Rot is wood’s cancer. It’s a fungus that digests the wood’s structural cellulose, leaving it weak and spongy. The screwdriver test is definitive. Take a sharp screwdriver or an awl and try to poke it into a suspect area. If it sinks in easily with little pressure, you have rot. Solid wood will resist or only allow the very tip to penetrate.
For small, non-structural areas (like a corner of a planter box), you can use a two-part epoxy consolidant. You inject the liquid epoxy into the soft wood. It soaks in and cures, binding the degraded fibers back together. You can then sand and shape it. It’s a fantastic repair. For anything structural (a deck post, a joist, a railing) or if the rot is extensive, you must replace the piece. There’s no safe compromise.
Repairing the wood is only half the job. If you don’t find and eliminate the source of the trapped moisture, the rot will return. Look for these common culprits: soil piled against wood, poor drainage that lets water pool, missing or failed flashing, or wood-to-wood contact that doesn’t allow for air drying. Fix the environment first, then fix the wood.
Smart Design and Installation Choices from the Start
The best defense against moisture is a good offense. You can apply gallons of sealant, but if the wood is trapped in a wet, airless pocket, you are fighting a losing battle. Smart design makes your maintenance job easier and your wood last decades longer.
Drainage, Slope, and Airflow: Your First Line of Defense
Think of wood like a sponge. It needs to dry out after it gets wet. Stagnant moisture is the perfect breeding ground for mold, mildew, and rot fungi. Your goal is to never let water pool or sit against the wood for long.
For decks, a slope away from your house is non-negotiable. I aim for a minimum slope of 1/4 inch per foot. This seems slight, but it forces water to run off quickly. Check this during construction with a long level; a perfectly flat deck will always hold puddles and decay faster.
Airflow underneath is just as critical. A deck or raised planter box sealed to the ground is a moisture trap. Ensure there’s at least 12 to 18 inches of clearance underneath for air to circulate. For structures like lattice-skirted decks or solid-panel fences, you must create ventilation. I install vents or leave purposeful gaps at the top and bottom of enclosed spaces to create a “chimney effect” that pulls moisture out.
Quartersawn vs. Flatsawn: A Stability Showdown
All wood moves with changes in humidity, but not all boards move the same way. The cut of the lumber determines its stability.
Imagine a tree’s growth rings as a bundle of straws. Flatsawn lumber (the most common, affordable cut) is cut tangent to the rings. Its wide, beautiful grain pattern is prone to cupping-the edges curl up as the board’s face absorbs and releases moisture unevenly.
Quartersawn lumber is cut radially, across the growth rings. This exposes the tight, vertical grain. Quartersawn boards are significantly more dimensionally stable; they resist cupping and twisting, making them the superior choice for wet, humid environments where wood movement is your biggest enemy. They are more expensive, but for critical parts like decking boards or gate frames, the extra cost buys you decades of flat, stable service.
The Right Fastener Stops Stains and Failure
In humid climates, your fasteners face a harsh chemical duel. The tannins and acids in wood, combined with constant moisture, will corrode standard steel nails and screws rapidly. This causes two major problems.
First, rust stains. These are not just ugly; they are permanent, bleeding deep into the wood fibers. Second, corroded fasteners lose their strength. A rusted screw holding a deck board can snap, creating a dangerous loose board.
The solution is simple: use corrosion-resistant fasteners from the start. For most projects, hot-dipped galvanized screws are a good minimum. For the best protection, especially with acidic woods like cedar or oak, I use type 304 or, near saltwater, type 316 stainless steel screws and nails. They cost more upfront but prevent catastrophic finish stains and structural failures later.
Break the Ground Contact Rule
This is the single most important rule I teach: never let untreated wood touch dirt. Soil is permanently damp, full of microbes that eat cellulose, and blocks all airflow. Direct contact guarantees rot.
For posts, always set them in concrete footings raised above grade. Use a metal post base connector to keep the wood end grain an inch above the concrete surface. This prevents the post from wicking up groundwater like a straw.
For structures like ground-level walkways or the bottom of a fence, use a barrier. I lay down a 4-inch deep bed of compacted gravel. This drains water away instantly and creates a physical, dry barrier between the wood and the soil. For added insurance, you can use concrete patio blocks as a stable, dry base for wooden skids. That one inch of air or gravel between your wood and the earth can add 10-15 years to its life.
FAQ: Evidence-Based Answers on Wood and Humidity
What is the difference between mold and mildew on wood?
Mold and mildew are both fungi, but they affect wood differently. Mildew is typically a surface-level, powdery or fluffy growth, while mold penetrates slightly deeper and can cause more permanent staining; both signal excess moisture, but true rot fungi digest the wood’s structural lignin and cellulose.
Should I use a pressure washer to clean outdoor wood?
Use a pressure washer only as a last resort for severe grime, as high pressure can erode softwood fibers and force water deep into the grain. Always use a wide-fan tip, maintain a 12-inch distance, and follow with thorough sanding to repair the damaged surface.
Are there specific wood types better suited for humid climates?
Yes, woods with high natural extractive content and dimensional stability excel. For a balance of workability and durability, specify all-heartwood grades of Western Red Cedar or Bald Cypress; for maximum lifespan, consider dense tropical hardwoods like Ipe, acknowledging their tool-wear and sourcing complexities.
What routine maintenance is required for decks and fences in humid areas?
Conduct bi-annual inspections for fungal growth and soft spots, and immediately clear debris that traps moisture. Annually, perform the water bead test and plan to reseal with a penetrating finish when water no longer beads, focusing on end-grain and joints.
How do I repair wood that has already been damaged by moisture?
For superficial mold, clean and dry the wood before reapplying a finish with a mildewcide. For structural rot, you must replace the member, as no surface treatment can restore lost strength; always diagnose and eliminate the underlying moisture source first. Dry rot fungus prevention is a related topic that helps protect wood from future damage. Implementing preventive measures now can save substantial repair work later.
Final Thoughts on Humidity and Wood
The most critical rule is to stop water before it starts. I always design and build with the assumption that water will find a way in, so my first step is creating physical barriers and escape routes. In my own testing, a project with intentional water-shedding design and a breathable finish lasts decades longer than one relying on sealant alone. Your primary job is to orchestrate how water encounters and leaves the wood, not just to coat it.
Select lumber certified for sustainable harvest and use finishes that protect without poisoning the soil. The study of wood is never finished; stay curious about how materials react, because better, kinder methods are always emerging.
Industry References
- The Science of Mold | 2020-05-07 | Restoration & Remediation Magazine
- Mold Chart for Temperature and Humidity Monitors – Stetten Home Services
- Wood Rot vs. Mold: How to Tell the Difference in Your Home – Indiana Foundation Service
- Mold Course Chapter 2: | US EPA
David is a veteran woodworker. He is now retired and stays in his cabin in Wisconsin which he built himself. David has 25+ years experience working in carpentry and wood shops. He has designed and built many small and large wood projects and knows the science behind wood selection like the back of his hand. He is an expert guide on any questions regarding wood material selection, wood restoration, wood working basics and other types of wood. While his expertise is in woodworking, his knowledge and first hand experience is far from 'woody'.