
How Do You Strip Polyurethane Finish with Chemistry and Sanding?
You have a piece of wood trapped under a failing polyurethane finish, and you need a removal method that works without destroying the grain or your lungs.
This article provides a materials-focused breakdown, covering how strippers chemically break bonds, why sanding mechanics matter, and a direct comparison of safety and results.
My guidance is built on shop-tested trials and a scientific look at how finishes interact with wood fibers.
What Makes Polyurethane So Hard to Remove?
Think of a polyurethane finish not as a stain that soaks in, but as a layer of clear, hard plastic glued to the wood’s surface. That’s essentially what it is. The liquid dries and cures through a chemical reaction, creating a dense, cross-linked polymer film. This plastic shield is incredibly resistant to solvents once fully cured.
Compare this to traditional finishes. Shellac dissolves easily in denatured alcohol. Lacquer thinner will melt and re-flow lacquer. Try those on polyurethane, and nothing happens. Polyurethane’s chemical resistance is its greatest strength as a finish and your biggest hurdle in removing it. It laughs at common solvents, which is why you need specialized, potent chemical strippers.
This plastic nature also explains the sandpaper struggle. As you sand, friction generates heat. The heat softens the polyurethane just enough for it to gum up and fill the spaces between the abrasive grits on your sandpaper. You’re not just sanding it away, you’re fighting a constant battle against it melting and re-adhering to your abrasive. A coarser grit generates more heat and clogs faster, which is why a methodical, step-by-step sanding approach is non-negotiable.
The First Decision: Chemical Stripper or Sandpaper?
Your choice isn’t about what’s “better,” but what’s right for the job. Each method has a clear territory where it excels. Getting this wrong means hours of extra work and potential damage to the wood.
The simplest rule is this: use chemical stripper for complex shapes and sandpaper for wide, flat surfaces. For most real-world projects, a hybrid approach is the smartest path to efficiency.
| Factor | Chemical Stripper | Sanding |
| Best For | Ornate carvings, turnings, detailed moldings, chairs, thin veneers. | Tabletops, cabinet doors, panels, any large flat surface. |
| Speed on Thick Finish | Fast. Can lift multiple layers at once. | Slow. Requires grinding through each layer. |
| Dust & Fumes | High fumes, chemical mess. | High dust (requires serious ventilation/collection). |
| Risk to Wood | Can raise grain; may stain some woods if left too long. | Can easily change the shape or sand through veneer. |
| Final Surface | Often requires light sanding after to remove raised grain and residue. | Ready for new finish after final grits, as it creates fresh wood surface. |
A hybrid approach saves time and effort: use a stripper to remove the bulk of the finish, then follow up with sanding to clean up the last bits and prepare the fresh wood surface. This step helps you prepare a clean, treated wood surface for the next steps. You let the chemicals do the heavy lifting, then use abrasives for the precision work.
Best Practice Workflow for Choosing Your Method
Don’t just grab a tool. Follow these steps to make a plan that protects the piece and your sanity.
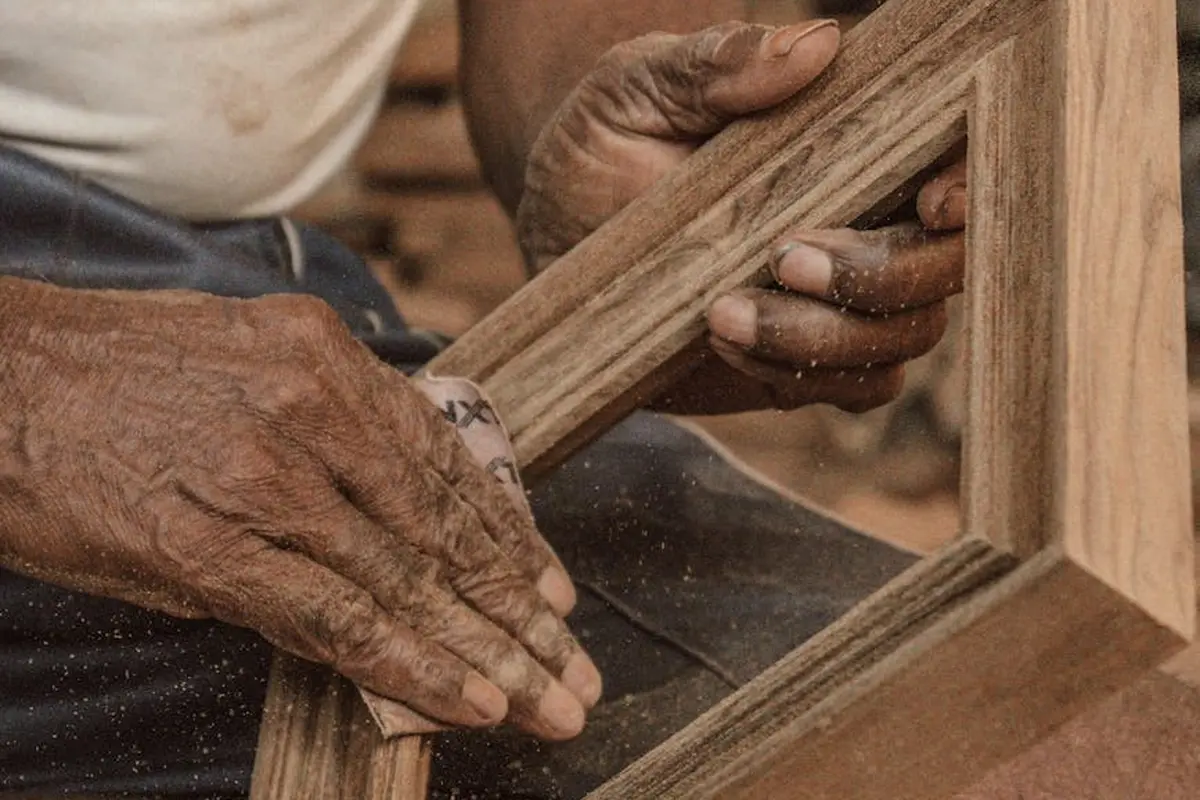
- Assess the piece thoroughly. Look at the geometry. Is it a simple flat panel or a chair leg with deep flutes? Run your fingers over the surface to feel the texture and thickness of the finish. A thick, alligatoring finish screams for a stripper first.
- Check for veneer. This is critical. Examine the edges of the piece. If you see a distinct line where a thin sheet of fancy wood is glued to a substrate, you must be extremely careful. Sanding through veneer is a permanent mistake. Chemical strippers are often safer here, but you must test.
- Test in an inconspicuous spot. Always do this. Try a dab of stripper on the bottom of a leg or inside a drawer. See how the finish reacts and check if the wood darkens. For sanding, make a few passes in a hidden area to see how quickly the paper loads up and how deep the finish is.
Your decision logic should follow this pattern: If the piece is ornate, use a stripper. If it’s a simple tabletop, sanding is viable. If it’s a mix, like a table with carved legs, use stripper on the legs and sand the top. If it has thin veneer, prioritize a gentle, tested chemical method. Your goal is to remove the finish, not the wood underneath it.
Gathering Your Arsenal: Tools, Chemicals, and Safety
You need the right tools for the job. Trying to strip polyurethane with the wrong gear is frustrating and unsafe. I organize my shop into two distinct kits, one for chemical work and one for sanding. Keeping these methods separate prevents chemical residue from ruining your sandpaper and sanding dust from contaminating your chemical workspace. When removing a finish, solvent choice matters. I’ll cover solvent selection for finish removal next, so you can pick safe, effective options.
Toxicity & PPE: Your Non-Negotiable Safety Gear
I treat chemical strippers with more respect than my table saw. The fumes and skin contact pose real, immediate health risks. Your lungs and skin have no backup parts, so protecting them is the first step of the project.
You must use a respirator with organic vapor (OV) cartridges paired with particulate filters. A dust mask or a ventilator with the wrong cartridge is useless. Wear heavy-duty, chemical-resistant nitrile gloves. Latex gloves will dissolve. Wear sealed goggles, not just safety glasses, to prevent splashes.
Ventilation means moving air. Open all doors and windows and use a fan to pull fumes *out* of the workspace, not just circulate them. I perform all chemical work outside on a calm day. Repeated exposure can lead to chemical sensitization, where your body develops severe allergic reactions to common solvents. It happened to a colleague of mine, and he can no longer be in a room with mineral spirits.
How to Strip Polyurethane with Chemicals: A Shop-Proven Method
Chemical stripping works by using powerful solvents to penetrate and swell the finish, breaking the bonds that hold it to the wood. Gel strippers are thick, so they cling to vertical surfaces and give the solvents time to work. The single biggest mistake is letting the stripper dry out; it re-hardens the finish, creating a gummy mess that’s ten times harder to remove. Work on manageable sections, about 2 by 2 feet for a large surface.
Step-by-Step Chemical Removal
First, ensure your workspace is safe and ventilated. Put on all your PPE. Have your scrapers and waste container ready before you start.
- Shake or stir the stripper as directed. Using a cheap brush, apply a thick, generous coat. Do not brush it out thin like paint. You want a consistent, opaque layer.
- Wait. The timing varies. Modern “green” strippers may take 30 minutes. Heavy-duty methylene chloride-based products work in 10-15. You will see the finish wrinkle, blister, and turn dark.
- Test a small area with your putty knife. If the finish scrapes off easily in a sludge, you’re ready. Always scrape with the wood grain to minimize scratches in the underlying wood. Use a gentle, steady pressure.
- For carvings, turnings, or crevices, use a brass brush or a folded piece of Scotch-Brite. Brass is soft and won’t damage the wood like steel can.
- Neutralizing is critical. Residual stripper left in the wood pores can interfere with your new finish. Follow the manufacturer’s instructions exactly. Often, you’ll wipe the surface down with denatured alcohol or water and a rag. Change rags frequently.
After neutralizing, let the wood dry completely for at least 24 hours in a warm, dry space. You will almost always need to do a final sanding with 120 or 150-grit paper to remove any last residue and prepare a perfect surface for refinishing.
How to Sand Polyurethane Off Wood: Avoiding Gummed-Up Paper
Sand polyurethane wrong, and you will fight a sticky, clogged mess. The problem is heat. Friction from sanding softens the finish, turning it into a glue that gums up your paper.
I use a random orbit sander for flat areas. Its dual motion spreads heat out and minimizes swirl marks. For edges, curves, and details, switch to a hand scraper or sanding block. A power sander here will round over your crisp lines before you notice.
Keep the sander moving steadily. Let the abrasive grit cut, do not press down and generate excess heat.
Choose sandpaper from suppliers who disclose their material sources. Supporting companies committed to sustainable forestry makes your shop work more ethical.
The Sanding Grit Sequence That Works
You need a progression. Start with 80 or 100-grit paper to cut through the finish film. Use a light touch. Your goal is to remove the polyurethane, not dig trenches in the wood.
Once the glossy layer is gone, move to 120 grit. Then go to 150, and finish with 180 grit. Each step erases the scratches from the previous one.
You will know you have hit bare wood when the dust changes color. Polyurethane dust is often a consistent, light powder. Wood dust shows the natural color and grain particles, especially when you sand stained wood before applying polyurethane.
For delicate items like a guitar, you must hand-sand. Never use a power sander. The vibration and heat can damage thin tonewoods and alter the instrument’s sound.
The grit progression is non-negotiable. Skipping from 80 to 180 grit leaves deep scratches that will haunt your new finish.
Stubborn Problems and How to Fix Them
Every woodworker hits these walls. Here is how to solve common, frustrating issues.
Dealing with Multiple Thick Coats
Old tables and doors often have decades of finish. A liquid stripper will not cut it. You need a heavy-bodied paste stripper.
Apply a thick layer and cover it with plastic wrap. Leave it for 30 to 60 minutes. The plastic traps the solvents, forcing them to penetrate deeper into the finish layers.
After the finish bubbles up, use a carbide scraper to peel off the sludge. This removes bulk material before you even touch sandpaper.
A carbide scraper is my go-to for thick finishes. It stays sharp far longer than steel and will not rust.
Stripping Polyurethane from Veneer Without Burning Through
Veneer is a thin layer of wood, often less than 1/32 inch thick. Sanding or scraping is a huge risk. I strongly recommend chemical methods only, especially when repairing damaged wood veneer.
Use a milder, gel-type stripper. Apply it, let it work, and wipe it away gently with a coarse cloth. Do not use any abrasive tools. If you must aid removal, a plastic putty knife is the safest choice.
Treat veneer with extreme caution. Sanding through it exposes the core material, and the repair is rarely invisible.
When working with veneer, remember it allows beautiful wood to be used efficiently. This aligns with sustainable sourcing by maximizing yield from harvested lumber.
What to Do When Sandpaper Gets Gummy Immediately
If your paper loads up on the first pass, you are using the wrong type. Standard wood sandpaper is designed for bare wood, not soft finish.
Switch to stearated sandpaper. It has a dry lubricant (stearate) coating that reduces heat and clogging. Look for paper labeled for “finish removal” or “no-fill.”
Clean the paper often. A rubber sanding block cleaner works like an eraser. Rub it over the clogged paper to pull out the gummy residue.
Stearated paper is a game-changer. It lasts three times longer on polyurethane than standard paper in my shop tests.
Getting the Wood Ready for Its New Finish
Stripping off the old finish is only half the battle. The real secret to a professional result lies in what you do next. Bare wood isn’t automatically ready wood. Any residue or poor surface prep will telegraph straight through your beautiful new coat of polyurethane or varnish.
Think of it like painting a wall. You wouldn’t slap paint over old, flaking paint and globs of glue. You’d scrape, sand, and clean first. The same principle applies here, but it’s even more critical because wood moves and finishes are thin.
Final Cleaning and Dewaxing
After scraping off the sludge, your wood looks clean. It usually isn’t. Most chemical strippers leave behind a microscopic residue. Many also contain waxes that help keep the stripper wet, and these waxes will ruin your next finish.
You must dewax the surface. I keep a stack of clean, white shop towels and a labeled can for this job.
- Dampen a towel with mineral spirits (paint thinner).
- Wipe down the entire surface, following the wood grain.
- Use a fresh section of the towel frequently. You’ll see grime and dissolved wax on the rag.
- Repeat with a fresh, solvent-dampened towel until a wipe comes away clean.
For stubborn cases or old wax finishes, a dedicated “dewaxing” solvent like naphtha is more aggressive and evaporates faster, leaving less of its own film. The goal is a truly inert surface.
This step prevents “fish eyes”-those ugly little craters in your new finish. Fish eyes happen because silicone or wax contamination causes the fresh finish to have a much higher surface tension in that spot, so it pulls away. A proper solvent wipe eliminates that contamination.
Making the Surface Perfect for Refinishing
Now you have a chemically clean surface. Next, you need a mechanically perfect one. All stripping methods, especially scraping or coarse sanding, leave microscopic scratches.
Start with a final sanding. Use a sanding block or random orbital sander with 180-grit paper, then move to 220-grit. Your goal is not to remove material, but to create a uniform, scratch-free surface for the finish to bond to. Always sand with the grain on this final pass to avoid cross-grain scratches that will show up later.
Here’s a shop trick many skip: grain raising. When you used water-based stripper or even just a damp solvent wipe, you introduced moisture. This causes the tiny wood fibers (the “grain”) to swell and stand up.
- Lightly dampen the entire surface with a water-misted rag. Don’t soak it.
- Let it dry completely, usually 30-60 minutes.
- Those swollen fibers will have hardened into tiny “whiskers.” Lightly hand-sand the entire piece with your 220-grit paper. You’ll feel it smooth out.
This step ensures your first coat of finish lays down smoothly instead of sealing in a rough surface.
The final, non-negotiable step is a meticulous dust removal. Blow off the piece with compressed air. Then, go over every square inch with a tack cloth-a cheesecloth impregnated with a light, sticky varnish that grabs dust. Your hand should glide smoothly without picking up grit. Any dust left now will be permanently encapsulated in your finish.
Polyurethane Finish Removal: Targeted Questions
Can I use acetone or paint thinner to strip polyurethane?
No. Fully cured polyurethane is a cross-linked polymer, making it impervious to common solvents like acetone. Dedicated strippers use stronger, penetrating chemicals designed to swell and break these bonds.
Is removing a water-based polyurethane finish different?
Yes, but the core challenge remains. Water-based polyurethanes are often softer and less chemically resistant, so they may respond to less aggressive strippers or sand more easily, but their plastic polymer nature still requires a methodical approach.
What’s the safest way to strip polyurethane from a valuable guitar?
Prioritize a gentle, tested chemical method over sanding to protect thin tonewoods and preserve acoustic properties. Always hand-sand any residual finish with fine grits, as power sanding can alter the wood’s thickness and sound.
How do I clean intricate carvings without damaging the wood?
After applying chemical stripper, use soft brass brushes and folded abrasive pads to lift the softened finish from details. Brass is softer than wood, minimizing scratches while effectively clearing crevices. This method is especially useful when you want to strip finishes, stains, or paints from furniture.
How can I be sure all stripper residue is gone before refinishing?
After the recommended neutralization, perform a final solvent wipe with denatured alcohol or naphtha. If the wood remains sticky or the rag shows residue, repeat the cleaning until the surface is inert. This ensures the wood is properly cleaned before staining.
Final Thoughts on Stripping Polyurethane Safely
The most critical step is to always test your removal method on a small, hidden area first. I rely on this test to reveal the wood’s response and the finish’s tenacity before committing to the entire piece. Choose chemical strippers for intricate details and sanding for flat, accessible surfaces, but never skip personal protective equipment. This cautious, methodical process protects the wood’s integrity and ensures a solid foundation for whatever finish you apply next.
Responsible ownership includes using citrus-based or low-VOC strippers and disposing of chemical waste at designated facilities to minimize environmental impact. Commit to continuous learning about wood science and sustainable sourcing; it makes you a better craftsman and steward of the material.
Citations and Authoritative Sources
- removing polyurethane from wood | Woodworking Talk
- r/woodworking on Reddit: Any efficient way to remove polyurethane?
- How to Remove Polyurethane: Step-by-Step Guide | Elephant Floors
David Ernst
David is a veteran woodworker. He is now retired and stays in his cabin in Wisconsin which he built himself. David has 25+ years experience working in carpentry and wood shops. He has designed and built many small and large wood projects and knows the science behind wood selection like the back of his hand. He is an expert guide on any questions regarding wood material selection, wood restoration, wood working basics and other types of wood. While his expertise is in woodworking, his knowledge and first hand experience is far from 'woody'.