
How Do You Dry Wood Correctly? The Science of Methods and DIY Kilns
You brought home a perfect board, only to watch it twist and split as it dries. That failure is entirely about moisture, and controlling it is your first step toward professional woodworking.
Let’s look at the process from a materials perspective. We will cover how wood cells release moisture, the practical advantages and limitations of air drying versus kiln drying, and a complete, tested design for building an efficient electric kiln in your shop.
I base this guide on my own experiments milling and drying dozens of species, constantly comparing moisture meter readings with the actual stability of the wood in finished projects.
Why Dry Wood at All? (Spoiler: It’s Not Just About Water)
Freshly cut wood is a disaster waiting to happen in your shop. It’s not just heavy. It’s actively changing shape. That beautiful board will warp, twist, and split as it loses moisture, ruining your project.
The core issue is wood movement. A wet board glued to a dry one will pull itself apart. A panel made from wet stock will develop giant cracks as it shrinks. Proper drying isn’t about making wood lighter; it’s about making it stable and predictable for the life of your project.
Wood constantly seeks balance with the air around it. This balance point is called Equilibrium Moisture Content, or EMC. If your shop’s air is humid, the wood absorbs moisture. If the air is dry, the wood releases it. Your goal is to dry wood to the EMC it will experience in its final home.
For indoor furniture in a climate-controlled house, that’s typically 6% to 8% moisture content. Construction lumber for framing, which will be enclosed in a wall, is often dried to around 15-19%. Using soaking wet framing lumber for a table leg is a sure path to failure.
Think of it like this: you’re not just removing water, you’re pre-shrinking the wood. You are forcing it to do most of its moving before you make the first cut.
The Science of Shrinking: How Wood Actually Dries
To dry wood without destroying it, you need to know what’s happening inside. Picture wood as a tight bundle of microscopic straws. These are the wood cells.
Water lives in two places inside these “straws.” First, there’s free water. This is the liquid sloshing around in the empty cell cavities. It’s the first to leave. Wood doesn’t start to shrink until the free water is gone and it starts losing bound water from the cell walls themselves.
Bound water is part of the wood’s structure. As it leaves, the cell walls literally get thinner. This causes the entire piece of wood to shrink. It shrinks very little along its length, but significantly across its width and thickness. That’s why a wide tabletop is more prone to movement than a long table leg.
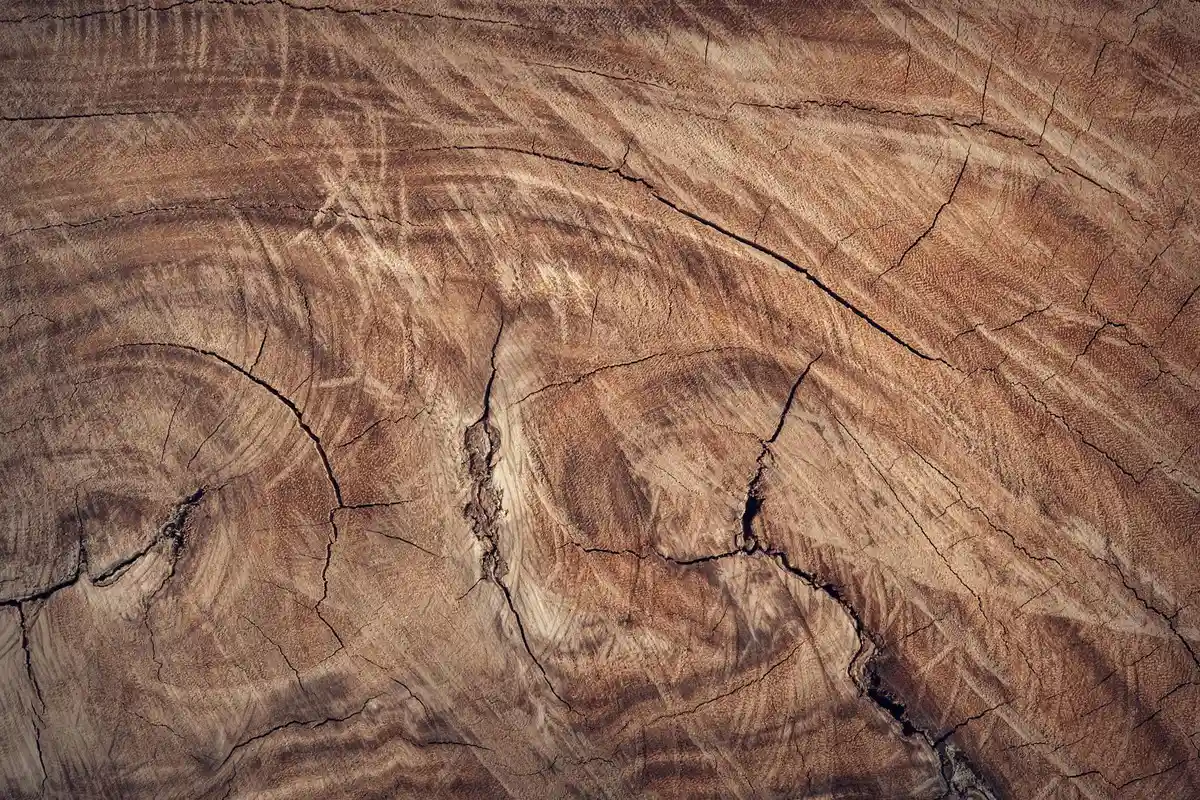
The main enemy is a moisture gradient. This is when the outside of the board is much drier than the inside. The outer shell wants to shrink, but the wet core holds it in place. This creates enormous stress.
Imagine trying to squeeze a wet sponge only on its surface. The dry, tight skin on the outside will crack and split because the wet inside won’t compress at the same rate. That’s exactly what causes surface checks and end cracks in lumber. Good drying is about managing this gradient to relieve stress evenly.
Can You Dry Wood in an Oven? (The Quick Test & Its Limits)
Yes, you can. But only for very small, solid pieces like a bowl blank for your lathe. For anything larger, like a board for a tabletop, the answer is a firm no.
If you need to dry a 4-inch turning blank, here is a safe method. Set your oven to its lowest possible temperature, ideally under 200°F (93°C). Place the wood on a metal pan or rack to catch any sap or moisture. Check it every 30 minutes with a pin-type moisture meter. Your goal is to slowly drive the moisture out, not to bake the wood like a potato. Stop when the meter reads near your target, usually between 6-8% for indoor furniture.
The risks are real and severe. First is fire. Ovens have heating elements that can ignite wood or its flammable vapors. Second is case-hardening. This happens when the wood’s surface dries and shrinks much faster than its core, trapping moisture inside and locking in enormous stress. The wood looks dry but will warp or crack violently later. I’ve seen case-hardened blanks literally explode on the lathe. Third, you will ruin your kitchen oven. Wood resins and moisture create a sticky, foul-smelling film that is nearly impossible to clean completely.
This method is not viable for lumber. A board has vastly more internal moisture to remove. An oven cannot provide the controlled, gradual drying that prevents defects. You will end up with a warped, cracked, and potentially dangerous piece of wood, wasting your time and material. For boards, you need a proper kiln or patient air-drying.
Method 1: Air Drying – Letting Nature Do the Work
Air drying is the original method. You are using the atmosphere as your dehumidifier. The goal is to stack wood so air can move past every board, pulling moisture out slowly and evenly.
The Basic Setup: Stack, Sticker, and Cover
Your stack needs three things: a foundation, spacing, and protection.
- A Level, Stable Base: Use concrete blocks or pressure-treated timbers. Get it perfectly level. A twisted base makes a twisted stack.
- Stickers for Spacing: These are 1-inch by 1-inch dry wood strips placed between every layer of boards. They must be aligned vertically. I space my stickers 16 to 24 inches apart. This creates air channels across the width of each board.
- A Covered, Breezy Location: Build your stack in a spot with consistent wind flow, like an open-sided shed or under a roof with wide overhangs. The cover must shield the stack from rain and direct sun, but the sides must stay open for air movement. A solid shed traps stagnant, humid air.
Forget this rule and you will get mold, stains, or severe warping as the boards dry unevenly.
The Rule of Thumb and The Reality
The old saying is one year of air drying per inch of board thickness. For a 2-inch slab, that’s two years. This is a starting point, not a guarantee. In my dry Colorado shop, 4/4 (1-inch) oak hits 15% moisture content in about 9 months. In a humid coastal climate, it could take 18.
The rule tracks because water moves through wood cells slowly; the distance from the core to the surface dictates the time. You are waiting for capillary action and vapor diffusion to do their job. You cannot rush this physics.
Ideal Species vs. Difficult Cases
Some woods air dry better than others. It comes down to density and heartwood content.
- Oak and Walnut are Champions. Their open pore structure and high proportion of stable heartwood allow for steady, predictable moisture release. They are less prone to surface checking during the process.
- Thick Maple is a Challenge. Maple is dense and has a high shrinkage rate. Thick pieces want to dry fast on the outside while the core stays wet. This mismatch creates tremendous internal stress, often leading to deep end checks or “honeycomb” interior cracks. I rarely air-dry maple over 8/4 (2 inches) thick for this reason.
Weighing the Pros and Cons
Air drying has one massive advantage: it is essentially free after the initial labor. You need no electricity, no complex equipment, just space and patience. It is the ultimate low-tech solution, unlike using ventilated workshops that often consume electricity.
The major drawback is you are at the mercy of the weather. A rainy summer can stall drying and promote fungal growth. High humidity prevents the wood from reaching the 8-12% moisture content needed for indoor furniture. Most air-dried lumber stabilizes at your local outdoor equilibrium moisture content, which is often 12-15%. You will likely need a final stint in a kiln or a conditioned space for interior projects, especially when working with wood in high humidity environments.
I keep a moisture meter in my shop apron. When I think a board is ready, I test it in several spots, especially the center of a thick piece. The meter tells me what the calendar cannot.
Method 2: Kiln Drying – Speed and Control
A traditional commercial kiln is essentially a very large, tightly sealed oven. It’s an insulated box with a heat source, fans to circulate air, and vents to control humidity. This setup gives us complete command over the drying environment.
We don’t just crank the heat to maximum. A proper kiln schedule is a carefully orchestrated recipe of temperature and humidity that changes over time. We start with a low temperature and high humidity. This gentle start lets internal moisture escape as steam without creating too much pressure, which prevents the violent cracking known as “case-hardening.” Think of it like bringing a pot to a slow boil instead of a raging one.
Once the wood’s core moisture begins to drop, we gradually increase the temperature and lower the humidity. The final high-heat phase serves a critical purpose beyond drying: it pasteurizes the wood. Sustained heat above 133°F (56°C) for long enough will kill insect larvae and mold spores, giving you a sterile, stable material. On projects that must endure heat and extreme conditions, high-temperature adhesives play a crucial role. They keep bonds strong where standard glues degrade.
So, how long to kiln dry wood? For 4/4 lumber (about 1 inch thick), it typically takes days to a few weeks. A fast-drying softwood like pine might be done in 48 hours. A dense, thick oak plank could take three weeks. Compare that to the multi-year timeline for air-drying the same oak, and the appeal is clear.
The greatest advantage of kiln drying is precision. We can stop the process at a specific target moisture content, say 6.5% for furniture destined for a heated home. This level of control is impossible with air-drying and is why kiln-dried wood is the predictable, reliable choice for fine woodworking. The trade-off is the high energy cost and infrastructure required. Running a large kiln is a major operational expense, which is reflected in the price of the lumber. My advice is to buy kiln-dried from reputable sources and focus your own energy on building, not on operating a power-hungry kiln.
Method 3: The DIY Hybrids: Solar and Dehumidification Kilns
If you’re past air-drying but not ready for a six-figure commercial kiln, you’ve found the sweet spot. Solar and dehumidification kilns are where practical science meets the home shop. I’ve built and used both. They give you far more control than air-drying, and the build process is a fantastic woodworking project in itself. When you’re working with pressure-treated wood, proper drying before staining is key, and these methods help you reach the right moisture level. That makes stain and sealers apply more evenly and last longer on outdoor projects.
The Solar Kiln: A Purpose-Built Greenhouse
Think of a solar kiln as a greenhouse designed for lumber, not tomatoes. The core principle is simple: sunlight passes through a clear roof (usually polycarbonate or glass) and heats the air inside a tightly sealed, insulated chamber. I line the interior walls and floor with black material to absorb maximum heat.
Hot air holds more moisture. As the internal temperature rises-easily reaching 120-140°F (49-60°C) on a sunny day-water inside the wood cells turns to vapor and enters the air. You then vent this moist, warm air out with fans, replacing it with drier outside air to keep the drying process moving. It’s a continuous cycle of solar heating and active venting.
Here are the key components for a functional build:
- A strong, level frame (treated lumber or metal).
- Rigid foam insulation for walls and floor.
- A clear, durable roof panel.
- Interior black coating (flat black paint works).
- A thermostat-controlled exhaust fan and intake vents.
- A sturdy, well-stickered wood stack inside.
The main challenge is consistency. On a cloudy week, drying nearly stops. You must monitor humidity closely to avoid over-drying surface fibers, which causes case-hardening. I use simple wireless sensor tags to track temperature and humidity from my workshop.
The Dehumidification Kiln: A Sealed, Precision Box
A dehumidification (DH) kiln works on a different principle. You build an airtight, insulated room-often from a prefab shed or framed space in a garage. Inside, a specially designed refrigeration unit, called a dehumidification heat pump, acts like a sophisticated air conditioner.
Here’s the science: a fan pulls the warm, moist air from the chamber across cold evaporator coils. Water vapor condenses on these coils and drains away. The now-dry air is reheated by the unit’s condenser and sent back into the room, creating a steady, energy-efficient drying cycle without venting. You are literally recycling heat while removing water.
Building one requires meticulous sealing:
- An airtight envelope (metal shed or plywood with sealed seams).
- Heavy insulation (at least R-12 for walls, more for ceiling).
- A dedicated DH kiln unit (not a home basement dehumidifier).
- Circulation fans to move air around the wood stack.
- A condensate drain line.
It runs slower than a solar kiln in peak summer, but it runs 24/7 in any weather. The environment is incredibly steady, which dramatically reduces stress and defects in the wood. My first DH kiln was built in a corner of my garage and paid for itself in two batches of walnut.
Side-by-Side: Choosing Your Hybrid Fighter
Choosing between these methods comes down to your climate, budget, and patience. Let’s compare them directly.
A solar kiln is cheaper to operate-sunlight is free. It can dry wood faster in summer, sometimes reducing 1-inch oak from 30% to 8% moisture in 30-40 sunny days. But it’s a seasonal tool, essentially dormant in winter or long rainy periods, which stretches your total project timeline.
A dehumidification kiln uses electricity, so it has a running cost. It’s generally slower, taking perhaps 60-90 days for the same oak. The trade-off is unparalleled control. You get a slow, steady, year-round process that is gentle on the wood and produces exceptionally stable lumber with minimal waste.
Think of it this way: solar is a sprinter, dehumidification is a marathon runner. One is bursty and powerful when conditions are right; the other is relentless and even-paced.
The Sweet Spot for Makers and Small Sawyers
These hybrid kilns are not for casual hobbyists drying a few boards. They are for the serious woodworker, small furniture shop, or homestead sawyer processing their own trees. The upfront build effort is significant, but the payoff is transformative.
You move from hoping the weather cooperates to commanding the process. You can dry tricky species like thick oak or maple with confidence. You turn green lumber into a ready-to-use, shop-quality asset in months, not years. For anyone regularly using hundreds of board feet, building a hybrid kiln is the single most empowering project you can undertake for material independence.
My advice? If you live in a sunny climate and have a good outdoor space, start with a solar design. If your shop is in a humid basement or you need year-round, predictable output, invest in a dehumidification system. Both paths lead you to better wood and a deeper understanding of the material you work with.
How to Choose Your Drying Method: A Shop Logic Guide
Forget complex theories. In the shop, your choice comes down to four things: volume, time, budget, and your wood’s personality. I think of it like this.
Ask Yourself These Four Questions
Your project’s success starts with a simple series of questions that match your reality to the right method.
- How much wood do you have? One beautiful slab or a dozen rough boards?
- How soon do you need it? Is this for a commission next month or a personal project next year?
- What’s your budget for drying? This includes both money and shop space.
- What species are you drying? A stable oak or a temperamental maple?
Your answers create a clear path. One slab of walnut for a live-edge table? Air dry it. You have the space and time. A truckload of 4/4 cherry for a cabinet run? Building a solar kiln makes economic sense. A few pieces of figured maple for guitar backs that must be stable now? A dehumidification kiln is your best bet.
Define Your Goal: Final Moisture Content (FMC)
Drying isn’t just about removing water. It’s about reaching equilibrium. Wood constantly exchanges moisture with the air around it. Your goal is to dry the wood until its moisture level matches the average humidity of its final indoor home. This is the Final Moisture Content.
Wood moves. It shrinks as it dries and swells when it absorbs moisture. If you build a cabinet at 12% moisture content (MC) and bring it into a heated house at 6% MC, it will shrink. Joints can open. Panels can crack. You need to dry to the right number.
For most indoor furniture in a climate-controlled home, aim for 6-8% MC. For a piece going into a sunroom or a drier climate, you might target 5-6%. This isn’t a guess. It’s a target based on physics.
Stop Guessing, Start Measuring
You cannot judge moisture content by look, feel, or weight. I’ve seen veteran woodworkers get this wrong. A $50 pin-type moisture meter is the most important tool for this job. It turns an art into a science. To ensure consistent results, measure wood moisture content with the meter. This practice makes the difference in board quality.
Use it when you buy wood to check if it’s already air-dry. Use it to monitor your air-drying stack every few months. Use it to confirm your kiln has done its job. Data from a moisture meter is the only way to know your wood is truly ready for milling and joinery.
Here’s my rule: never mill a board for a project until your meter reads within 1% of your target FMC at the board’s core. Test in the center of the end grain, not just the surface. The surface always dries first.
A Simple Shop Flowchart
Let’s put it all together.
- Low Volume (1-5 boards), Flexible Time (>1 year), Tight Budget: Air Dry. Use stickers, weight the stack, and wait. Check with a meter.
- High Volume, Moderate Time (3-6 months), Moderate Budget/Space: Build a Solar Kiln. It uses free energy to accelerate air drying predictably.
- Any Volume, Short Time (2-4 weeks), Higher Budget: Use/rent a Dehumidification or Conventional Kiln. This is for professional timelines or fussy species.
The wildcard is species. Dense woods like white oak dry slowly and are prone to checking. I always dry them slower, with closer sticker spacing. Lightweight woods like poplar dry fast and are forgiving. Adjust your method’s aggression to match the wood. When in doubt, dry slower. You can’t put moisture back in a split board.
How to Build a Simple Solar Kiln: A Frame-by-Frame Plan
Think of this as building a super-insulated, single-slope shed that acts as a solar oven. The goal is to trap heat and create a natural airflow to pull moisture out. I’ve built two of these, and the design is forgiving. You can make it from mostly reclaimed materials.
Lab/Shop Requirements: The Materials List
You don’t need specialty items. This is a scavenger hunt project.
- For the Structure: Pressure-treated 4x4s for the base skids. Standard 2x4s for the wall and roof framing. Exterior-grade plywood or OSB for the back wall and ends.
- For Insulation: Foil-faced polyisocyanurate foam board, at least 1.5 inches thick. The foil face is critical-it reflects radiant heat back inside.
- For the “Window”: A used sliding glass door, old storm windows, or twin-wall polycarbonate panels. This is your south-facing roof.
- For Heat Absorption: Cheap black asphalt roofing rolls or several gallons of flat black paint.
- For Ventilation: Two adjustable louvered vents (one for the top, one for the bottom). Aluminum window screen to keep bugs out.
Your tool list is basic: a circular saw, a drill/driver, a staple gun, a utility knife, and a caulk gun. If you can build a simple workbench, you can build this.
Step-by-Step Assembly: The Big Four Components
Work on a level patch of ground with full southern sun exposure.
Step 1: Build a Sturdy, Level Base and Back Wall Frame
Construct a rectangular frame from the 4x4s. This sits directly on the ground. On top of this, build your main box frame from 2x4s, with the back wall about 8 feet tall and the front wall about 6 feet tall. This creates the slope. Anchor it all securely to the 4×4 base. A wobbly frame leads to cracked glazing.
Step 2: Insulate Everything-Floor, Walls, Ceiling
Sheathe the outside of the frame (except the sloped roof opening) with your plywood. Now, line the entire interior-floor, walls, and ceiling-with the foil-faced foam board. Cut it tight and seal all seams with foil tape. This insulation layer is what turns a hot shed into an efficient kiln by holding the heat where you need it.
Step 3: Install the Glazing on the Sloped South-Facing Roof
Build a simple frame to hold your glass or polycarbonate. Securely fasten it to the top of your box. Caulk every joint to make it weathertight. The angle isn’t hyper-critical; the slope you already built is fine. I used an old patio door I got for free.
Step 4: Install Vents and Paint the Interior Black
Cut a hole for a vent near the peak of the back wall (the high point) and one near the base of the front wall (the low point). Install the louvers and cover the inside with screen. Finally, paint the floor and the back wall with flat black paint. This absorbs solar energy and heats the air.
Loading and Running Your First Batch
How you stack the wood is as important as the kiln itself.
Use dry, 1×1 stickers placed every 16 to 24 inches along each board. Align the stickers perfectly vertically from layer to layer. Leave at least 4 inches of space on all sides between the lumber stack and the kiln walls. Perfectly aligned stickers are non-negotiable; they are the columns that keep your stack from sagging and warping.
The science is simple. Sun heats the black interior. Hot, moist air from the wood rises and exits the top vent. This draws drier, cooler air in through the bottom vent. The cycle runs all day.
Be patient. Expect to dry 1-inch thick oak from green to 8% moisture content in 2 to 3 sunny summer months. Maple might be faster, walnut a touch slower. You only know by measuring. Check several boards in the middle of the stack with a moisture meter every week. It’s done when the readings are stable and match your local equilibrium moisture content, especially when considering oak vs maple for furniture or flooring.
Troubleshooting Dry Wood: Cracks, Warps, and Sticky Meters
Problems tell a story. Your job is to listen.
End cracks (splits radiating from the board ends) mean the ends dried too fast. Seal the end grain of your next batch with anchor seal or old paint immediately after cutting. Internal honeycomb checks (hidden cracks inside the board) are more serious. They point to a kiln schedule that was too aggressive-the outside shell set too fast and trapped moisture inside. In a solar kiln, this usually means you had too much heat and not enough airflow. Open the vents more.
Warping-cup, bow, or twist-is often a stacking error. Uneven sticker placement or an unlevel base puts unequal pressure on the boards as they shrink. Always stack wood on a perfectly level base and place heavy weights on top of the pile.
If your moisture meter gives jumpy readings, don’t blame the wood first. Check the meter’s calibration. Then, remember the surface of wood in a kiln can get case-hardened. Take a reading, then plane or sand a fresh spot in that same area and test again. Hysteresis in wood moisture means the reading can depend on the wood’s moisture history—whether it has been drying or absorbing moisture. The true moisture content is in the freshly exposed wood, not on the dried surface.
The core principle is the same as drying herbs or making jerky. You remove moisture to stop the biological activity (fungus, decay) and to make the material stable for use. With wood, we’re just doing it on a massive, slower scale to preserve a beautiful, structural material.
Troubleshooting Dry Wood: Cracks, Warps, and Sticky Meters
Even with the best plans, drying wood can go wrong. The good news is, the failures tell a clear story. Learning to read them turns problems into lessons.
Reading the Cracks: End Checks vs. Honeycomb
Not all cracks are created equal. Where they appear tells you exactly what went wrong in the drying process.
End cracks, or checks, that split open from the board’s end are a sign of drying too fast. Think of water leaving a sponge. The ends dry first, shrink, and pull apart because the wet interior is holding its size. You can prevent end checks by sealing the end grain with a commercial sealant, old paint, or even heavy glue, which slows moisture escape from the most vulnerable area.
Internal cracks, often called honeycomb or case-hardening checks, are more serious. These happen inside the wood and might not be visible until you mill the board. They’re a classic sign of an overly aggressive kiln schedule, especially in the early stages. The outer shell dries and hardens too quickly, trapping moisture inside. Later, that inner moisture finally escapes, causing the shell to collapse inward and crack. If you find honeycomb, the kiln’s temperature was raised or the humidity lowered too quickly, not giving the interior moisture time to migrate to the surface.
The Straight Truth on Stopping Warp
Warping-cupping, twisting, bowing-is wood’s natural desire to move as it dries. Your job is to restrain it evenly. Proper stacking is your most powerful tool.
- Stickers must be aligned perfectly vertical, directly above one another from the bottom of the pile to the top. A staggered sticker is a bent board waiting to happen.
- Use dry, stable wood for stickers, like pine or spruce. They should all be the same thickness, typically 3/4″, to ensure even air flow.
- Place stickers no more than 18 inches apart for heavy hardwoods, and closer (12 inches) for woods prone to warp like maple or oak.
Weight is your helper. A concrete block or other heavy weight on top of the stack applies even pressure, discouraging boards from cupping upwards. For a critical project, I’ll often place a heavy, flat panel (like MDF) on top of the stack before adding weight, which distributes the pressure perfectly across every board.
When Your Moisture Meter Lies (Or Seems To)
You get a 6% reading on the surface, but the board feels cool and heavy. Trust your instincts. Meters are tools, not oracles. Inconsistency usually points to one of three issues.
- Check calibration first. Use the manufacturer’s calibration block. If you don’t have one, test on a known, bone-dry piece of wood inside your climate-controlled shop.
- Surface readings are often misleading. The outer 1/4″ of a board can be much drier than the core, a condition called a moisture gradient. For a true reading, you must test freshly exposed wood. Split a small piece off the end, or drive the meter’s pins into a freshly planed or sawn surface on the board’s edge.
- Pin-type meters need clean, sharp pins driven deep into the wood. Blunt pins or surface debris cause false lows. Pinless meters must be held flat and firm against a smooth surface; air gaps ruin the reading.
A board at equilibrium will give you the same reading on a fresh face as it does on the surface. If the numbers differ by more than 1-2%, the wood is still equalizing and isn’t ready for fine joinery.
Wood Drying and Your Kitchen: The Same Science
The core principle here is universal. We dry wood for the same reason we make jerky or dried fruit: to remove the water that microorganisms need to live. In wood, that’s fungi and rot. In food, it’s bacteria and mold.
Both processes require controlled air flow and managed humidity. Blast meat with too much hot, dry air and it case-hardens-a tough, leathery shell forms, trapping moisture inside that will later spoil. Sound familiar? It’s the same as honeycomb checking in oak. The goal is always a slow, steady removal of moisture that achieves uniform dryness from the center to the surface, whether you’re preserving cherry wood for a table or cherries for a pie.
Frequently Asked Questions: Wood Drying Science and Methods
How does wood drying differ fundamentally from food drying for preservation?
Wood drying aims to achieve dimensional stability and relieve internal stresses to prevent warping and cracking, while food drying primarily inhibits microbial growth by removing water. Both processes rely on controlled humidity and airflow, but wood’s anisotropic shrinkage requires slower, more regulated moisture removal to manage cellular stress.
Are there industry-standard names for specific wood drying schedules?
Yes, organizations like the USDA Forest Products Laboratory and ASTM International publish standardized kiln schedules, often categorized by species and thickness (e.g., T3-D2 for hardwoods). These schedules provide precise temperature and humidity steps to minimize defects and ensure consistent, repeatable results in professional settings.
Why is wood cell anatomy critical when selecting a drying method?
Wood’s cellular structure, such as pore size and cell wall thickness, dictates moisture migration rates; dense, thick-walled species like maple require gentler, slower drying to avoid honeycomb checks. Understanding this anatomy allows you to tailor drying aggression, prioritizing methods like dehumidification kilns for sensitive hardwoods over faster air-drying for open-pore woods.
Can household food dehydrators be used to dry small wood pieces?
No, typical food dehydrators lack the necessary capacity and precise environmental control for wood, often causing case-hardening and cracks due to uneven, rapid drying. For small items like turning blanks, a modified oven with low, steady heat and moisture monitoring is a more reliable bench-scale solution.
Where can I find scientifically validated wood drying method guides in PDF format?
Authoritative PDF guides are available from sources like the USDA Forest Products Laboratory’s “Dry Kiln Operator’s Manual” and university extension services, which offer evidence-based schedules for various species. These resources provide actionable, science-backed protocols for both commercial kilns and DIY applications, ensuring material durability.
Choosing Your Drying Path
The most critical rule in drying wood is controlling moisture loss. You must measure moisture content with a reliable meter; guessing leads to failure. Testing with a small sample board is the only true way to validate your kiln’s performance before risking valuable lumber. Mastering this patience and process is what separates usable stock from firewood.
Every board you dry carries an environmental legacy, so source your material from responsibly managed forests. Your growth as a woodworker is tied to understanding the material science behind the grain, from felling to final finish.
Citations and Authoritative Sources
- Wood drying – Wikipedia
- Fundamental Aspects of Kiln Drying Lumber | Oklahoma State University
- 10 Wood Drying Methods : What’s the Best Method?
- Drying Wood at Home | The Wood Database
- Wood drying 1 Wood drying
- How to Dry Wood at Home – Pro Techniques for DIY Projects
- Drying Wood Methods – Woodworking Stack Exchange
- Considerations in Drying Hardwood Lumber | MU Extension
David is a veteran woodworker. He is now retired and stays in his cabin in Wisconsin which he built himself. David has 25+ years experience working in carpentry and wood shops. He has designed and built many small and large wood projects and knows the science behind wood selection like the back of his hand. He is an expert guide on any questions regarding wood material selection, wood restoration, wood working basics and other types of wood. While his expertise is in woodworking, his knowledge and first hand experience is far from 'woody'.