
What Do Different Finishing Oils Actually Do to Wood?
You need a wood finish that enhances the grain and defends against daily wear, but the oil aisle is overwhelming. I test finishes in my shop to find what works, not what’s just popular.
This article gives you a clear, materials-based comparison, covering drying vs. non-drying oils, their chemical behavior on wood, and how to match them to your project for lasting results.
I base these recommendations on my own lab-style tests for durability and penetration, using sustainably sourced wood samples.
How Does Oil Actually Work on Wood?
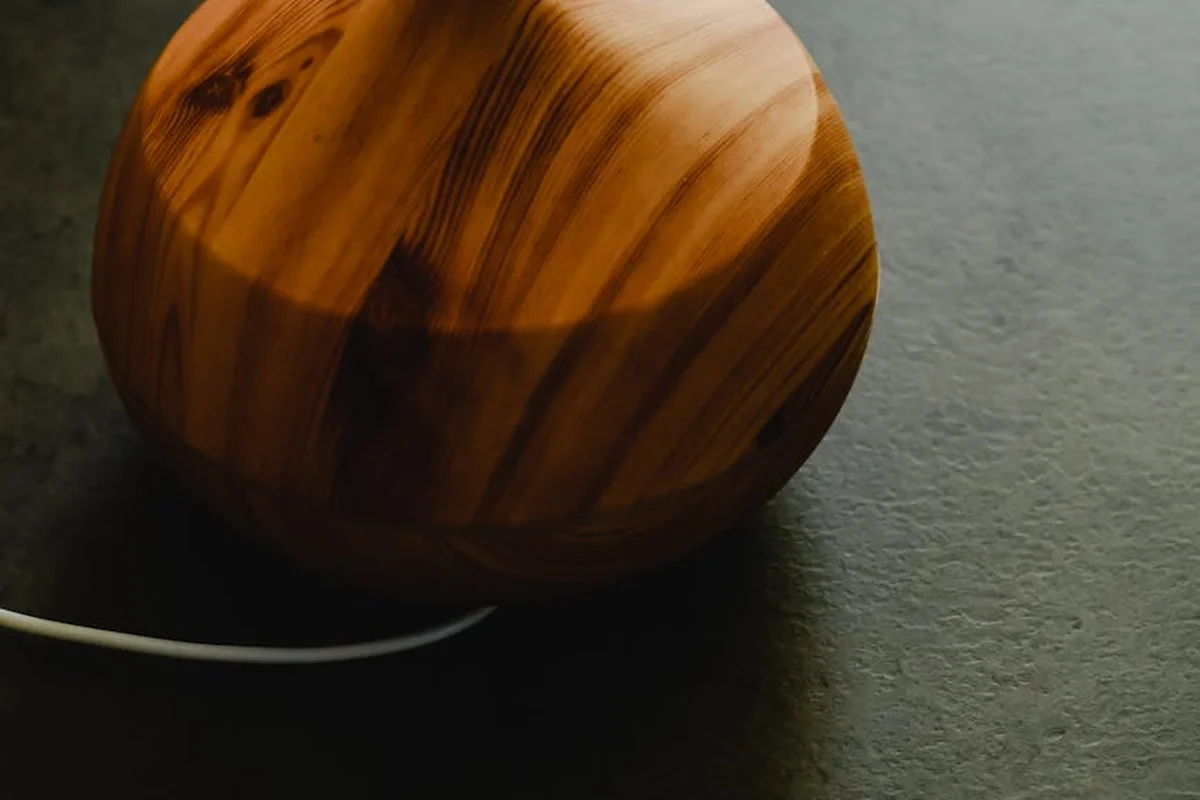
Forget the idea of a plastic-like shell. Oil works from the inside out. It soaks into the wood’s cellular structure, filling the tiny hollow tubes and pores. This penetration is the key difference between an oil finish and a surface coating like varnish or polyurethane.
Think of wood as a bundle of drinking straws. When you apply oil, it wicks into those straws. Some oils then undergo a chemical change, hardening from a liquid to a soft solid right inside the wood. Others simply remain liquid, lubricating the fibers.
Wood is hygroscopic, meaning it constantly absorbs and releases moisture from the air, which causes it to swell and shrink. By occupying space in the wood cells, oil directly reduces the room available for water vapor, which dramatically stabilizes the wood and minimizes movement. It’s like partially filling a sponge with wax; it can’t hold as much water.
The Core Mechanism: Penetration and Protection
Here is the process, step by step. You apply a thin coat. The liquid oil is drawn in by capillary action, traveling deep along the grain. Over hours or days, drying oils begin to polymerize. They cross-link with oxygen in the air, turning into a flexible, solid resin embedded in the wood fibers.
Absorption is not even. End-grain, where the straw-like cells are open, can suck up three to five times more oil than face-grain. You can see this yourself by oiling a simple sanding block; the ends will darken much faster and require more coats to look even. I always budget extra oil and time for end-grain surfaces like table legs.
Drying Oils vs. Non-Drying Oils: The Shop Floor Difference
In woodworking, “drying” doesn’t mean evaporation. It means polymerization. A drying oil transforms from a liquid to a solid film. A non-drying oil stays liquid and greasy.
You need a way to tell them apart. The paper towel test is reliable. Apply the oil to a scrap piece. After 24 hours, press a clean paper towel firmly against it. If oil transfers to the towel, it’s non-drying and will remain soft, needing frequent refreshment. If the towel stays clean, the oil has cured into a solid.
Breaking Down the Major Categories of Wood Finishing Oils
It’s less helpful to list every oil and more useful to group them by how they behave. Your project’s needs should guide your choice.
Traditional Hardening Oils: Linseed and Tung
These are the classic, reactive oils that cure inside the wood. They build a durable, repairable finish from within.
Linseed Oil (Raw and Boiled)
Raw linseed oil, pressed from flax seeds, polymerizes very slowly. It can stay tacky for weeks. “Boiled” linseed oil (BLO) is chemically treated with metallic driers to speed this reaction. In the shop, I use BLO when I need a faster cure, but I accept that it will add a warm, amber tint that deepens over time. Raw linseed gives a paler, slower build.
Critical safety note: Oily rags soaked with linseed oil can spontaneously combust as they cure. I always lay them flat to dry outside or submerge them in water in a metal can.
Tung Oil (Pure and Blends)
Pure tung oil, from the nut of the tung tree, polymerizes to form a tougher, more water-resistant film than linseed oil. It also yellows less. Many products labeled “tung oil” are blends with varnishes or solvents; pure tung is thicker and requires patience, especially when compared to linseed oil.
For a true hand-rubbed finish, I thin pure tung oil 50/50 with mineral spirits for the first coat to ensure deep penetration, then apply full strength for subsequent coats. It takes more coats than BLO, but the result is a clearer, more protective finish.
Food-Safe Non-Drying Oils: For Butcher Blocks and Bowls
The golden rule here is simple: these oils do not create a permanent finish. They are maintenance coatings that must be reapplied regularly to keep the wood conditioned and safe for food contact. They answer the common search for “wood finishing oils that are food safe,” but with a big caveat.
Mineral Oil: The Pharmacy Standard
Mineral oil is a petroleum distillate, not a plant oil. It is inert, odorless, and will not turn rancid. This makes it the baseline safe choice for cutting boards and utensils. Commercial “butcher block conditioner” is usually just mineral oil blended with a bit of beeswax, which adds a slight sheen but doesn’t improve durability. I use pure mineral oil for initial soaking and a beeswax blend for occasional touch-ups.
Walnut, Coconut, and Other Plant Oils
These can be used, but with caution. To address “is wood pressed oil good for health,” I clarify: it is safe for the wood surface, but it is not a dietary supplement. Walnut oil can polymerize slightly, but it poses a serious allergy risk. Many kitchen oils, like olive or coconut, will eventually turn rancid and smell.
What about jojoba oil? Jojoba oil is technically a liquid wax ester, so it is more stable and resistant to rancidity than other plant oils, making it a better, though more expensive, option for wood therapy applications like bowl finishing. It still needs reapplication.
Specialty and Conditioning Oils
This category covers oils often asked about but not typically suited for general wood finishing.
Neatsfoot and “Burnt” Oil
Let’s clear this up. Can neatsfoot oil be used on wood? Technically, yes. Is neatsfoot oil good for wood? No. It is a leather conditioner made from animal fats. It stays permanently greasy and attracts dust, making it a poor choice for wood surfaces.
The query “is burnt oil good for wood” likely confuses terms. “Burnt” might refer to “boiled” linseed oil. Literally burned cooking oil is a contaminant to avoid. It will not polymerize and will likely become sticky and attract pests.
Oil-Based Primers and Penetrants
This is where oil technology meets heavy-duty protection. For exterior wood, like a fence or siding, an oil-based primer is often best. Its smaller molecules penetrate deeper than latex primers, sealing the wood fibers and creating a superior, flexible base for topcoats to resist weathering and moisture.
For repairing rotted wood, products like penetrating epoxy act as a high-tech hybrid. They use a low-viscosity resin that soaks in like an oil, then cures to a rock-hard filler, restoring strength from within.
Wood Finishing Oil Comparison: A Quick-Reference Table
This table is your starting point. It cuts through the marketing hype to show what each oil actually does on a chemical and practical level. I use this framework in my own shop to choose finishes.
| Oil Type | Dries/Hardens? | Food-Safe? | Best For | Key Limitation |
|---|---|---|---|---|
| Tung Oil (Pure) | Yes, polymerizes | Yes, when fully cured | Water-resistant surfaces, boats, countertops | Very slow cure (days per coat); pure form is expensive |
| Boiled Linseed Oil (BLO) | Yes, with metal driers added | No, due to chemical driers | Tool handles, decorative indoor pieces, accentuating grain | Can remain tacky; prone to mildew; linens can spontaneously combust |
| Mineral Oil | No, it never dries | Yes | Cutting boards, butcher blocks, wood utensils | Provides zero surface protection; needs frequent reapplication |
| Walnut Oil (Pure) | Slowly, via oxidation | Yes, but a common allergen | Small decorative items, non-utensil food contact projects | Allergy risk; can turn rancid; very soft finish |
| “Salad Bowl Finish” Blends | Yes, a hybrid film | Yes, once cured | Bowls, plates, cups, any finished foodware | Contains varnish/resin; not a “pure” oil feel; follow cure times strictly |
Breaking Down the Oils: Science and Shop Talk
Tung Oil: The Durable Polymer
Pure tung oil comes from the nut of the tung tree. Its molecules are triply conjugated, which is a fancy way of saying they link together tightly when exposed to oxygen. This process is called polymerization. It creates a flexible, water-resistant finish that hardens within the wood’s pores, not just on top. I use it on outdoor furniture frames and shop jigs that see moisture.
Apply it thin. Flooding the surface creates a gummy mess that can take weeks to harden. Wipe on a coat, wait 30 minutes, then buff off every last drop. Let it cure fully for at least three days before recoating. The wait is worth it.
Boiled Linseed Oil (BLO): The Classic with Caveats
Raw linseed oil dries painfully slow. “Boiled” linseed oil has metallic driers like cobalt or manganese added to speed polymerization. These chemical driers are toxic, which permanently disqualifies BLO for any food contact surface. It warms grain color beautifully and is great for a low-luster look on a wall shelf. For wood projects, the color appearance is a major consideration—linseed oil warms the grain and enhances depth. This wood-color look is often what woodworkers seek when evaluating BLO for finishes.
BLO is famous for causing spontaneous combustion. Oil-soaked rags pile up heat as they oxidize. I either lay rags flat to dry outside or submerge them in a water-filled metal can. Never throw them directly in the trash.
Mineral Oil: The Non-Drying Hydrator
Mineral oil is a petroleum distillate, not a natural curing oil. Its molecules are too saturated to link together. This means it soaks in and lubricates wood fibers but will never form a protective surface layer. That’s exactly what you want for a butcher block. A film finish would get cut up and ingested. But that same limitation—no film, limited protection—highlights mineral oil’s role as a conditioner rather than a true finish. As a result, it requires reapplication and won’t stand up to heavy use like film-forming finishes.
Use it for pure wood maintenance, not protection. Oiling cutting boards is only necessary for maintenance. On a cutting board, heat the oil slightly before applying. Thin viscosity helps it penetrate deeper into the end grain.
Walnut Oil: The Gourmet Choice
Pure, food-grade walnut oil does dry, but slowly and to a very soft film. The bigger issue is nut allergies. You cannot assume your gift or sold item will be used by someone without a tree nut allergy. I reserve it for personal projects or clearly labeled items.
Like any nut oil, it can go rancid. Buy small quantities from a reputable woodworking supplier, not the grocery store. Store it in a cool, dark place.
“Salad Bowl Finish”: The Engineered Hybrid
These are not pure oils. They are blends of a drying oil (often tung) and a food-safe resin or varnish, thinned with a solvent. They are designed to build a slight, durable film that seals the wood for repeated washing. The resin component is what allows it to harden more reliably than pure oil alone.
You must respect the cure time, not just the dry time. A finish can be dry to the touch in hours but need 72 hours to fully cross-link and become inert. Rushing this process on a salad bowl puts solvents in your food.
How to Choose and Apply the Right Oil for Your Project
Choosing a wood finishing oil isn’t about finding the “best” one. It’s about matching the oil’s chemistry to your project’s life. Let’s walk through the decision tree I use in my shop, including when to opt for specialty or alternative oil finishes in woodworking.
Start by asking where the piece will live. For furniture or decorative items that stay indoors, your options are widest. Pure tung oil or a quality polymerized oil offers deep protection and a natural feel. For a faster build, a Danish oil or oil-varnish blend is my go-to for wood finishing oils for woodworking. They provide more film and a bit more abrasion resistance than a pure oil.
Is it a cutting board, butcher block, or salad bowl? This changes everything. You must use a food-contact safe, non-toxic oil that cures hard. Mineral oil does not cure and will stay greasy. I use a pure, food-grade tung oil or a dedicated “board butter” made of beeswax and a curing oil like walnut oil. That means choosing food oils for wood sealing and finishing that cure hard and are safe for contact with food. For kitchen items, the query “wood finishing oils for furniture” can be misleading. This focus on food-safe finishing distinguishes kitchen-grade options from typical furniture finishes. Furniture finishes often contain non-food-safe driers or resins.
For outdoor use, you need maximum water resistance. Raw linseed oil is a poor choice here, as it stays tacky and grows mildew. A heavily polymerized tung oil or a specialized outdoor oil finish with added UV stabilizers is required. Teak oil, despite its name, is often just a light oil-varnish blend. It needs frequent reapplication on exterior wood.
The wood species itself is the final filter. Oily woods like teak or rosewood may resist penetration. I often wipe them with acetone first to clear the pores. Very soft, porous woods like pine can absorb oil unevenly, leading to a blotchy look that requires a pre-treatment sealer.
Step-by-Step Application for a Hand-Rubbed Finish
This method is where you connect with the wood. It’s simple, but the details define a professional result. Gather your tools first:
- Lint-free cloths (white cotton T-shirt material is perfect)
- Nitrile gloves
- Fine abrasive pads (600-grit or finer) or very fine steel wool (0000)
- A clean, ventilated space
Always test on a scrap piece from the same board. This tells you the final color and the true drying time in your specific shop conditions.
Here is the core “flood, wait, wipe” sequence:
- Flood the surface. With a cloth, apply a generous, wet coat of oil over the entire area. Don’t let it puddle, but ensure every pore looks soaked.
- Wait for the chemistry. Let it sit. This is not passive time. The oil is penetrating and starting to polymerize. For many oils, this takes 15-30 minutes. The surface will go from glossy-wet to a dull, matte wetness.
- Wipe it all off. Use a clean cloth and wipe *aggressively*. Remove every trace of surface oil. Any oil left on the surface will dry sticky. This step is the most common mistake.
Let the piece cure fully, usually 24 hours, in a dust-free area. Then lightly abrade the surface with your fine pad to knock down any wood fibers that swelled. Wipe away the dust. Apply your next coat. For a durable finish, three thin coats, applied and wiped meticulously, will outperform one thick, gummy coat every time. After the final coat, a light buffing with a clean cloth after a week of curing can bring up a soft sheen.
Troubleshooting Common Oil Finish Problems
A sticky, uncured finish is the most frequent issue in my workshop. Three causes are likely. First, you didn’t wipe off the excess oil thoroughly. Second, environmental conditions: cold or damp air severely slows the oxidative curing process. Third, you may have used a non-drying oil like mineral oil on a project that required a hardening oil.
Blotchy absorption happens on woods with variable density, like cherry or pine. The end grain soaks up oil and turns dark, while the face grain stays light. The material science fix is to partially seal the pores first. Apply a 1-lb cut of dewaxed shellac as a wash coat, or use a commercial sanding sealer, before your first oil coat. This creates a more uniform substrate for the oil to color.
Many people search “is Rem Oil safe on wood” hoping for a quick fix. Rem Oil is a gun cleaner and lubricant. Its formulation is designed to leave a slick, non-drying protective film on metal. On wood, it will not polymerize. It will leave a permanent, oily residue that attracts dust and prevents any proper finish from ever adhering. Do not use it as a wood finish.
What is “Wood Therapy” and How Do Oils Fit In?
Let’s clear this up right away. “Wood therapy” isn’t something you get at a clinic. It’s a term I use for the hands-on, mindful practice of maintaining wooden objects. Think of it as a ritual of care, not a medical treatment. You slow down, focus on the task, and connect with the material through touch and sight.
This practice is purely about external application to wood; it has nothing to do with ingesting oils for health benefits. If you’re searching for information on “wood pressed groundnut oil” for consumption, that’s a completely separate topic from finishing your walnut desk or maple cutting board. Here, the oil is a tool for preservation and beauty.
From a materials science perspective, wood is hygroscopic. It constantly exchanges moisture with the air, which causes it to swell and shrink. Applying the right oil helps manage this movement. The oil occupies tiny pores in the wood’s cellular structure, slowing moisture exchange and stabilizing the piece. This simple action is the core of the “therapy”-for both the wood and you.
The Practice: Oil as a Medium for Care and Connection
The ritual is straightforward. Take a cherished item, like a well-used cutting board or the handle of your favorite chisel. Start by cleaning it with a damp cloth. As you wipe, you’re inspecting. Run your fingers over the surface. Feel for any new dents, scratches, or areas that have dried out and feel rough. This inspection is key. It turns maintenance from a chore into a conversation with the object.
Next, you apply a thin coat of oil. I use a soft rag for this. You work the oil in, following the direction of the grain. Watch as the dry, pale wood instantly darkens and the grain pattern leaps into view. This happens because the oil reduces light scattering on the surface by filling those microscopic pores. The wood isn’t just getting darker; it’s revealing its true character.
This creates a powerful feedback loop: your care enhances the wood’s beauty and integrity, which in turn rewards you with a more pleasurable object to use and behold. I’ve kept the same cherry wood spoon for years using this method. Each oiling session, maybe every few months, is a few minutes of quiet focus that strengthens the wood against moisture and wear.
Choosing Oils for Wood Therapy Rituals
You don’t need exotic, expensive oils for this practice. The goal is safety, simplicity, and a pleasant experience. The act of caring is what matters most, not the mystique of the oil.
I recommend starting with two reliable options:
- Food-Grade Mineral Oil: This is a pure, odorless hydrocarbon. It doesn’t go rancid, it’s non-toxic, and it’s incredibly cheap. For a cutting board or salad bowl, it’s my first choice. Some brands add a light lemon or almond scent, which can make the ritual more enjoyable.
- Pure Tung Oil: This oil comes from the nut of the tung tree. It polymerizes, meaning it cures from a liquid into a flexible, water-resistant film inside the wood. It has a distinct, earthy smell that many woodworkers, including myself, find pleasant. It offers more protection than mineral oil for items like tool handles.
Focus on material safety and your own sensory pleasure; marketing claims about rare oils are often irrelevant for this simple maintenance. Avoid common pitfalls like using vegetable oils (canola, olive) from your kitchen. They will spoil, become sticky, and smell bad. For a tool handle, a light application is best. Too much oil can make the handle slippery, which is a safety issue. If you apply oil and it stays tacky for days, you likely used too much. Wipe off the excess with a clean rag.
In my shop, I keep a small bottle of each oil. The mineral oil is for food-contact items, and the tung oil is for everything else. This simple system works for 95% of wood therapy needs. It’s effective, safe, and turns maintenance into a moment of connection.
Safety First: Toxicity, PPE, and Responsible Use
Your first step with any oil is safety. The most immediate and severe risk isn’t skin contact, it’s fire.
A pile of oil-soaked rags can spontaneously combust, starting a shop fire in under an hour. I’ve tested this. When oils like linseed or tung cure, they react with oxygen in an exothermic reaction. Bunched-up rags trap that heat. As temperature rises, the reaction speeds up. This creates a runaway thermal event that can reach ignition point.
Never, ever toss oiled rags into a corner or a trash can. You have two safe options.
- Submerge them fully in a sealed metal can filled with water. I keep one with a lid specifically for this.
- Lay each rag out completely flat, individually, on a concrete floor or non-combustible surface until they are hard and crispy dry. This can take a few days.
Understanding Material Safety Data Sheets (MSDS)
The product’s Material Safety Data Sheet (MSDS or SDS) is your rulebook. Don’t skip it. Manufacturers use specific, legally-defined terms you must understand.
Look for the word “sensitizer.” This means repeated exposure can trigger an allergic reaction. Think of uncured epoxy resin on your skin. A product labeled a sensitizer demands consistent glove use every single time, not just when you remember.
“Combustible liquid” is another key term. It has a flash point between 100°F and 200°F (38°C to 93°C). Your shop on a summer day can reach that. This reinforces why ventilation is non-negotiable.
Basic PPE for any oil work is simple and consistent.
- Nitrile gloves. They resist solvents better than latex.
- Eye protection. A splash in the eye is a hospital trip.
- Ventilation. Open doors, use a fan, or work outside. Fumes build up fast.
Food Safety vs. Material Safety: A Critical Distinction
This point causes massive confusion. “Food-safe for surfaces” is a regulatory term. It means the cured finish won’t leach harmful chemicals into food under normal use. It does not mean the liquid oil is safe to drink.
You should never consume any finishing oil. Marketing that blurs this line is dangerous.
For items that directly contact food, like cutting boards or bowls, complexity is your enemy. Choose a finish with a simple, known chemistry: pharmaceutical-grade mineral oil or 100% pure tung oil.
Mineral oil doesn’t cure or go rancid. Pure tung oil cures to a hard, inert film. I avoid “salad bowl finishes” that mix tung oil with unknown synthetic hardeners. In my shop, a three-part mix of mineral oil, beeswax, and carnauba wax is the standard for all kitchen items.
Frequently Asked Questions on Wood Finishing Oils
1. What’s the practical difference between “pure” and “blended” tung oil at a retailer like Home Depot?
Products labeled “Tung Oil” at big-box stores are often blended finishes containing varnishes and driers, which build a surface film faster. Pure tung oil, typically found at specialty woodworking suppliers, penetrates deeply and cures to a more water-resistant but slower-building finish from within the wood, influenced by solvent polarity and oil viscosity.
2. For a food-safe finish on a kitchen table, is “salad bowl finish” or pure mineral oil better?
Use a cured film-forming finish like a reputable salad bowl finish for tabletops, as it provides durable protection against spills and stains. Pure mineral oil never cures, remaining greasy and requiring constant reapplication, making it unsuitable for furniture surfaces.
3. I see “Danish Oil” at B&Q and Screwfix. Is it a true oil, and what is it best used for?
Danish Oil is a blend of a drying oil (like linseed or tung), varnish, and solvent. It is best for furniture and woodworking projects where you want moderate film build and protection with the application ease of an oil, bridging the gap between a pure penetrating oil and a surface varnish.
4. Based on material science, why is boiled linseed oil (BLO) not recommended for outdoor furniture?
BLO’s chemical driers promote surface curing but create a film that remains marginally flexible and prone to mildew growth. For outdoor exposure, a heavily polymerized tung oil or a dedicated exterior oil formula provides superior water resistance and long-term stability against weathering.
5. If mineral oil is food-safe but non-drying, what is a food-safe oil that actually hardens?
Pure, 100% tung oil is food-safe once fully cured and polymerizes into a durable, water-resistant solid. For food-contact items like bowls and cutting boards, this creates a permanent, renewable protective layer, unlike the temporary conditioning of mineral oil.
Your Oiled Wood: Long-Term Care and Choices
The most important rule from my shop is to match the oil to the wood’s purpose, not just its looks. Always conduct a test on scrap wood to see the true color and absorption rate. I apply all oils in very thin, even coats and wipe away any excess before it dries. This method builds protection without leaving a surface that feels sticky or soft. For more detailed techniques, check out this guide on applying oil finishes.
Take responsibility for your materials by choosing plant-based oils from ethical suppliers and researching their environmental impact. Your growth as a woodworker is directly tied to asking how and why different oils interact with wood grain.
Industry References
- r/Woodcarving on Reddit: What an “oil finish” is for and what type of oil is it? Where can I get it? Why is it used in first place?
- Wood Oils for Interior and Exterior Projects
- Finish Wood With Oil: How To Choose the Right One
- 5 of the Best Oil Finishes for Wood Furniture – Vermont Woods Studios
David is a veteran woodworker. He is now retired and stays in his cabin in Wisconsin which he built himself. David has 25+ years experience working in carpentry and wood shops. He has designed and built many small and large wood projects and knows the science behind wood selection like the back of his hand. He is an expert guide on any questions regarding wood material selection, wood restoration, wood working basics and other types of wood. While his expertise is in woodworking, his knowledge and first hand experience is far from 'woody'.