
What Are the Best Chemical Solvents for Stripping Oil Paint from Wood?
Stripping oil paint is a chemical puzzle, not just a physical chore. Choosing the wrong solvent can damage the wood’s surface or leave a gummy mess.
This article provides shop-tested methods based on how materials interact. We will cover the science of solvent penetration, a direct comparison of common stripper chemistries, and a safe, effective step-by-step removal technique.
My recommendations come from years of hands-on testing, measuring how different solvents affect various paints and wood species.
How Do You Diagnose the Paint and Wood First?
Before you touch a chemical, you need to know your enemy. Many finishes look alike, but they come off differently. Assuming it’s oil paint or stain can waste time and damage the wood.
Start with a simple acetone test in an inconspicuous spot. Dab a cotton swab with pure acetone (nail polish remover often works). Rub it firmly on the finish for 30 seconds. If the finish softens, becomes sticky, or starts to dissolve onto the swab, it’s a solvent-based finish like shellac, lacquer, or some varnishes. Genuine, cured oil-based paint is highly resistant to acetone. It won’t soften. This test tells you if you’re dealing with a true, hard oil paint film.
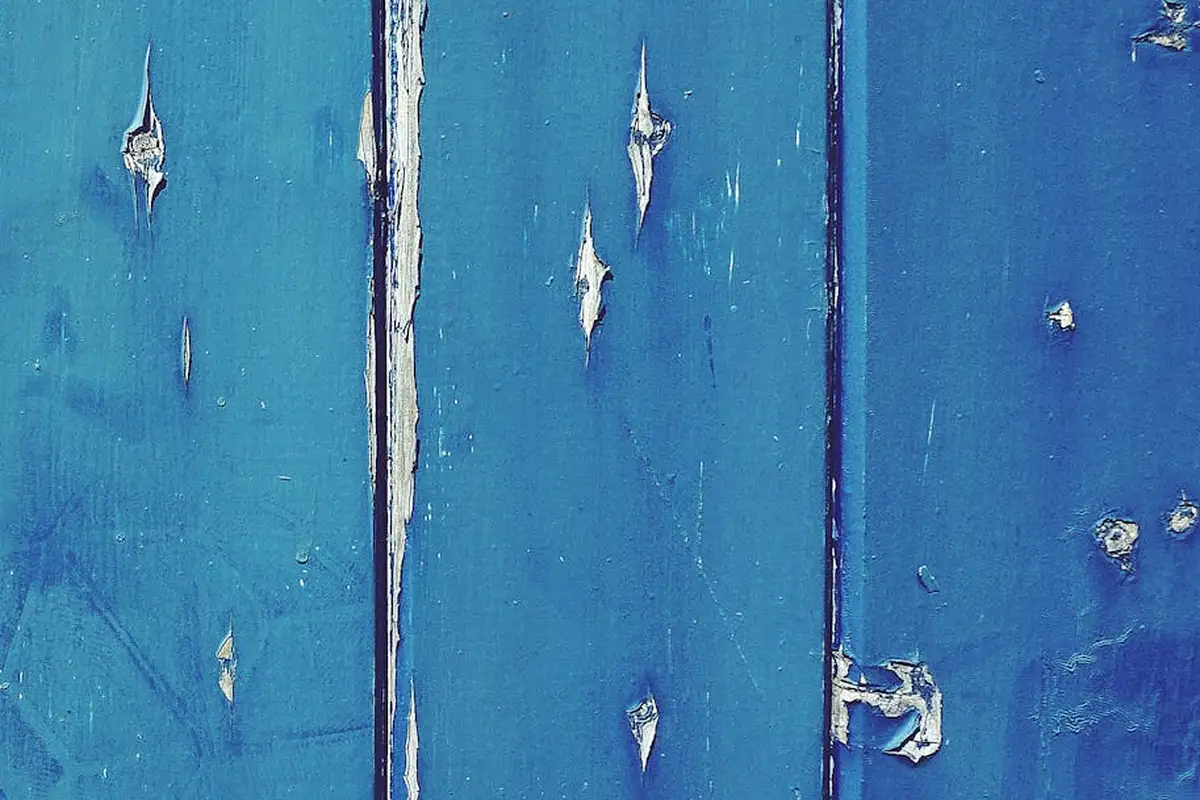
The wood underneath matters just as much. Softwoods like pine, fir, and cedar are sponges. Their open grain soaks up strippers, which can raise the grain permanently and leave a fuzzy surface. Hardwoods like oak, maple, and poplar have tighter cell structures. They tolerate chemical intrusion far better and sand back smoothly.
This applies everywhere. A painted oak floor can handle more aggressive methods than a delicate pine antique dresser. For wooden pallets, assume it’s a softwood like pine and that it’s been coated with the cheapest, toughest paint available. Proceed with extra caution.
Lead paint testing is not optional for any surface made before 1978. You can buy EPA-recognized test kits at any hardware store. If the test is positive, your job changes completely. Do not sand, scrape, or use heat guns, as these create toxic dust and fumes. Your only safe option is to consult a lead abatement professional. For modern paints, you can proceed with the chemical methods outlined below.
Safety First: The Non-Negotiable Prep and Toxicity Guide
Stripping chemicals don’t ask for permission. They attack your lungs, skin, and eyes on contact. Setting up correctly isn’t about comfort, it’s about health.
Ventilation is your primary defense, not a secondary thought. Always work outdoors if possible. In a garage, open all doors and use a powerful box fan in a window to pull fumes *out*, creating negative pressure. These solvents are “sensitizers.” That means repeated exposure, even to low levels, can trigger severe allergic reactions later. Your body builds up an intolerance, and one day a small whiff can cause a dangerous response.
Your work zone needs a stable, disposable surface. I use sheets of heavy 6-mil plastic on sawhorses. Have a metal can with a lid for used chemical sludge and a separate bag for contaminated rags and scrapers. These materials can spontaneously combust as solvents evaporate.
Disposal is part of the job. Never pour stripper sludge down a drain or into the soil. Let the sludge fully dry and harden in its sealed can, then dispose of it as hazardous household waste at your local facility. Check your municipality’s rules. This is the ethical, and legal, way to handle it.
Toxicity & PPE: Your Personal Protective Checklist
Your gear is your shield. Don’t compromise.
- Respirator: For methylene chloride-based strippers (the fastest, most aggressive type), you need a properly fitted half-face respirator with organic vapor (OV) cartridges *and* particulate pre-filters. For “safer” citrus or NMP-based strippers, you still need OV cartridges. The fumes are less acutely toxic but still harmful with prolonged exposure.
- Gloves: Disposable nitrile gloves are good for water-based strippers. For powerful solvents, you need heavy-duty chemical-resistant gloves made from nitrile, neoprene, or butyl rubber. Check the manufacturer’s chemical compatibility chart.
- Eye Protection: Splash goggles that seal to your face, not safety glasses. A full face shield over goggles is even better.
- Wear old, long-sleeved cotton clothing and a disposable plastic apron. Synthetic fabrics can melt onto skin if splashed.
Food-safe” is a property of the final finish, not the stripping process. No chemical stripper is food-safe. Your goal is to completely remove all chemical residue through neutralization and washing before any new, food-safe finish is applied. The stripping stage is purely about safe removal.
Chemical Strippers Decoded: Solvents, Gels, and Paste
Modern paint strippers work by breaking the bond between the paint film and the wood. I group them into three chemical families based on their active ingredient. Each has a distinct personality in the shop.
Solvent-Based Strippers (The Penetrators)
These were traditionally methylene chloride-based, a potent but hazardous solvent now largely banned for consumer use. Today’s alternatives use chemicals like N-Methyl-2-pyrrolidone (NMP) or dibasic esters. Think of them as specialized paint dissolvers.
They work by swelling the paint film from underneath, causing it to blister and lift. For removing oil paint from wood, a quality solvent-based stripper is often your most effective bet against multiple, aged coats. I’ve used them to strip five layers of paint from a 1920s door where other strippers failed. They are less effective on modern latex paints.
- Pros: Powerful on thick, old oil paint. Often faster-acting.
- Cons: Fumes require serious ventilation. Can raise wood grain. More aggressive on skin.
Caustic Strippers (The Reactors)
These are typically sodium hydroxide (lye) based. They don’t dissolve paint. Instead, they create a chemical reaction called saponification that turns the oil in oil-based paint into a soap. You’ll see the paint turn into a dark, gooey sludge.
Caustics are very effective but require respect. Caustic strippers can darken wood like oak or cherry and will raise the grain significantly, requiring more sanding later. They are also water-based, which isn’t ideal for veneered pieces or glued joints.
- Pros: Very effective, often less expensive. Good for flat, sturdy surfaces.
- Cons: Can damage wood and glue. Requires thorough neutralization with vinegar or water.
Bio-Based & “Safer” Gels (The Controllers)
Formulated with soy, citrus, or other plant-derived solvents, these have gained popularity. They are much less toxic but also less potent. Their key advantage is the gel formulation, which clings to vertical and detailed surfaces.
In my tests, a bio-based gel will work on a single coat of oil paint if you give it enough dwell time, sometimes 24 hours or more under plastic wrap. For intricate trim or carved furniture where runoff is a problem, a thick gel is the only practical choice, even if it requires multiple applications of oil finishes.
Gel vs. Liquid Remover: A Shop Perspective
This is a classic trade-off between control and penetration.
A wood paint stripper gel is like pudding. It stays put. This is perfect for chair spindles, door panels, or any vertical work. The downside is that its thickness can sometimes act as a barrier, slowing the chemical’s penetration into thick layers.
A liquid stripper is like water. It soaks in fast and deep, attacking multiple layers from within. For a flat tabletop buried under decades of paint, a penetrating liquid will usually work faster than a gel. The obvious con is it runs right off anything but a perfectly horizontal surface.
Choosing a Stripper: A Simple Decision Matrix
Don’t pick a stripper from a brand name. Match the chemistry and form to your project. This table is based on my shop logs.
| Project Type | Recommended Stripper Type | Key Reason & Tip |
|---|---|---|
| Flat Furniture (tabletop, door) | Solvent-Based Liquid or Paste | Maximum penetration for multiple layers. Use a paste on slightly vertical edges. |
| Detailed Trim & Carvings | Bio-Based or Solvent-Based Gel | Clings to complex shapes. Be prepared for a second application. |
| Floors or Structural Wood | Caustic Stripper | Cost-effective for large, durable areas. Neutralize and sand thoroughly after. |
| Cleaning a Wooden Pallet | Caustic or Solvent Liquid | Pallet wood is rough. Aggressive stripping is fine. Always sand heavily after to remove residual chemicals. |
| Antique/Veneered Furniture | Mild Bio-Based Gel | Preserves fragile veneer and old glue. Test in an inconspicuous area first for staining. |
Stripping Before or After Sanding? The Answer is Clear.
Always strip first. Sanding after.
Sanding first just gums up your sandpaper instantly, creates toxic dust, and drives paint particles deeper into the wood grain. Your goal is to remove 95% of the finish chemically, then use sanding to clean up the final 5% and prepare the fresh wood surface. A grit sandpaper wood finishing guide explains the recommended grit progression for this stage, helping you choose the right next grit. Using that guidance keeps your project on track and minimizes dust and surface damage. Start with 120-grit after stripping to remove residual stain and raised grain, then progress to your desired smoothness.
Use Case: The Old Furniture Dilemma
For that one-off antique dresser, start gentle. It’s a careful, methodical approach used in restoring antique wood furniture. I use a citrus-based gel, cover it with plastic wrap to keep it active overnight, and scrape with a plastic putty knife to avoid gouging the wood. If that doesn’t work, I move up to a solvent gel. This patient, stepped approach prevents damage to patina or original markings that give old furniture its value.
Mechanical and Heat Methods: When to Skip the Chemicals
Sometimes, the best solvent is your own two hands and a sharp tool. Chemical strippers are powerful, but they create hazardous waste and can raise the wood grain. For certain jobs, a physical approach is cleaner, faster, and safer for the wood itself. Understanding solvent selection for finish removal can influence the choice and result of the approach. The right solvent can make finish removal smoother and gentler on the wood.
Scraping and Abrasive Tactics
Your first line of defense is a simple scraper. A sharp, flexible putty knife is great for lifting thick, loose paint. For more delicate work, I prefer a card scraper. You can burnish its edge to a fine hook that shaves off paint without digging into the wood fibers underneath. Properly sharpened, a card scraper removes paint in thin, controllable curls, preserving the wood’s original surface better than any other method I’ve tested.
For larger areas or tougher paint, abrasion is your friend. Sanding works, but it loads up paper quickly. I start with coarse grits (60-80 grit) to break the paint film, then move to 100-120 grit to clean the surface. For intricate moldings, I wrap abrasive cord around the profiles or use detail sanding tools.
A more advanced option is soda blasting. It uses baking soda propelled by air to scour away paint. It’s less aggressive than sandblasting and won’t etch the wood like harder media. The soda dissolves in water, making cleanup simple. It’s messy and requires special equipment, but for a heavily painted ornate piece, it can save dozens of hours.
The Heat Gun Problem
Many guides recommend a heat gun to soften paint for scraping. I advise against it, especially on older pieces. First, heat easily scorches wood. The temperature needed to bubble oil paint (often over 400°F/204°C) can permanently cook the wood’s surface cells, creating a weak, brittle layer.
The second reason is more dangerous. Paint applied before 1978 likely contains lead. A heat gun doesn’t just soften lead paint, it vaporizes it. You can’t see lead fumes. Inhaling them is a severe health risk, and the contamination spreads through your shop. Using a heat gun on old paint is an effective way to create a toxic hazard, not a clean surface. The risk far outweighs the convenience.
Mechanical vs. Chemical: A Shop Comparison
Choosing between elbow grease and solvent comes down to the project. Mechanical methods give you immediate feedback and control. You see the wood as you reveal it. They create dust, not toxic sludge, and leave the wood chemically neutral for your next finish.
But they require more physical effort and a skilled hand to avoid gouges. Chemical strippers work with less effort on complex layers and can be better for deeply penetrated, alligatored finishes. My rule is simple: if the paint is thick but largely on the surface, I start with a scraper; if it’s thin, old, and has soaked into the grain, I reach for a stripper.
How Do You Get Dried Paint Off of Wood Floors Mechanically?
Floors are a special case. The wood is often harder, and the surface area is large. Your goal is to remove paint without creating valleys or gouges that a sander can’t fix.
Start with the right tool. Use a floor scraper or a sharp, wide putty knife. Hold it at a low angle, about 30 degrees to the floor, and push with steady pressure. You want to skim the surface, not dig in. Work in the direction of the wood grain to prevent tear-out.
Follow this sequence:
- Remove any loose material with a stiff-bristle brush or vacuum.
- Scrape the bulk of the paint off using long, overlapping strokes. Keep your blade sharp; a dull blade requires more force and slips easily.
- For stubborn spots, use a rotary drill with a nylon abrasive pad or a brass brush attachment. These are less likely to scar the wood than steel wool.
- Once the majority of paint is gone, hand-sand the area with 80-grit paper on a sanding block to remove the final residue and smooth any slight ridges from scraping.
For an entire floor, you perform these steps to clear the bulk of the paint. The floor sander is your final tool, not your first. Never run a sander over significant paint buildup. It will clog the paper instantly, gum up the drum, and likely burn the paint onto the wood. Use the sander only after you’ve mechanically removed 95% of the paint. Start with a coarse grit (36 or 40) to level any remaining traces, then proceed through your standard sanding sequence to a fine finish.
The Best Practice Workflow for Chemical Stripping

A good strip job is not an art. It is a disciplined science experiment you control from start to finish. Skipping steps or rushing will force you to repeat them later, often after you’ve sanded and applied a new finish that then fails. This is your non-negotiable sequence.
Always test your chosen stripper and method on a small, inconspicuous area first to check for wood staining, glue line failure, or an undesirable surface texture. This is your only chance to change course without consequence.
- 1. Prep the Workspace & Piece: Work outdoors or in a space with massive ventilation. Wear chemical-resistant gloves, goggles, and a respirator with organic vapor cartridges. Remove all hardware. If the piece is dusty, wipe it down with a dry cloth. Do not wet it.
- 2. Apply Stripper & Wait: Follow the product’s instructions for application and dwell time. Set a timer. This is not a guessing game.
- 3. Remove Bulk Paint: Use the correct non-marring tool to lift the sludge.
- 4. Neutralize & Clean: This step is 100% mandatory. We will detail it below.
- 5. Final Sanding Prep: Once the wood is completely dry, sand lightly with 120-grit paper to remove any raised grain and prepare a fresh surface.
Step-by-Step: Applying and Removing a Paint Stripper for Wood Furniture
Step 1: Application for Maximum Dwell
Think of the stripper as a chemical blanket that needs to stay in contact with the paint. Apply a generous, even coat with an old brush. On vertical surfaces, use a paste or gel formula. I apply it thickly, like frosting a cake. The goal is to prevent it from drying out or sliding off before it finishes working.
Step 2: Monitoring the Reaction
Do not walk away. Watch for the paint to blister, wrinkle, or become gelatinous. You are waiting for the paint to “lift” away from the wood, not fully “dissolve” into nothing. If you wait too long, the stripper dries and becomes ineffective. If you scrape too soon, you’ll just smear gum. The perfect time is when the film can be lifted in sheets with a corner of your scraper.
Step 3: The Scraping Technique
Use a wide, flexible plastic scraper or a dull metal putty knife with rounded corners. Hold it at a shallow angle, like a plane taking off. Push; do not dig. Let the tool glide under the sludge. Wipe the gunk off the scraper onto newspaper frequently. Using a sharp tool or too much force is the fastest way to carve a permanent gouge into the soft, chemically-soaked wood.
Step 4: Tackling Final Residue
After bulk removal, a sticky film always remains. Pour a small amount of the appropriate solvent (mineral spirits for most paint residue) onto a pad of #0 or #00 steel wool or a heavy-duty abrasive pad. Scrub with the grain using moderate pressure to pull residue from the pores without scratching the surface. Wipe clean with a rag. Change your pad often as it loads up with gunk.
Neutralizing and Cleaning: The Most Skipped, Most Critical Step
This is where projects go wrong. Stripper residue left in the wood will ruin any new finish, causing cloudiness, poor adhesion, or endless tackiness. You must remove every trace of the cleaning chemicals themselves.
For Caustic (Lye-Based) Strippers: These leave an alkaline residue. Mix a solution of 50% white vinegar and 50% water. Flood the surface, scrub lightly with a brush, and let it fizz for a minute to neutralize the base. Rinse thoroughly with clean water.
For Solvent-Based or “Safer” Strippers: They leave a waxy or oily film. Flood the surface with mineral spirits and scrub with abrasive pads. This dissolves and carries away the leftover stripper medium. Wipe it all off with clean rags.
The final step for all methods is a clean water wash. Use a sponge and water to remove any last traces of vinegar or mineral spirits. This also raises the wood grain intentionally. Let the piece dry completely for at least 24 hours. Then, sand lightly with 120-grit paper to knock down the raised grain. You now have a perfectly clean, chemically neutral substrate.
Consider a painter’s wooden palette, caked with dried oil paint. Simply scraping it leaves paint deep in the porous grain. You must flood it with solvent, scrub to get into those pores, and then clean off the solvent itself with soap and water. Furniture is no different. The wood has memory and will hold that residue against the next thing you apply, whether you’re stripping finishes, stains, or paints.
Troubleshooting Stubborn Paint and Cleaning Up Mistakes
Stripping oil paint is rarely a one-step job. The real skill lies in solving the problems that come up afterward. Let’s fix the most common issues.
How Long to Wait if Chemical Stripper is Still Leaving Paint on Wood?
If the stripper is wet but paint remains, you haven’t waited long enough. The clock doesn’t start until the stripper is applied, it starts when the chemical reaction finishes.
I think of stripper like a delivery truck. The gel holds the solvents against the paint. Those solvents must soak through each layer, soften the binders, and break the paint’s grip. Thick, old, or lead-based paints take far longer. A 30-minute wait might work for a new coat, but I’ve left heavy-bodied oil paint under paste for 4 hours in a cool shop.
Cover the area with plastic wrap. This prevents evaporation and gives the chemicals time to work. If paint still won’t scrape off after a long dwell time, the stripper may be exhausted or too old. Apply a fresh, thick coat over the old one and wait again.
How to Get Paint Off of Stained Wood Without Removing All the Stain
This is a delicate operation. Your goal is to remove the paint polymer without dissolving the stain particles embedded in the wood fibers. It requires a targeted approach, especially when dealing with teak wood.
First, identify the stain. An oil-based stain soaks into the wood. A water-based or dye stain penetrates deeply. A gel stain sits more on the surface. Test in a hidden spot with your chosen solvent on a cotton swab.
Use a slower-acting, less aggressive solvent and work in tiny, controlled areas. Instead of slathering on a heavy-duty methylene chloride stripper, try a citrus-based or dibasic ester stripper. They work slower and are less likely to pull deep stain. Apply it only to the paint splatter, not the entire board.
Scrape carefully with a plastic putty knife or a wooden scraper you’ve sanded to a rounded edge. The moment you see clean, stained wood, stop. Wipe the area immediately with the solvent’s recommended cleaner (often mineral spirits for oil-based strippers) to halt the chemical action.
Fixes for Common Problems: Dried Stripper, Paint in Grooves, and Raised Grain
Here are quick solutions for the headaches we all face.
- Dried Stripper: Never try to scrape it. You’ll gum everything up. Re-wet it. Apply a fresh, thick layer of the same type of stripper over the dried residue. It will re-activate the old chemicals. Wait 20 minutes, then all of it should scrape off together.
- Paint in Grooves or Carvings: Brushes and scrapers are too big. I use pointed, whittled dowels or hardwood sticks. For really fine detail, I twist strands from a brass wire brush into a tight point. The brass is softer than the wood, so it won’t scratch. You can also use a dental pick, but be gentle.
- Raised Grain: Water-based strippers or even leftover moisture from cleaning will make wood fibers swell. This is actually a good sign, it means you’ve gotten down to bare wood. Let the piece dry completely for 48 hours. The grain will stand up. Then, sand it lightly with 220-grit paper just until it’s smooth again. Don’t sand aggressively, you’re just knocking off the fuzz.
Cleaning an Old Oil Painting on Wood: Conservation vs. Full Stripping
This is a critical fork in the road. Is your goal to restore a historical piece or to refinish a painted table?
For conservation, you aim to preserve both the wood substrate and as much of the original finish history as possible. Full stripping is destructive and erases history. Instead, the process is called “surface cleaning.”
Start with the gentlest method: a soft, dry brush. If grime remains, I use a conservation-grade eraser like a Smoke Sponge (vulcanized rubber) rolled into a point. It lifts dirt without liquid. For greasy grime, I might use a tiny drop of mineral spirits on a cotton swab, testing endlessly in an inconspicuous corner first. The rule is to stop the moment you see original color or varnish.
Full stripping is for when the paint has no historical value and you want the wood back for a new life. Even then, on an antique, I’d consider leaving the paint on the back or sides as a record of its age. The choice defines whether you’re a restorer or a refinisher.
Next Steps: Prepping Bare Wood for Its New Life
Stripping off the old paint is just the first battle. The wood underneath has been through a chemical assault. Your job now is to heal it and prepare a perfect canvas. Rushing this stage will ruin your refinishing project.
Sanding Progression: Erasing Ghosts and Scars
Chemical strippers lift the bulk of the finish, but they almost never leave a perfectly clean surface. You will often find a “ghost” of the old color trapped in the wood grain or tiny bits of finish clinging to the pores. Sanding removes this and, more importantly, levels the wood surface that the chemicals have slightly roughened.
Start with a coarser grit than you think you need, around 80 or 100 grit, to quickly remove leftover residue and even out the surface. Sanding by hand with the grain is safest here. Power sanders can dig in if you hit a soft spot the stripper created.
Your goal is fresh, uniform wood. Move up through the grits systematically:
- Start grit (80-100): Removes ghosts and levels the surface.
- Medium grit (120-150): Erases the scratches from the first grit.
- Fine grit (180-220): Creates the smooth surface ready for finish.
Do not skip grits. Jumping from 80 to 220 will leave deep scratches you cannot see until you apply a stain or oil, and then they will glow like neon signs. A quick tip: change your sandpaper often. Dull paper burns the wood and creates more work.
The Residue Test: Don’t Let Chemistry Ruin Your Finish
This is the most critical, skipped step. Strippers leave behind a microscopic chemical film, and modern finishes will not stick to it. The film is often invisible.
To check, use the water test. Lightly mist a small, inconspicuous area with water. Watch what the water does.
- If it soaks in evenly and darkens the wood, the surface is clean.
- If it beads up like water on a waxed car, you have residue.
Beading water is a failure warning your new finish will peel or chip. The fix is simple. Wipe the entire piece down with a rag soaked in mineral spirits or denatured alcohol. These are neutral solvents that dissolve the stripper’s leftover surfactants without damaging the wood. Let it dry, then sand lightly with your final grit (180-220) to remove any raised grain from the solvent. Test with water again.
Conditioning the Wood: Managing a Hungry Surface
Aggressive stripping and sanding opens up the wood’s pores dramatically. This is especially problematic for soft, blotch-prone woods like pine, cherry, or maple. If you apply a stain directly, it will soak in unevenly, creating dark, splotchy areas. This is why proper surface preparation is crucial before staining.
Apply a pre-stain wood conditioner to these woods after your final sanding and before any stain. Think of it as a light sealer. It’s a thin solution of sanding sealers or boiled linseed oil that partially fills the grain. In the sanding sequence for wood stain preparation, this step helps ensure even stain absorption. Properly conditioned wood is ready for a smooth, uniform finish when you apply stain.
It creates a more uniform surface so your stain color develops evenly. You apply it, wait the time on the can (often 15 minutes), wipe off the excess, and then apply your stain within a two-hour window. It adds one step, but it saves you from a blotchy, amateur-looking result on a piece you’ve worked so hard to strip down.
Frequently Asked Questions on Chemical Paint Stripping
What is the primary advantage of using a wood paint stripper gel over a liquid?
A gel’s high viscosity allows it to cling to vertical and intricate surfaces without running, providing controlled, localized chemical action. This makes it the superior choice for detailed furniture, trim, or carvings where liquid strippers would simply drain away.
How do I choose the best wood paint stripper from a hardware store like Bunnings?
Ignore marketing and read the active ingredients on the safety data sheet (SDS) to match the chemistry to your project. For thick oil paint, look for solvent-based formulas containing NMP or dibasic esters; for detailed work, select a gel variant of those same chemistries for better control.
Why might a paint stripper fail to work on wood, even after the recommended dwell time?
Failure typically indicates either an incompatible chemistry for the paint type or premature drying of the product. Ensure you’ve correctly identified the finish as oil-based and keep the applied stripper moist by covering it with plastic wrap to prevent solvent evaporation before the reaction is complete.
Is a ‘safer,’ bio-based paint stripper for wood furniture effective on multiple heavy coats?
Bio-based strippers, often citrus or soy-derived, work through slower, less aggressive solvent action and struggle to penetrate many aged, hardened layers. They are best reserved for single coats or as a first, gentle attempt on delicate antique surfaces where preserving the substrate is paramount.
After stripping, my wood feels fuzzy. Did I damage it, and how do I fix it?
The fuzz is raised grain, a normal result of moisture or solvent intrusion into the wood fibers, not damage. Let the wood dry completely for 24-48 hours, then sand it lightly with 120-150 grit paper along the grain to remove the fuzz and prepare a smooth surface for finishing.
Smart Practices for Wood After Paint Removal
Your most important job is to preserve the wood grain while stripping paint. I always test the mildest solvent, like a soy gel, on a hidden spot first to check for damage. Work slowly and use a respirator with chemical-rated filters for safety. Finish by wiping the wood with a neutralizer, such as a dilute vinegar solution, to prepare it for refinishing.
Select solvents with lower toxicity and dispose of waste properly to protect our ecosystems. Consider safety solvents and VOCs in wood finishing to protect indoor air quality. This awareness helps you make safer, cleaner projects in the long run. Stay curious about how wood density and finish history affect your results for better projects ahead.
Sources and Additional Information
- Solvent Based Interior Wood Paint | Oil Based Trim Paint | Screwfix
- Solvents for Oil Painting | DeSerres
- Oil Paint for Wood
David is a veteran woodworker. He is now retired and stays in his cabin in Wisconsin which he built himself. David has 25+ years experience working in carpentry and wood shops. He has designed and built many small and large wood projects and knows the science behind wood selection like the back of his hand. He is an expert guide on any questions regarding wood material selection, wood restoration, wood working basics and other types of wood. While his expertise is in woodworking, his knowledge and first hand experience is far from 'woody'.