
How Do You Apply a Chemical-Resistant Finish to a Walnut Bar Top with Catalyzed Lacquer?
You need a finish for your walnut bar top that fights off alcohol, citrus, and daily wear without yellowing or softening. Catalyzed lacquer is the professional choice for this job, but using it correctly requires a blend of careful technique and materials knowledge.
I will break down the entire process from my shop experience. We will cover the chemistry of catalyzed lacquer, perfect surface preparation for walnut, precise spraying techniques, and the critical curing conditions for maximum chemical resistance.
I base this guide on my own materials testing, having sprayed and abused countless finish samples to see what actually holds up on a bar.
Why Walnut and Catalyzed Lacquer Are a Perfect Match
A bar top is a chemistry lab in disguise. It faces beer, wine, spirits, citrus juice, soda, and harsh cleaning sprays daily. A standard furniture finish will soften, cloud, or stain when these chemicals attack it. You need a finish that cross-links into a tight molecular network, one that solvents can’t easily penetrate.
Let’s compare your top three clear, durable options.
- Epoxy is the tank. It’s incredibly resistant but builds a thick, plastic-like layer. It’s difficult to repair without a full resurface. The feel under a glass is solid, but it lacks the subtle warmth of wood.
- Polyurethane is the common choice. It’s tough but cures through oxidation, which can amber over time, subtly shifting walnut’s color. The film can feel slightly rubbery or thick if applied heavily.
- Catalyzed Lacquer is the specialist. It provides a hard, solvent-resistant shield in a remarkably thin film. The finish feels like wood, not a coating, because it sits in the grain, not on top of it. Best of all, a new coat melts into the old, making spot repairs invisible.
This clarity and thinness are why it’s perfect for walnut. Walnut doesn’t need color help. Its rich browns, purples, and complex grain are the show. A heavy finish obscures that. Catalyzed lacquer acts like a durable, invisible magnifying glass.
I rarely stain walnut. To keep it light, use a clear water-based sanding sealer as your first coat. To darken it, a light wipe with a dye (not a pigment stain) will intensify the grain without hiding it. Always test your color and finish schedule on scrap from the same board.
What Exactly Is a Catalyzed Lacquer Finish?
At its core, it’s a standard nitrocellulose or acrylic lacquer with a separate catalyst added. This catalyst, usually an acid, kicks off a chemical reaction. Think of it as a two-part glue for your finish film, creating bonds much stronger than the finish could make on its own.
The result is a dramatic change in performance. Where standard lacquer can be redissolved by its own thinner, a fully cured catalyzed film resists it. This is the chemical resistance you need. It’s also harder, reducing scuffs and ring marks from glasses.
You’ll find this finish sprayed on high-end kitchen cabinets and hospital furniture, places demanding durability and cleanability. That commercial pedigree is a testament to its toughness.
Here’s the critical science for your bar top: drying is not curing. The solvents evaporate and the finish is dry to the touch in minutes. Curing is the slower, chemical cross-linking that builds ultimate hardness and chemical resistance over the next 7 to 10 days. Your bar will be usable before it’s fully cured, but treat it gently during this period. Don’t set a wet glass on it overnight just yet.
In the shop, this means precision. Once you mix the catalyst into the lacquer, you have a “pot life,” often 8 hours. After that, the chemical reaction in the can renders it useless. Mix only what you’ll use in a session. Always wear a proper organic vapor respirator. The solvents are aggressive, and the overspray is a fine, sticky dust you don’t want in your lungs.
Preparing Your Walnut Top for a Flawless Finish
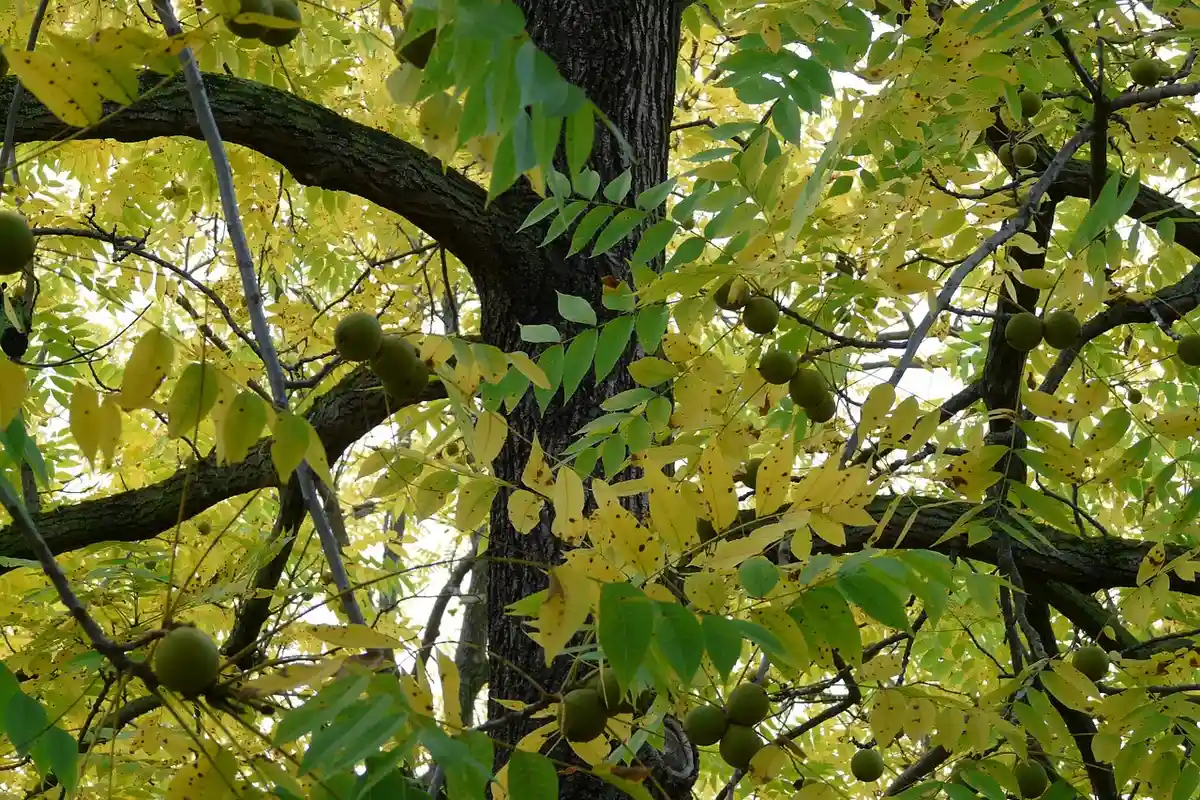
Every great finish starts with perfect wood. With walnut, your goal is to highlight its deep color and complex grain, not hide it under a layer of scratches. Understanding walnut Janka density helps tailor your finish to its hardness and pore structure. This knowledge guides your approach to finishing, ensuring the wood’s color and grain shine without scratches.
Detail Sanding Progression to Reveal the Grain
I start sanding at 120-grit, but only to erase milling marks. The real work begins at 150-grit. Sand thoroughly with the grain until the entire surface has a uniform, dull sheen. This “scratch pattern” is your new baseline; every subsequent grit must erase it completely. Move to 180-grit, then 220-grit. Stop here for a catalyzed lacquer. Going finer can burnish the wood, creating a surface too smooth for the finish to grip properly.
Use a bright, raking light to check for scratches. Tilt a lamp across the surface. Remaining scratches will appear as fine white lines. If you see them, go back a grit. This process, which I call the “grain reveal,” ensures the wood’s character is clean and open, ready to accept finish. In the next step, you’ll prepare a clean, treated wood surface to ensure the finish adheres evenly. This basic prep sets the stage for a smooth, durable finish.
Discussing Walnut’s Pores: To Fill or Not to Fill
Walnut has open pores. Under a film-forming finish like lacquer, those pores create tiny craters. For a bar top, you have two valid paths.
For a perfectly glass-smooth, contemporary look, you must use a grain filler. Apply a paste wood filler (tinted dark brown or neutral) after your 150-grit sanding. Force it into the pores across the grain, let it haze over, then wipe *across* the grain to leave filler only in the pores. Sand lightly with 180-grit once cured. This creates a flat substrate.
For a more traditional, tactile finish that still protects, skip the filler. The lacquer will bridge the pores, creating a slight texture. I prefer this for bar tops. It feels more like wood and hides minor wear better than a flawless glass surface.
Final Cleaning: The Last Critical Step
After sanding, your wood is a dust magnet. First, vacuum the entire piece thoroughly. Then, wipe it down with a clean, dry tack cloth to grab fine particles. Your final step before finishing must be a solvent wipe. Dampen a clean, lint-free rag with mineral spirits or naphtha and wipe the entire surface. This does two things: it shows you the true, wet color of the walnut and it evaporates any remaining oils or dust that the tack cloth missed. Let it dry completely. This is the core of how to clean walnut wood before finishing.
On the topic of how to finish black walnut wood, its natural color is the prize. You can paint or bleach walnut, but for a bar top, that defeats the purpose. Bleaching is harsh and painting hides the grain. You’re using a premium material; let it show.
Gathering Your Tools and Setting Up a Safe Space
Catalyzed lacquer is a professional material. It demands respect and the right equipment. Do not try to brush it on—especially for woodwork projects that require precision and the right solvents.
The Essential Tool Kit
You need a way to spray a thin, even coat. Here’s the short list:
- HVLP Spray System: A turbine-driven HVLP is ideal. It provides a fine finish with good transfer efficiency and minimal overspray.
- Mixing Cups: Use graduated cups for accurate 1:1 or 4:1 ratios (catalyst to lacquer). Precision matters.
- Paint Filters: Always strain the mixed finish through a mesh filter (like a 150-micron cone filter) into your spray gun cup to catch any grit.
- Nitrile Gloves: Wear them from the moment you open the catalyst. This stuff is not for skin contact.
The Non-Negotiable: Respiratory Protection
This is the most important line item. A standard dust mask or even a half-face respirator with organic vapor cartridges is insufficient for the isocyanate vapors in the catalyst. You need a supplied-air respirator or a forced-air system with a full hood. Isocyanates can cause severe respiratory sensitization. This is not a place to save money or cut corners.
Building a Simple Spray Booth
You need to control dust and overspray. In my shop, I create a temporary booth:
- Hang plastic sheeting from the ceiling to create a three-walled enclosure.
- Lay a fresh roll of rosin paper or more plastic on the floor as a drop cloth.
- Place a box fan in a window *behind* the plastic wall, exhausting air outside. This creates negative pressure, pulling overspray and fumes away from you.
- Wet the floor inside the booth with water to keep any settled dust from kicking up.
Why Environment Dictates Success
Catalyzed lacquer cures by chemical reaction, not just solvent evaporation. Temperature and humidity directly control your working time and film quality. Apply lacquer in an environment between 65°F and 75°F (18°C – 24°C) with moderate humidity (40-60%). Too cold, and the cure slows to a crawl; the finish can stay soft. Too hot, and the finish can “kick” in your gun or dry too fast, causing orange peel. High humidity can cause the finish to blush, taking on a cloudy, white haze as moisture gets trapped. Check your product data sheet, but these ranges are a reliable rule. Wood stain polyurethane finishes also have dry cure times that hinge on temperature, humidity, and film thickness. Understanding these times helps you plan coatings and recoat windows just as you would with lacquer.
Health and Safety Profile: Working with Catalyzed Lacquer
Catalyzed lacquer is not like wiping on polyurethane. The catalyst is a cross-linking agent, typically an acid, that triggers a permanent chemical reaction in the lacquer resin. This hardener makes the finish durable, but it also makes the uncured material a potent sensitizer, meaning repeated exposure can trigger lasting allergic reactions. Your skin and lungs will not forgive casual handling. Historically, wooden finishes relied on shellac lacquer and other traditional formulations. These older finishes contrast with today’s catalyzed lacquers in both application and safety considerations.
You must treat the mixing and spraying area like a temporary chemical lab. Cross-ventilation with fans moving air out a window is the bare minimum. I use a dedicated spray booth or set up a large fan in a garage door. Indoors without active exhaust is not an option.
Your personal protective equipment (PPE) is non-negotiable. Here is the full kit:
- Respirator: An organic vapor cartridge (OV) paired with a pre-filter for particulates. A dust mask or simple N95 is worthless against these vapors.
- Goggles: Sealed safety goggles to prevent splash or vapor irritation. Regular glasses do not seal.
- Gloves: Disposable nitrile gloves. Change them immediately if you get any finish on them.
- Coveralls: A disposable Tyvek suit or dedicated shop clothes you will wash separately. This keeps mist off your skin and clothes.
For a bar top, the food safety question is critical. Once fully cured-a process that takes weeks, not days-the finish is inert and safe. The cross-linking reaction creates a stable, plastic-like film that does not leach chemicals. A fully cured catalyzed lacquer is considered food-safe, which is why it’s used on commercial bars, restaurant tables, and hospital furniture. The key is allowing that full cure.
Safe practice extends to the whole process:
- Mixing: Do it in a well-ventilated area immediately before use. Measure the catalyst precisely with a dedicated syringe or measuring cup. Never guess.
- Application: Keep everyone else out of the area. Wear all PPE until you leave and the vapors have cleared.
- Cleanup: Wipe tools with the recommended solvent (usually lacquer thinner) immediately. Dispose of rags and mixing cups in a sealed metal container, as they can spontaneously combust.
The Best Practice Workflow: Mix, Spray, and Build the Film
Step 1: Precise Mixing of Catalyst and Lacquer
Accuracy here defines your finish’s performance. The ratio is critical, often 1 part catalyst to 10 parts lacquer (a 10:1 ratio), but always check your product’s data sheet. I use a small digital scale for volume-based ratios, as it’s more precise than measuring cups. Mix only what you can use within the pot life, which is typically 2 to 8 hours once combined. The mixture will begin to gel and become unsprayable after this window. Mix thoroughly but gently to minimize introducing air bubbles.
Step 2: Applying the First Seal Coat
Your goal is to lock down the walnut’s surface and prepare it to accept subsequent coats. Thin your mixed lacquer about 10-15% with the recommended reducer. This creates a “mist coat.” Using an HVLP spray gun, apply a very light, even pass. You should still see the wood grain clearly. This first coat is not about build; it’s about creating a stable, sealed substrate for the heavier coats to follow. Let this coat flash off for 15-30 minutes as directed.
Step 3: Scuff-Sanding and Applying Build Coats
After the seal coat has dried for at least an hour, lightly scuff-sand the entire surface with 320-grit sandpaper or a gray synthetic pad. You are not sanding to bare wood. You are simply abrading the surface to create “tooth” for the next coat to mechanically bond to. Wipe away all dust with a tack cloth.
Now, apply your first full build coat without thinning. Spray a medium-wet coat, moving the gun steadily to avoid runs. The timing between these build coats is called the “recoat window.” Applying the next coat within this window (often 1-2 hours) allows the coats to chemically fuse into a single, thicker film, which is stronger than layers applied after a full cure. Repeat this scuff-and-spray process for 2-3 build coats.
Step 4: Achieving Final Film Thickness and Flow
You have enough material when the surface has a consistent, glossy “flow” without any dry, textured spots (called “orange peel”). A good target is 3-4 total milled coats. You can gauge this by looking at the edge of the bar top. The finish should look like a continuous, wet layer that perfectly follows the wood’s contours, with no thin or starved areas. If you see light texture, you can apply one more final coat after a light scuff. Avoid the temptation to over-apply, as thick films are more prone to cracking.
Step 5: The Full Cure Timeline
This is where patience pays off. The finish will be dry to the touch in hours and hard enough to sand within a day. But full chemical cure is slower. The bar top will be safe for light use (placing glasses) after about 3-5 days, but it remains soft and vulnerable to solvents like alcohol for weeks. For full service-withstanding spilled spirits, citrus juices, and constant cleaning-you must allow a full 30-day cure at room temperature. Only then has the cross-linking reaction reached maximum hardness and chemical resistance.
Is This the Right Finish for Your Shop? Pros and Real Challenges
Catalyzed lacquer sits in a unique category. It is not a simple wipe-on finish, nor is it a basic rattle-can lacquer. Understanding what you gain and what it requires is the first step. At the core is the chemistry of catalysts that drive rapid, durable curing. Understanding how catalysts interact with resins and drying agents helps you predict performance and finish quality.
The advantages are substantial for a high-use surface like a bar top. The finish forms an incredibly hard, cross-linked film that resists water, alcohol, and common household acids (think citrus juice or soda). This chemical resistance comes from the catalyst reaction, which creates a dense plastic-like barrier that simple finishes cannot match. The finish also stays remarkably clear, enhancing walnut’s deep color without the amber tint of oils or varnishes. The result is a professional, glass-smooth surface.
Now, for the honest barriers. You need spray equipment. A high-volume low-pressure (HVLP) spray gun is the standard. Brushing or wiping catalyzed lacquer is impractical; it dries too fast and will leave terrible streaks. Safety is non-negotiable. You are spraying volatile organic compounds (VOCs) and isocyanates from the catalyst. A properly fitted organic vapor respirator with P100 cartridges is mandatory, along with forced ventilation or a spray booth.
Mixing is a precise, timed operation. You have a “pot life”-typically 2 to 8 hours-after mixing the catalyst with the lacquer base. After that, the material gels in the cup and is useless. You must mix only what you can use in one session.
If the spray setup or chemical handling gives you pause, there is a smart alternative. Search for a local professional finisher or cabinet shop. The search term “catalyzed lacquer finish near me” will point you to shops with the environment and expertise. Paying for a professional application is often more cost-effective than buying all the safety and spray equipment for a single project. This finish is common on commercial cabinetry (hence “catalyzed lacquer finish for cabinets”), so many shops are set up for it. If you’re weighing finishes, compare lacquer with shellac to see which look and durability you prefer. Shellac provides warmth and easier repair, while lacquer offers a harder, smoother film.
Troubleshooting Common Issues with Catalyzed Lacquer
Even with perfect prep, issues can arise. Here is how to fix the most common ones, based on both chemistry and shop practice.
Fixing “Blushing” (Whitish Haze)
Blushing looks like a milky white cloud trapped in the finish. It happens when humidity is high, usually above 70%. The fast-evaporating solvents cool the finish surface so much that moisture from the air condenses into the wet film. To fix it, lightly sand the blushed area and apply a new coat in lower humidity, adding a few drops of “retarder” to your mix to slow solvent evaporation. Preventing it is easier than fixing it. Monitor your shop’s humidity and avoid spraying on rainy days.
Repairing Runs, Sags, and Orange Peel
These are application errors. Runs and sags mean you applied too much material in one pass. Orange peel (a bumpy texture like citrus skin) means your material was too thick, your air pressure was wrong, or you held the gun too far from the surface.
The fix is the same for all three. Let the finish cure completely-at least 24 hours. Then sand it flat with 320-grit paper on a hard block. Do not try to “touch up” a run with more lacquer; you will just create a bigger mess. Sand it flat and respray the entire surface for a seamless repair.
Addressing Sand-Throughs on Edges
Edges and corners are easy to sand through because there is less material. If you see bare wood, stop immediately. Do not try to spot-fix it. A patch will flash (look different) under the next coat. Instead, seal the sand-through. Use a small brush to apply a dab of dewaxed shellac or a barrier coat to the exposed wood. Let it dry, then lightly sand the whole top again before applying your next full coat of lacquer. This isolates the spot and prevents the new lacquer from sinking into the raw wood.
Why Pigment Affects Chemical Resistance
Clear catalyzed lacquer forms that continuous, impervious film. Adding pigment (like in a toner or opaque lacquer) introduces solid particles into that film. Under a microscope, these particles can create micro-pathways for liquids to seep through, slightly reducing the finish’s overall chemical barrier. It is still very resistant, but a pure clear coat offers the maximum protection. If you need color, consider staining the wood directly before applying clear coats for the best durability.
Catalyzed Lacquer for Bar Tops: Key Questions Answered
What is the difference between a catalyzed lacquer finish and a conversion varnish?
Both are cross-linking finishes, but conversion varnish uses a different resin chemistry, often resulting in a slightly more plastic-like film with superior moisture resistance. Catalyzed lacquer offers better clarity and a more traditional, thinner film that feels like wood, making it preferable for highlighting premium walnut grain. If you ever refresh the piece, removing lacquer finishes can be part of restoring the wood’s natural character. Understanding how these finishes age can help decide whether removal and refinishing is the right next step.
How dangerous are the isocyanates in the catalyst, and how long do vapors persist?
Isocyanates are potent respiratory sensitizers requiring an air-supplied respirator. While solvent vapors dissipate within hours, the isocyanate reaction concludes once the film is dry to the touch, but uncured catalyst residues on tools or in mixed material remain a hazard until fully reacted.
If I search for a “catalyzed lacquer finish near me,” what should I ask a professional finisher?
Ask for their spray booth setup, specific product brand, and if they follow ASTM D2571 standards for chemical resistance testing. A professional shop should guarantee a fully cured, food-safe film with a uniform mil thickness appropriate for bar use.
Can I brush on catalyzed lacquer for cabinets if I don’t have spray equipment?
No, brushing is impractical. The fast solvent flash and rapid chemical cure will result in severe brush marks and an inconsistent film. The material is designed for spray application to achieve the thin, even, cross-linked layer necessary for chemical resistance.
How do I estimate the amount of material needed and manage the pot life for a large project?
Calculate surface area and consult the product’s coverage data sheet, then mix only a 2-3 hour supply per session. For large projects like multiple cabinets, stage your work into manageable sections to avoid wasting material that exceeds its pot life in the cup.
Ensuring a Lasting Finish on Walnut
The most important factor for a chemical-resistant bar top is the complete and proper cure of the catalyzed lacquer. This finish relies on a precise chemical reaction, so always mix the catalyst and resin according to the manufacturer’s specifications. In my experience, a poorly cured lacquer feels tacky and will fail under stress, while a fully cured film becomes a hard, inert barrier. Achieve this by applying thin, even coats in a dust-free environment with controlled temperature and humidity.
Select finishes from suppliers who practice ethical wood sourcing and develop low-impact chemistries. Steadily building your knowledge of wood technology and finish science leads to more durable projects and a lighter environmental footprint.
Citations and Authoritative Sources
- Walnut Bar Tops | Commercial & Home Bar Designs| EARTHY® TIMBER
- English Walnut Cross Cut w/ Caviar resin fill, epoxy pour w/ resin finish
- Lumber & Slab Inventory – Menomonie Specality Lumber – Menomonie Wisconsin 54751 – 715-505-0454
- Live Edge Black Walnut Bar Top/Mantle/Floating Shelf Slab 1501 | Lumber Shack
- Live Edge Black Walnut Kitchen Counter/Bar Top Slab 1008 | Lumber Shack
- What Is The Best Finish For A Walnut Table? (Solved!)
- Live Edge Bark Black Walnut Bar Top/Kitchen Table Top Slab 39000 – Lumber Shack
- Walnut Wood Varnish Bar Top Closure – 19.5 mm Synthetic Shank