
How Do You Remove Mold from Wood Without Damaging the Material?
You’ve found mold on a cherished table, a kitchen cutting board, or your floors, and your first thought is how to clean it without harming the wood. As a woodworker focused on materials, I treat mold not just as dirt, but as a biological agent that interacts with the wood’s structure.
We will cover how to safely kill mold spores, the right cleaning solutions for different wood types and finishes, and the critical steps to stop mold from returning.
I base this guidance on my own shop tests, where I’ve applied and assessed various cleaners on samples from pine furniture to maple cutting boards.
First, Know What You’re Dealing With: Mold on Wood
You need to spot the difference before you start cleaning. It changes your entire plan.
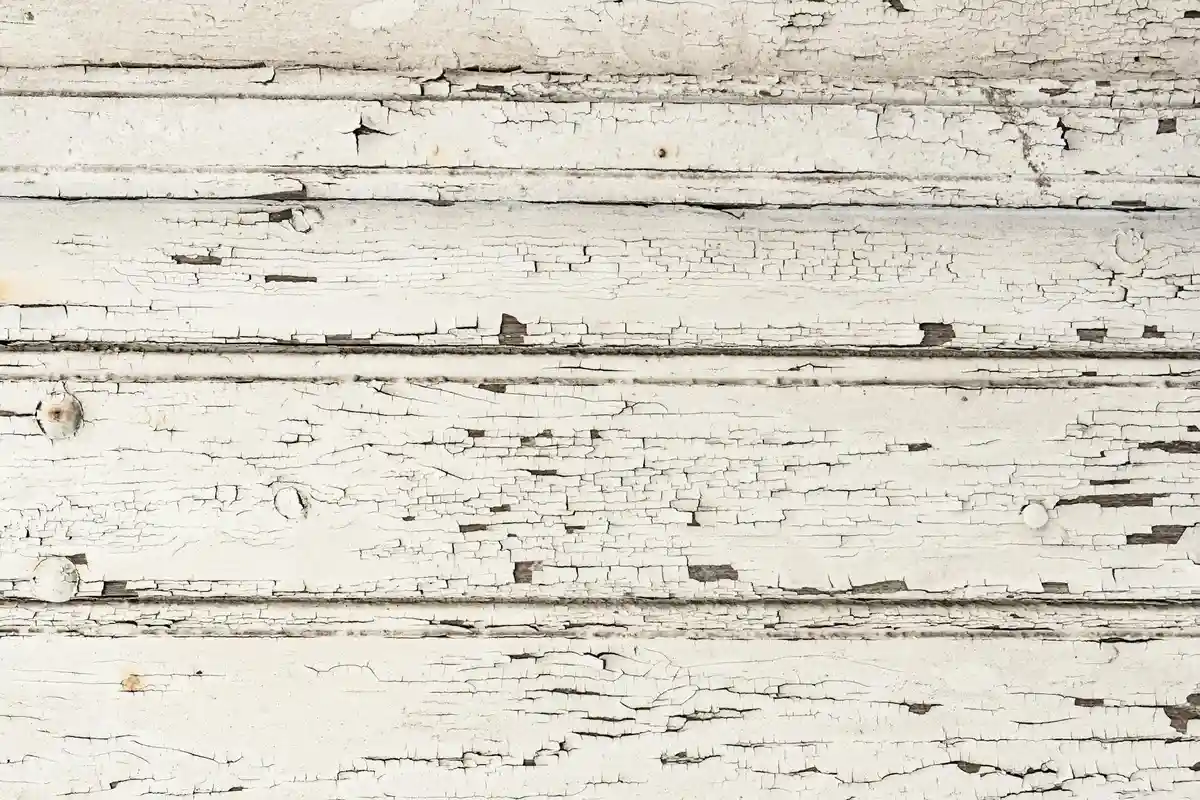
Surface mildew looks like a white or grayish, powdery film you can often wipe away with a dry cloth. It’s a surface-level nuisance, usually from high humidity. True mold is different. It appears in splotches of green, black, or blue and has a fuzzy or slimy texture. This is the stuff that sends out tiny roots called hyphae into the wood’s pores.
Why Wood is a Mold Magnet
Think of wood as a bundle of tiny straws. Those straws suck up moisture from the air. We call this being hygroscopic. It’s why a wooden spoon left in a damp kitchen feels wet. Mold spores are everywhere, floating in the air. When they land on damp wood, they find a perfect home: moisture to drink, wood sugars to eat, and warmth.
Common types like Aspergillus or Cladosporium sound scary, but the rule is universal. No moisture, no mold. I’ve seen it in my own shop on a stack of maple left near a leaky wall. The science is simple, but the damage is real.
The Simple Swab Test
Is it mold or just an old stain? Here’s a shop trick. Dampen a cotton swab with a drop of household bleach and gently rub it on a hidden spot. If the spot lightens or disappears after a minute, it’s likely mold or mildew. Dirt or most pigment stains won’t react. Always test in an inconspicuous area first to check for bleaching on the wood itself.
Surface Issue or Deep Problem?
This is the critical question. Press a fingernail into the stained wood. If it’s soft or crumbly, the mold’s digestive enzymes have started breaking down the wood’s cell structure. That’s deep damage. If the wood is still solid under the discoloration, you’re probably dealing with a surface colony. For furniture and floors, deep mold often means replacing the affected board. For a cutting board, deep mold means it’s time to retire it. You can’t sand away a biological problem that’s eaten into the fibers.
Toxicity & PPE: Your Safety Comes First
I treat every mold cleanup like I’m dealing with fine, toxic dust. It’s not about fear, it’s about respect for your health.
You must assume all mold can irritate your lungs, skin, and eyes, especially in an enclosed space. Repeated exposure can make you more sensitive to it over time. This isn’t a place for shortcuts.
Your gear is non-negotiable:
- Respirator: Use an N95 or, better yet, a P100 respirator. A basic dust mask from the hardware store is useless here. It doesn’t seal properly and won’t stop microscopic spores.
- Gloves: Thick nitrile gloves. Mold and harsh cleaners can both irritate skin.
- Goggles: Simple safety goggles that seal to your face. You do not want a splash of cleaning solution or a spore cloud in your eyes.
Work in a well-ventilated area. Open windows, use a fan to blow air *outside*, and contain the mess. For a large job on a floor, isolate the room with plastic sheeting if you can.
The Critical Note on Cutting Boards
Food safety changes everything. Many powerful mold cleaners, like bleach or ammonia solutions, can leave toxic residues that soak into the wood and leach into your food later. You must use food-contact-safe methods only. I’ll get to specific, safe recipes in the cleaning section, but this principle guides every choice for a board you eat from. Wood cutting board food safety also depends on the board’s condition and how you maintain it. Proper drying and storage help keep the surface safe for every use.
Lab/Shop Requirements: Tools and Solvents for the Job
Fighting mold isn’t just about scrubbing. You need the right gear to diagnose the problem, contain the mess, and apply the science correctly. Think of it like a surgery: you need diagnostic imaging, sterile tools, and the right medicine.
Diagnostic Tools: See What You’re Fighting
Jumping straight to cleaning is a mistake. First, assess the battlefield. Your goal is to understand the mold’s source and depth.
- Moisture Meter (Critical): This is your most important tool. Mold can’t grow on dry wood. I use a pin-type meter to check the moisture content in several spots. If the wood reads above 16-18% moisture content, you have an active water source that must be fixed first, or the mold will return. You can find reliable meters at any hardware store or online retailer.
- Bright Flashlight: Shine it across the wood surface at a shallow angle. This raking light reveals texture changes and faint spores your overhead lights miss. It helps you see the full extent of the fuzzy or speckled growth.
- Plastic Scraper or Putty Knife: Never use metal. Gently scrape a tiny test spot. If the mold stains penetrate deep into the grain, surface cleaning alone will fail, and you’re likely dealing with a salvage or refinishing project. The plastic prevents gouging the wood.
Cleaning Tools: Apply the Treatment Safely
These tools are for containment and controlled application. You want to kill and remove mold, not blast spores all over your shop or house.
- Soft Bristle Brushes (Nylon or Natural): Stiff brushes drive spores and stains deeper into open wood pores. A soft brush agitates the cleaning agent without damaging the surface. Keep one brush for applying cleaner and a separate, clean one for rinsing.
- Microfiber Cloths: They are superior to paper towels or rags. Microfiber traps spores and debris instead of pushing them around. Use damp cloths for wiping and dry ones for final buffing. Change them frequently.
- Spray Bottles: Use dedicated bottles clearly labeled for each cleaning agent (e.g., “Vinegar Soln,” “Peroxide”). A fine mist allows for even, controlled coverage without oversaturating the wood.
- Plastic Sheeting & Tape: For floors or large furniture, tape plastic sheeting to isolate the work area. This contains spores during cleaning and protects surrounding surfaces from your chosen solvents.
Common Agents: The Chemistry of Cleaning
You don’t always need harsh chemicals. These common household items are effective because of their specific chemical actions on mold’s structure and the wood’s surface. Here’s what each one does and where to find it. They are a natural alternative to chemical wood cleaners.
Distilled White Vinegar
This is a mild acid (typically 5% acetic acid). The acidity disrupts the mold’s cellular structure and inhibits regrowth. Understanding pH in wood cleaning explains why products are available as acidic or alkaline solutions. The right pH choice helps remove mold effectively while protecting the wood’s finish. It’s excellent for light, surface mold on finished furniture and non-porous wood sealants. Find it in any grocery store. Avoid using on unsealed wood like a raw cutting board, as the acid can be absorbed and affect taste.
Hydrogen Peroxide (3%)
This is an oxidizing agent. It breaks down mold at a cellular level through an oxidation reaction, effectively bleaching it. It’s my go-to for whitening mold stains on bare, light-colored woods like maple or pine. Always test on a hidden area first, as it can slightly lighten some wood tones. You buy this at any pharmacy.
Denatured Alcohol
Alcohol is a solvent and a desiccant (drying agent). It kills mold by breaking down its cells and evaporates quickly, which helps pull moisture from the wood. Use it for spot-cleaning mold on shellac or lacquer finishes, as it won’t damage those specific films. Get it from the paint section of a hardware store. It is highly flammable, so no sparks or open flames.
Baking Soda
When mixed with water to form a paste, baking soda (sodium bicarbonate) is a gentle abrasive and deodorizer. It’s perfect for scrubbing mold from porous, unfinished wood like a cutting board because it won’t leave a toxic residue. The mild abrasion helps lift stains from the top layer of grain. A box is available at any grocery store.
Mild Dish Soap
Use this as a first step for grimy mold. Soap is a surfactant-it breaks the surface tension of water, allowing it to penetrate and lift dirt and loose spores. A few drops in warm water is your initial wash to remove surface gunk before applying a dedicated killing agent like vinegar or peroxide. Any brand will do.
Setting Up for Success: Containment and Ventilation
You cannot clean mold if you are spreading its spores everywhere. Mold reproduces through microscopic spores that travel on air currents, like pollen. Disturbing the colony sends a cloud of these particles into your room. The single most important step before you touch the mold is to isolate the work area and control the airflow.
Build a Simple Containment Zone
Think of this as building a temporary, clean room in reverse. You are sealing the contaminated area off from the rest of your home. For a piece of furniture or a section of floor, you only need a few basic items.
- Plastic sheeting (4-mil or thicker, available at any hardware store).
- Painter’s tape (blue or green, as it removes cleanly from most surfaces).
- A utility knife or scissors.
First, move the item to the center of the room if possible. Drape the plastic from the ceiling or wall to create walls around your work zone. Tape all seams and edges securely to walls, floor, or ceiling. The goal is a sealed tent. If working on a fixed floor, build walls around the affected area, leaving one side as an entry flap. Always tape plastic to itself where it overlaps.
I use this method in my shop when sanding epoxy or milling spalted wood. A common pitfall is not making the zone large enough. Give yourself ample space to move and place cleaning supplies without brushing against the plastic walls.
The Critical Role of Cross-Ventilation
Containment stops spores from spreading, but ventilation removes them from the air you are breathing. This is non-negotiable for health and safety. You need to create a deliberate draft that pulls contaminated air out of the containment zone and your home.
Open windows or doors on opposite sides of the room to create a cross-breeze. Place a box fan in one window, sealed around the edges with plastic and tape, facing outdoors. This setup creates negative air pressure inside your containment zone. Air (and spores) will be pulled into the zone from the room and then exhausted directly outside.
Never point a fan *at* the mold or have fans blowing air around the room. That just stirs up the spore cloud. Effective remediation means controlling the spore’s path: from the wood, into the contained air stream, and directly out of the building.
FAQ: What is DIY Mold Remediation Containment?
It’s the process of physically isolating a mold problem to clean it safely without contaminating other areas. Professionally, it involves heavy plastic, negative air machines, and airlocks. For a household project, we scale it down. The concept is identical: seal the space, control the airflow, exhaust to the outside.
The cost is very low. A 10×25 foot roll of 4-mil plastic is about fifteen dollars. Painter’s tape and a box fan you might already own complete the kit. This small investment prevents a simple cleaning job from becoming a whole-house contamination issue.
The Core Method: How to Clean Mold Off Wood Surfaces
Think of this process as the universal first aid for mold on any finished, non-porous wood surface. A varnish, polyurethane, or lacquer finish creates a barrier. This means your battle is on the surface, not deep within the wood fibers. Follow these steps in order every time you need to clean mold off wood.
The single most important step happens before you apply any liquid: you must remove the dry, loose spores. Skipping this just pushes mold around and drives spores deeper.
- Dry Brushing (Outdoors or in a Well-Ventilated Area)
Take the piece outside. Using a soft-bristle brush, like a clean paintbrush or dry toothbrush, gently brush the moldy areas. Always brush with the grain to avoid scratching. This captures the powdery, airborne spores so they don’t spread inside your workspace. For floors, use a soft-bristle broom and dustpan, then vacuum with a HEPA filter if possible. - Applying the Cleaner
Dampen a clean, white cloth with your chosen cleaning agent. Do not soak it. A sopping wet cloth risks forcing moisture under the finish or into end grain. Wipe the affected area with the damp cloth to apply the solution. Let it sit for the recommended time for your cleaner (usually 5-10 minutes). This dwell time is non-negotiable for killing mold. - Gentle Scrubbing with the Grain
Use a fresh cloth, a soft nylon scrub pad, or that soft brush again, dampened with your cleaning solution. Gently scrub the area, following the wood’s grain pattern. You are not sanding; you’re agitating the surface to lift the remaining mold bodies. For textured surfaces, the brush is often better than a cloth. - Immediate and Thorough Drying
This is the step that prevents mold from coming right back. Immediately after scrubbing, use a fresh, dry, absorbent cloth to wipe the area completely dry. Follow up with a second dry cloth if needed. I keep a stack of clean shop towels just for this. Your goal is to return the wood to a dry state faster than new mold can grow.
Choosing Your Cleaner: From Vinegar to Commercial Sprays
The “best” cleaner depends on the wood’s use and your finish. Cleaning the surface before staining ensures even color uptake and adhesion. A quick wipe after staining helps remove residue and set the finish. Here’s how common options work from a material science perspective.
Distilled White Vinegar
Vinegar is a weak acetic acid (typically 5% acidity). It works by lowering the pH on the wood’s surface, creating an environment where mold struggles to survive. It’s safe for most finishes and excellent for how to clean mold off wood furniture. Use it straight from the bottle. The smell dissipates as it dries. Do not mix vinegar with hydrogen peroxide or bleach.
Hydrogen Peroxide (3% Solution)
This is an oxidizing agent. It attacks mold by breaking down its cell walls, similar to how it bleaches hair. It’s very effective and leaves no residue. I use it on lighter woods where vinegar might cause slight darkening. Test on an inconspicuous spot first, as it can sometimes dull a finish with repeated use.
Diluted Dish Soap
For very light, superficial mildew (that dusty gray film), a teaspoon of clear dish soap in a quart of warm water can work. The surfactants lift the mold off the surface. This is a cleaner, not a killer; it removes mold but may not kill the roots. It’s a good first, gentle attempt on a fragile antique finish.
Now, for the specific questions I get in the shop:
“Does tea tree oil kill mold on wood?” Yes, it has antifungal properties. But it is expensive, has a potent scent many dislike, and offers no cleaning advantage over vinegar or peroxide for surface mold on finished wood.
“Can you use Mold Armor or similar chemical treatments on wood?” You can, but carefully. These potent chemical sprays are formulated for exterior deck wood and siding. Always test on your furniture’s finish in a hidden area. Never, ever use them on a cutting board or any food-contact surface.
Avoid bleach and ammonia completely. Bleach (sodium hypochlorite) is mostly water. It bleaches the visible mold on the surface but does not penetrate to kill the roots in porous wood. On a finish, it can break down the coating, leaving a dull, damaged spot. Ammonia can react poorly with certain finishes and is simply unnecessary given safer, more effective options.
Tailoring the Approach: Furniture, Floors, and Cutting Boards
Mold is a moisture problem with a biological cause. Your cleaning strategy must respect the wood’s construction and surface. Using the wrong method can ruin a finish or drive moisture deeper into mahogany surfaces.
For Finished Furniture: Preserving the Surface
The finish-varnish, lacquer, shellac, or paint-is your first line of defense. A sound finish often seals the wood, meaning mold is only on the surface. Your goal is to kill and remove it without softening or clouding that protective layer.
Start with the gentlest option. Mix a few drops of plain dish soap in a quart of warm water. Dampen a soft cloth, wring it out until it’s barely damp, and wipe the area. Dry it immediately with another cloth. This simple soap solution is often all you need for light, surface mold on a well-sealed piece.
If mold persists, step up to distilled white vinegar. Its mild acidity kills most common molds. Use it full strength in a spray bottle, mist the area lightly, let it sit for one minute, then wipe dry. Never let vinegar pool or soak in. Test any cleaner on an inconspicuous spot first, like the back of a leg.
For Wood Floors: Managing Moisture and Gaps
Floors present a unique challenge: the seams between boards. These are direct pathways to the subfloor. Flooding a floor with liquid is the fastest way to cause cupping, swelling, and a much bigger mold problem underneath.
You must use a well-wrung mop. I mean it should feel barely damp to your hand. For a cleaning solution, a cup of vinegar per gallon of warm water works well. Mop a small section and immediately dry-buff it with a clean, dry towel. Work in three-foot square sections to ensure no moisture sits on the wood for more than a minute.
Pay special attention to mold in gaps. Use a soft-bristled brush (an old toothbrush works) dipped in your cleaning solution to gently scrub the gap, then dry it meticulously with the corner of a towel. The key is mechanical removal without adding water volume.
For Unfinished & Porous Wood
Unfinished wood, like the back of a cabinet or a rustic shelf, has no seal. Mold hyphae (the root-like structures) can penetrate the surface. Here, you need a stronger cleaning solution and longer contact time.
A solution of one part distilled white vinegar to one part water is a good start. Apply it and let it sit for up to 10 minutes to penetrate and kill the mold at a deeper level. Scrub gently with a soft nylon brush. After cleaning, drying is critical. Use fans and dehumidifiers. The wood must dry completely to its core, especially when removing mold from teak wood.
Even after the mold is gone, you may see a superficial stain in the wood fibers. Once the piece is fully dry-wait 48 hours-you can often sand these stains away with 120-grit sandpaper. This removes the stained surface fibers, revealing clean wood underneath. Always sand with the grain.
For Cutting Boards: The Food-Safe Protocol
This is non-negotiable. You cannot use harsh chemicals on a surface that touches food. This three-step method is what I use in my own shop for cleaning and sanitizing.
- Abrasive Cleaning: Sprinkle the entire board with coarse kosher salt. Cut a lemon in half and use it as a scrubber, squeezing juice as you grind the salt into the surface. The salt provides abrasion, and the citric acid from the lemon helps break down organic material and has mild antibacterial properties.
- Sanitizing: Rinse the board. Now, sanitize it. You have two safe options: spray with 3% hydrogen peroxide or wipe with full-strength white vinegar. Let your chosen sanitizer sit on the surface for five minutes, then rinse. Do not mix hydrogen peroxide and vinegar, as this creates a corrosive acid.
- Rehydration: Wood moves with moisture. Cleaning strips moisture out, so you must put safe moisture back in. Use food-grade mineral oil. Apply a heavy coat, let it soak in for several hours or overnight, then wipe off the excess. This final oiling prevents the dry, thirsty wood from absorbing bacteria or moisture from your next food prep session.
When Cleaning Isn’t Enough: Dealing with Deep Infestation
Surface cleaning works when mold is a topical problem. The real challenge begins when the organism has started a colony inside the wood fibers. My rule in the shop is simple: if it smells musty even after cleaning, the problem is deeper than it looks.
How to Assess if Mold is Too Deep
You need two diagnostic tools: your senses and a moisture meter. Your fingers are the first test. Press on stained areas. Does the wood feel soft, spongy, or does it crumble? True rot has begun if the wood structure is compromised. This is common in floors or furniture legs that have sat in dampness.
Next, use a pin-type moisture meter. Readings consistently above 16% moisture content (MC) in a dry indoor environment mean the wood is wet enough to sustain active mold growth and further decay. Compare a reading in the moldy spot to a known dry spot on the same piece. A major difference confirms an internal moisture problem. To assess thoroughly, measure wood moisture content at multiple spots. This helps map moisture patterns and guide remediation.
The Last Resort: Contained Sanding
When you need to know how do i kill black mold on wood that has penetrated the surface, mechanical removal is the only sure answer. Chemical killers can’t reach deep hyphae (the root-like filaments). This is a last resort due to the spore cloud it creates.
You must treat this like a hazardous material operation. Here is my contained method:
- Isolate the piece in a well-ventilated area, like a garage with the door open.
- Don a P100 respirator, goggles, and gloves.
- Shroud the area with plastic sheeting taped to the piece, creating a containment zone.
- Use a random orbital sander connected to a HEPA-filtered vacuum. The vacuum must be running before the sander touches the wood. This captures spores at the source.
- Sand just enough to reach clean, unstained wood. Start with 80-grit to remove material quickly, then move to 120-grit.
- After sanding, while still masked, wipe the entire containment area and piece with a damp cloth, then vacuum with the HEPA vacuum.
- Seal the sanded dust in a plastic bag before disposal.
This process physically removes the infected wood cells. Once done, you can apply a disinfectant like diluted vinegar to the fresh surface for final cleanup before refinishing.
The Hard Truth: When to Discard and Replace
Wood is a renewable resource. Your health is not. There are times when remediation is not worth the risk or effort, especially when dealing with chemically treated wood.
Discard the wood if you find structural rot. If a floor joist, table leg, or cutting board is soft all the way through, its strength is gone. No amount of cleaning or sanding can restore the crushed cellulose fibers that give wood its strength. Replacing it is the only safe option.
The exception is an irreplaceable antique with high sentimental value. For those items, the calculus changes. Aggressive, professional restoration may be justified. For a generic pine shelf or a compromised cutting board, replacement is the wiser, safer choice. It also gives you the opportunity to select sustainably sourced wood for your new project.
After the Cleanup: Drying and Preventing Its Return
You can scrub a surface perfectly clean, but if the wood underneath is damp, the mold will be back in days. Thorough drying is the single most critical step in mold remediation, more important than any cleaner you use. Mold is a moisture problem first and a cleaning problem second.
Immediately after cleaning, get air moving. Use fans. Run a dehumidifier. For a floor or large piece, you may need to do this for several days. Do not assume it’s dry because the surface feels cool. Wood is a sponge; moisture hides deep within the cells. I rely on a pin-type moisture meter to tell the truth. Your goal is to get the wood’s internal moisture content consistently below 12%. This is the safe zone where mold spores go dormant because they lack the water to activate.
To Re-Finish, or Not to Re-Finish?
Once the wood is truly dry, you must decide on a new finish. Think of a finish as a fresh bandage for a healed wound. The cleaning process, especially with vinegar or bleach, often strips away the existing seal. Leaving the wood bare invites moisture back in.
For kitchen items like cutting boards and butcher blocks, re-applying a food-safe mineral oil or beeswax blend is non-negotiable. It protects the wood and is safe for food contact. For furniture or floors, a fresh coat of finish seals the wood’s pores and creates a physical barrier against ambient humidity. If the original finish was oil-based polyurethane, sand lightly and apply a new topcoat. For painted items, a primer-sealer is your best friend before repainting.
Building a Mold-Resistant Environment
Prevention is about controlling the environment, not just the wood. Here is your checklist:
- Eliminate Water Sources: This is non-negotiable. Fix every leaky pipe, faulty roof seal, and clogged gutter. Mold can’t grow without liquid water.
- Manage Ambient Humidity: Buy a simple hygrometer. Aim to keep your home’s relative humidity below 60%. In damp basements or seasons, a dehumidifier is a necessary tool, not a luxury.
- Promote Air Circulation: Stagnant air creates micro-climates of moisture. Use ceiling fans. Don’t push furniture directly against exterior walls. In storage areas, leave space between items and the wall.
- Store Smartly: Never store wood furniture or heirlooms in a damp basement or non-climate-controlled storage unit. For long-term storage, use moisture-absorbing desiccant packs in sealed containers.
This isn’t about perfection, it’s about tipping the balance. You make the environment slightly less hospitable, and the mold simply can’t gain a foothold.
Calling the Pros: When DIY Wood Mold Remediation Isn’t Wise
Knowing when to stop is as important as knowing how to start. In my shop, I tackle most problems myself. But with mold, crossing a certain threshold turns a cleaning job into a health and construction project. The EPA’s guideline of 10 square feet is a solid bright line. That’s about the size of a standard interior door. If the patch is larger, the risk of spore aerosolization during cleaning is too high for a safe DIY approach.
Beyond sheer size, three other conditions mean you should pick up the phone, not the scrub brush.
- HVAC Contamination: If you suspect mold in your ductwork or on a system component, stop. Forced air will distribute spores to every connected room. Cleaning one piece of furniture becomes pointless.
- Structural Compromise: Probe the wood gently with a screwdriver. If it’s soft, punky, or crumbles, the fungal hyphae have decayed the wood cell structure. This isn’t surface cleaning anymore; it’s repair or replacement.
- Health Concerns: If anyone in the home has asthma, immune issues, or mold allergies, do not experiment. Professional containment is non-negotiable.
Professional Containment vs. Your Plastic Sheet
You might think, “I’ll just tape up some plastic.” I’ve tried that for dust. It’s not the same. Professional containment is an engineered airlock system, not just a physical barrier.
My DIY plastic curtain keeps sawdust from drifting into the house. A remediation crew’s containment keeps microscopic spores from escaping the work zone. They use specialized equipment to create negative air pressure. Air is actively sucked *out* of the contained area through a HEPA-filtered exhaust machine, preventing spores from leaking into your clean living space. Your taped-up sheet just sits there.
They also use true HEPA air scrubbers inside the containment to clean the air during work, not just a box fan with a furnace filter. The difference is in the particle size captured and the air changes per hour. It’s a surgical approach versus a hopeful one.
What Drives the Cost of Professional Remediation?
If you need a pro, cost is a fair question. Don’t expect a flat fee. It’s like asking “how much does a cabinet cost?” The price hinges on three main factors.
Area Size and Accessibility are the biggest drivers. A moldy 4×8 sheet of subfloor in an open basement is one thing. The same mold spread across the joists and subfloor in a cramped crawl space triples the labor time. Every minute in a Tyvek suit in a tight space costs more.
The Materials matter, too. Remediating mold on non-porous tile is fast. On porous wood, it’s slower and more meticulous. If the wood is structural and can’t be removed, the cleaning protocol is more intensive than a simple cut-and-replace.
For a frame of reference, a contained, professional job for a clearly defined 30-40 square foot area on accessible wood might range from $1,500 to $3,000. A whole basement or an attic with compromised sheathing can easily reach five figures. Always get a detailed assessment and scope of work, not just a quote over the phone.
Remediation FAQ: Mold on Wood
1. When should I use vinegar versus hydrogen peroxide on moldy wood?
Use distilled white vinegar on sealed, finished wood where its acidity can effectively treat the surface without penetrating. Opt for 3% hydrogen peroxide on bare, light-colored woods where its oxidative bleaching action is needed to remove stains from within the top layers of grain, especially when working with delicate or sensitive finishes. Understanding the chemistry behind wood stains can also guide you in choosing the right treatment for your wood projects.
2. How can I definitively tell if a dark spot on wood is mold or just a stain?
Perform a chemical test: apply a drop of household bleach to the spot; if it lightens within 1-2 minutes, it’s likely biological mold. Inert stains from tannins, dyes, or metal corrosion will not react to this oxidizer.
3. Is it safe to use a commercial “mold-killing” spray from the hardware store on any wood project?
Only on exterior or non-porous, finished surfaces after testing for finish compatibility; never use them on cutting boards or food-contact surfaces. These sprays often contain harsh quaternary ammonium compounds or chlorine-based chemicals unsuitable for unfinished wood or food safety.
4. Why is controlling moisture content more critical than the cleaning agent used?
Mold hyphae become biologically dormant below 16% wood moisture content, making drying the primary remediation goal. Cleaning agents address surface colonies, but without removing the internal moisture source, regrowth from within the wood structure is inevitable.
5. Do homemade cleaning solutions like vinegar or peroxide have a shelf-life for remediation use?
Yes, their efficacy degrades; hydrogen peroxide decomposes to water and oxygen when exposed to light, and vinegar’s acetic acid concentration can slowly volatilize. For reliable results, use fresh, unopened bottles and do not store diluted solutions for future mold remediation work.
Final Thoughts on Mold and Wood Integrity
The most important step is to control moisture. Mold cannot grow without it. Your first job is always to find and fix the source of dampness. Everything else is just cleaning up the symptom.
Good stewardship of wood means understanding its material science. Learning how wood reacts to its environment is the best tool for preventing problems and preserving your work for generations.
Expert Resources and Citations
- r/BeginnerWoodWorking on Reddit: How to get rid of mold on wood?
- How To Remove Mold From Wood
- No. 3: Cleaning Mold on Wood
- Safe way to remove black mold from wood
- Bleaching mold stains | American Association of Woodturners
- What Kills Black Mold on Wood – Core By W.B. Arthur
- How to Clean Mold From a Wood Floor : 4 Steps – Instructables
David Ernst
David is a veteran woodworker. He is now retired and stays in his cabin in Wisconsin which he built himself. David has 25+ years experience working in carpentry and wood shops. He has designed and built many small and large wood projects and knows the science behind wood selection like the back of his hand. He is an expert guide on any questions regarding wood material selection, wood restoration, wood working basics and other types of wood. While his expertise is in woodworking, his knowledge and first hand experience is far from 'woody'.