
How Do Wood Stains Work Chemically? A Woodworker’s Guide to Selection and Application
Stain is more than just colored paint for wood. It’s a chemical interaction, and knowing how it works stops blotchy finishes and wasted time.
I will explain the science behind stain penetration and give you my shop-tested methods for perfect results every time. We will cover the fundamental difference between pigments and dyes, how wood grain and density dictate your choice, and the precise steps for an even, durable coat.
My advice comes from mixing stains in the lab and applying them in the shop, testing how chemistry meets craft on real boards.
The Simple Chemistry Behind Every Wood Stain
A wood stain is not paint. It is a colored liquid designed to soak into the wood’s fibers, changing its color from within rather than coating the surface. This fundamental difference is why stain highlights the wood’s natural character instead of hiding it.
Think of a dry sponge. Drip colored water on it, and the sponge absorbs the liquid, taking on its hue. Wood behaves similarly. Its porous structure pulls the stain in. This direct analogy answers your core question: wood stain works by penetrating the wood.
I’ve refinished many pieces where a previous owner used stain like paint. The result was always a flat, lifeless film. Knowing stain soaks in is the first step to a beautiful finish.
Mechanism of Action: Staining as a Chemical Journey
Staining is a three-phase chemical process. First, a solvent carries colorants into the wood. Next, the solvent evaporates. Finally, the binder left behind cures, locking the color in place.
Wood is not solid. Under magnification, you see a network of vessels and tracheids. These long, hollow cells act like microscopic straws, channeling the stain deep along the grain. In my shop, I sand end grain smoother than face grain. This helps prevent it from absorbing too much stain and becoming darker than the rest of the board.
Why Stains Penetrate: The Role of Solvents and Capillary Action
Solvents like mineral spirits or water are the delivery trucks. Their job is to carry colorant molecules and wet the interior wood surfaces so deposition can happen.

The driving force is capillary action. This is the same pull that draws water up a narrow tube. Capillary action works because the attraction between the liquid and the pore walls is stronger than the liquid’s internal cohesion. In practice, a thinner stain penetrates deeper. A common pitfall is using a gel stain on a porous wood like oak; it may not soak in fully, leaving a superficial coat.
If your stain pools on the surface, the wood pores might be clogged with sanding dust or a prior finish. Wipe the wood with a tack cloth and test on scrap.

Stain Ingredients: Solvents, Colorants, and Binders Under the Microscope
Every stain can be broken into four parts: solvent, colorant, binder, and additives. Treating stain like a recipe lets you predict its behavior and fix problems before they happen. Knowing what’s in the can is your best tool.
Pigments vs. Dyes: The Two Types of Colorants
All color comes from either pigments or dyes. They are not the same.
Pigments are fine, solid particles. They do not dissolve. Pigments settle into the wood’s pores and surface grooves, much like mud collecting in a drain grate. This is why they accentuate grain patterns. On oak, pigments make the large pores pop with color.
Dyes are molecules that dissolve fully in the solvent. Dyes stain the wood’s cellulose fibers themselves, similar to how tea saturates a cotton rag. This gives a more even, transparent color. Pigments, by contrast, sit on the surface for more opacity and grain contrast. This highlights pigments vs dyes wood stains when choosing a finish. I use dyes on maple or cherry when I want rich color without masking the subtle grain.
Here is how they compare:
| Property | Pigments | Dyes |
|---|---|---|
| Primary Action | Fill pores and surface texture | Penetrate and color wood fibers |
| Visual Effect | Highlights grain contrast | Offers uniform, translucent color |
| Fading Resistance | Typically very good | Some fade with UV light; check the label |
| Best Wood Match | Open-grained woods (oak, ash) | Tight-grained or figured woods (maple, walnut) |
Many commercial stains use both. From my tests, a dye stain under a pigment stain can create incredible depth. Always shake a pigment stain vigorously. The solids settle fast.
The Binder: The Glue That Holds Color In Place
The binder is the film-forming ingredient that remains after the solvent evaporates. It cures to create a matrix that traps the colorants. The binder’s chemistry defines the stain category: oil-based, water-based, or lacquer-based.
Oil-based binders, like modified linseed oil, cure by reacting with oxygen. They dry slowly, allowing for easy wiping and blending. Water-based binders are usually acrylic resins that cure as water evaporates. They dry quickly and have minimal odor. Lacquer-based binders use resins like nitrocellulose and dry almost instantly, favored for production work.
Your binder choice dictates your workflow. Oil-based stains are forgiving and penetrate deeply but require chemical cleanup and can amber over time. Water-based stains raise wood grain; I always lightly mist my sanded piece with water before staining to pre-raise and sand it smooth. If a finish feels tacky days later, the binder may not be curing due to cold temperatures or contamination. Move the piece to a warmer, drier space.
How Stain Interacts with Wood: Penetration vs. Coating
Think of wood like a bundle of straws. Stain works by flowing into these tubes. An open-pored wood like red oak has wide, hollow straws. A tight-grained wood like hard maple has straws that are nearly glued shut. This is why they accept stain so differently.
Oak sucks up stain deeply, emphasizing its dramatic grain pattern. Maple resists penetration, often leading to a weak, washed-out color unless you use a specific technique. The fundamental rule is that stain color comes from pigment or dye trapped inside the wood’s structure, not from a layer sitting on top.
This brings us to blotchiness, the bane of staining pine, cherry, and poplar. It’s a two-part problem. First, these woods have areas of wildly different density within the same board. The soft, porous earlywood absorbs stain like a sponge, while the hard, dense latewood barely takes any. Second, in woods like pine, sap and natural resins can block the “straws” unevenly. The stain can’t penetrate consistently, creating dark, ugly splotches.
Factors That Control Stain Penetration
You control the stain’s journey. Ignoring these factors is why projects fail.
Wood Density is the primary governor. Dense woods (maple, birch, cherry) absorb less. Soft, porous woods (pine, ash, oak) absorb more. There’s no way around this physics.
Grain orientation changes everything. Cutting across the “straws” exposes their open ends. End grain will always, always drink more stain and turn darker than face grain. You must pre-seal it.
Moisture content is a hidden variable. Wood at 12% moisture content has water molecules already filling some of those tiny tubes. If you apply an oil-based stain, it can’t penetrate as well, leading to poor color and adhesion. Always work with wood acclimated to your shop’s environment.
Surface sanding grit creates the pathway. Sanding to 150 grit leaves a slightly textured surface that stain can grip. Sanding to 220 grit or higher polishes and closes the surface cells, limiting penetration. For most staining, I stop at 150 grit. For a very even, lighter color on a blotch-prone wood, I might go to 180, but never finer.
My shop method for predictable results is simple. I sand the entire piece to 150 grit. Then, I take a damp rag and wipe the surface. This “raises the grain” and shows me exactly where the end grain and softer areas are. After it dries, I sand those specific spots lightly again with 150 grit to manage absorption. This one extra step prevents most surprises.
Choosing Your Stain: Oil-Based, Water-Based, and Gel Stains Compared
People always ask, “what’s better, oil or water?” The real answer is, neither is universally better. They are different tools. The best one depends on your project, your schedule, and your shop conditions. The choice comes down to chemistry.
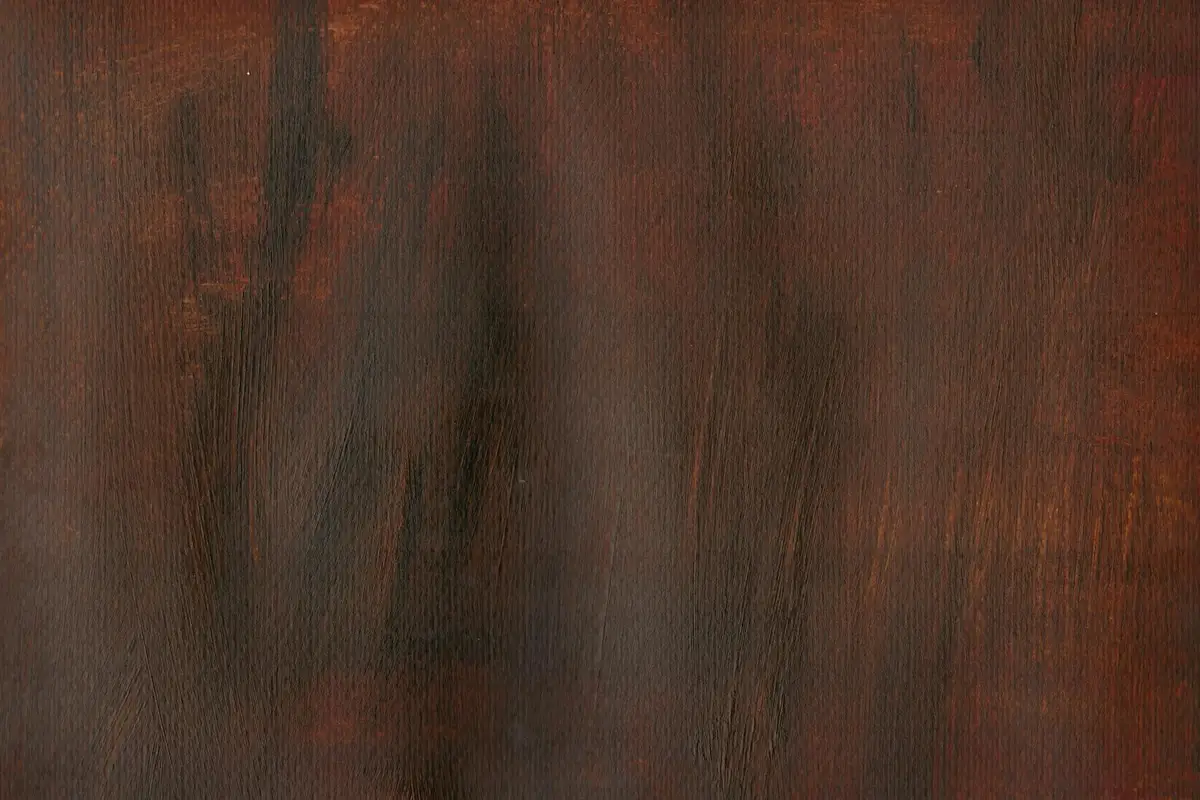
Oil-based stains use mineral spirits as a carrier. This solvent is great at penetrating deep into wood pores. The pigment and dye particles ride this solvent inward. This deep penetration creates rich, warm color that many woodworkers prefer for traditional furniture. Pairing this with oil finishes wood furniture application can seal the color and add protection. It’s a natural next step after staining to achieve a durable, cohesive look. The trade-off is time. These stains need 6 to 24 hours to dry before you can topcoat. They also require mineral spirits for cleanup.
Water-based stains use water as a carrier. The science here is about suspension; the colorants are held in microscopic acrylic or urethane resins. Water evaporates much faster than mineral spirits. This means a water-based stain can be dry to the touch in 30 minutes and ready for a topcoat in just 2 hours, a huge advantage for indoor projects. The finish is also clearer and doesn’t yellow over time like oil can. Cleanup is with soap and water.
Gel stains are a third, crucial option. They are essentially oil-based stains with thickeners added, creating a paste-like consistency. Because a gel stain sits on the wood’s surface more than it penetrates, it’s the best choice for vertical surfaces, end grain, and woods like pine or cherry that blotch easily. It gives you far more control. You wipe it on, wait, and wipe off the excess. It doesn’t run or drip. Cleanup is still with mineral spirits.
Project Match Guide: Which Stain Type for What Job
Use this simple list to match the stain chemistry to your work. I’ve tested these recommendations on hundreds of boards in my shop.
- Use Oil-Based Stain For: Furniture where you want deep, warm color and grain emphasis. Think oak tables, walnut chairs, or mahogany casework. It’s the classic choice for a reason. Durability is good, but it must be protected with a topcoat like polyurethane. The long dry time is its main drawback.
- Use Water-Based Stain For: Any indoor project where speed and low odor are priorities. Kids’ furniture, bookshelves, or any piece you need to finish in a day. Its durability under a topcoat is excellent, and it resists yellowing. The fast dry time means you must work quickly and avoid overlaps to prevent lap marks.
- Use Gel Stain For: Doors, cabinets, and trim. Its non-drip formula is perfect for vertical panels. It’s also my go-to for softwoods like pine or fir, and for blotch-prone hardwoods like maple or cherry. You get even, predictable color. Durability is similar to oil-based stains. It is the easiest type for a beginner to control.
Cleanup confirms the chemical divide. Oil and gel stains need a dedicated solvent like mineral spirits. Water-based stains clean up at the sink. Always have the right cleaner ready before you pop the can open.
The Wood Itself: How Species and Grain Dictate Your Stain Result
Choosing a stain begins with looking at the wood, not the color chart. The species and its internal structure control the final result more than any product can. You cannot fight the wood’s natural tendencies, so your first job is to understand them.
Staining a piece of pine is a fundamentally different task than staining a piece of poplar, even though both are common and inexpensive. Pine has areas of very soft earlywood and hard latewood that absorb liquid at drastically different rates. Poplar, while more uniform, has a greenish-gray heartwood that can fight your chosen color, creating muddy results. Recognizing these differences before you open a can saves time, money, and frustration.
The goal is to work with the wood’s grain and density, not against it, to achieve a beautiful, predictable finish.
Working With Common Woods: Pine, Oak, Maple, and Cherry
Each common wood has a personality. Here is how to handle them.
Pine: The Battle Against Blotching
Pine blotches because its growth rings are a tale of two densities. The light-colored, spongy earlywood soaks up stain like a thirsty sponge. The darker, harder latewood resists it. This creates a high-contrast, splotchy pattern that most find undesirable for furniture.
The fix is not a better stain, but a prepared surface. A pre-stain wood conditioner is non-negotiable for pine. These are typically thin, fast-drying varnishes or sealers that partially fill the porous earlywood. They create a more uniform surface for the stain to adhere to.
Apply conditioner liberally, let it soak in for the time specified on the can (usually 5-15 minutes), then wipe off the excess before it gets tacky. Stain over it within the recommended window, typically two hours. The result is a muted, softer, and gloriously even color that still shows the grain.
Oak: The Pigment Stain Champion
Red and white oak have large, open pores arranged in distinctive grain patterns. These pores are perfect tiny cavities for pigment particles to settle into. This is why oak takes pigment stains so well and looks so rich. The pigments collect in the pores, accentuating the grain texture rather than hiding it.
You can use either oil-based or water-based stains on oak with great success. For a pronounced, rustic look, apply a dark stain and wipe it off vigorously. The pigment will remain in the pores. For a more subdued effect, use a gel stain, which sits more on the surface, or a dye stain for a more uniform color with less grain emphasis.
Maple and Cherry: The Case for Dyes
Maple and cherry have a tight, closed-pore structure. Their beauty is in their smoothness and subtle figuring, like the delicate curls in bird’s-eye maple or the silky ribbons in cherry. Pigment stains sit on top of this dense surface and can look muddy, blotchy, and obscure the very figure you want to highlight.
For these woods, dye stains are your best tool. Dyes are microscopic colorants that dissolve into the carrier (water, alcohol, or oil). They penetrate the wood’s cell walls, tinting it from within. This colors the wood evenly without masking the grain.
You can apply a light, diluted pigment stain for a subtle tint, but for deeper, richer colors on maple or cherry, a dye is the professional’s choice. Think of it this way: pigments color the *texture* of oak, but dyes color the *substance* of maple. For cherry, which darkens naturally with light exposure, a very light dye or even just a clear finish that allows the natural aging process is often the most elegant solution.
Your Stain Application Workflow: A Shop-Proven Step-by-Step Guide
Forget the guesswork. This is the method I use in my own shop for how to apply stain to wood. It works on every project, from a pine shelf to an oak table. Follow this linear, foolproof protocol from bare wood to a perfectly sealed finish.
Step 1: Surface Preparation is Everything
This step determines your final result more than the stain itself. You are preparing a canvas. The goal is a uniformly textured surface so stain absorbs evenly. Start sanding with the grain using 120-grit paper to remove major tool marks and plane lines. Move to 150-grit for final smoothing. For stain, I almost always stop sanding at 150-grit because it leaves the wood open enough for good stain penetration without highlighting tiny scratches. Going to 220-grit or higher can burnish the surface, potentially causing the stain to sit on top and look blotchy.
After sanding, you must remove every speck of dust. It mixes with stain and finish, creating a rough, gritty surface. Use compressed air first, then go over the entire piece with a tack cloth. Do not skip this.
When and How to Apply a Pre-Stain Wood Conditioner
A pre-stain conditioner is a thin, fast-drying sealer. It partially fills the largest pores in the wood’s grain. This limits how much stain those pores can drink up, preventing dark, splotchy areas. Think of it like applying primer to a porous drywall before painting; it creates a more uniform base for better stain absorption.
Which woods always need it? The usual suspects are softwoods and close-grained hardwoods with uneven density:
- Pine
- Fir
- Alder
- Birch
- Maple (especially soft maple)
Here is the application protocol. Use a clean rag or brush to flood the surface with conditioner. Let it soak in for 5 to 15 minutes (check the can label). Then, wipe off every bit of the excess with a clean rag. Let it dry completely, usually for one hour, before applying your stain. If you don’t wipe it all off, you’ll seal the surface completely and the stain won’t take.
Step 2: Applying the Stain – Technique Over Strength
You do not “paint” stain on. You control how long it interacts with the wood. The universal method is “flood, wait, wipe.” Using a lint-free rag (my preference for control) or a natural bristle brush (for speed on large, flat panels), apply a heavy, wet coat over a manageable area. Ensure the wood is fully saturated. Let it sit. This “wait” time is your control dial. The longer the stain sits before you wipe, the darker the final color will be. Start with 5 minutes, then wipe all the excess off with a clean rag, always wiping with the grain. For a darker shade, let the next section sit for 10 minutes.
How many coats of stain will you need? Almost always, just one. A second coat rarely adds significant color; it mostly just darkens the tone slightly. If you want it much darker, you needed a longer initial wait time or a darker stain. Applying multiple heavy coats can create a muddy, plastic-like look and prevents proper sealing later.
Step 3: Sealing and Protecting the Stained Wood
This is non-negotiable. Do I need to seal a stain? Yes, absolutely. Stain is colorant only; it provides zero protection against moisture, scratches, or heat. The topcoat seals and protects the wood and the stain you worked so hard to apply.
Always let your stain dry fully according to manufacturer’s instructions, usually 8-24 hours. For your topcoat, follow the solvent rule: like over like. Use an oil-based polyurethane over an oil-based stain. Use a water-based polyurethane over a water-based stain. I typically apply three thin coats of a satin or matte polyurethane, sanding lightly with 220-grit paper between coats after the first one has fully cured. This builds a durable, clear shield that lets the beauty of your stained wood shine through for years.
Stain for Specific Projects: Doors, Cabinets, and Floors
General theory is useful, but woodworking happens on specific projects. The chemistry of the stain interacts with the unique demands of each surface. Your approach must adapt.
How Do You Stain a Wood Door?
A door is a vertical surface with edges that love to create drips. The first rule is to remove it and lay it flat on sawhorses. Gravity is your enemy when staining upright.
For this job, a gel stain is your best friend. Its thick, paste-like consistency clings to vertical edges and molded profiles without running. The suspended pigments in a gel stain don’t penetrate deeply, which minimizes raised grain and allows for more uniform color on tricky areas. This technique is especially useful when applying gel stain for a uniform finish.
Doors face constant abuse from hands, sunlight, and weather. A simple stain isn’t enough protection. You need a robust topcoat. I finish doors with a catalyzed varnish, sometimes called a conversion varnish. This finish uses a chemical hardener to create an incredibly dense, cross-linked film that resists solvents, moisture, and abrasion far better than a standard polyurethane.
How Do You Stain Wood Cabinets?
Cabinet staining is all about control and predictability. You are often working with frame-and-panel construction, which means dealing with both end grain and long grain. These absorb stain at wildly different rates.
You must test your stain on a hidden area, like the back of a door or a scrap from the same wood batch. I keep a bin of sanded cutoff pieces from every project for this exact purpose. This test reveals the true color and how the wood will react.
For cabinets, I again lean on gel stains or dedicated wiping stains. Their longer open time lets you manipulate the color and carefully wipe excess from corners and details where liquid stain would pool and darken. If you’re using a common cabinet wood like maple or pine, which is prone to blotching, a pre-stain wood conditioner is a non-negotiable step to seal the thirsty soft grain.
How Do You Stain Wood Floors?
Staining a floor is a major undertaking. The margin for error is small and the consequences are large. For any significant area, I recommend at least consulting a professional. The physical labor of sanding is immense.
The process starts with sanding the floor completely bare. You must remove all previous finish, otherwise the stain cannot penetrate evenly. This typically requires a professional-grade drum sander, followed by an edger, and meticulous hand-sanding.
Application uses a lambswool applicator on a pole. This tool holds a lot of stain and lets you flood the floor in manageable sections, working quickly to maintain a “wet edge” and avoid lap marks. After the stain dries, you apply multiple coats of a high-performance sealant, like an aluminum oxide fortified polyurethane, sanding lightly between coats. Water-based finishes are popular here for their fast dry times and low odor, though oil-based versions can offer a warmer, deeper look.
Fixing Common Stain Problems in the Shop
Think of this as your stain first-aid kit. Even with perfect prep, things can go sideways. Here’s how to diagnose and fix the most frequent issues, based on both chemistry and shop time.
Why Is My Wood Stain Blotchy and How Do I Fix It?
Blotchiness is uneven color absorption. It’s not a stain flaw, it’s a wood behavior flaw. Wood is a porous matrix of long cellulose fibers held together by lignin, with softer earlywood and denser latewood in each growth ring. The stain penetrates these areas at different rates.
Diagnose the cause. You typically have one of three issues:
- Uneven Sanding: You created high and low spots. Sanding to 150 or 180 grit is standard, but you must sand evenly across the entire surface. Any area you sand more aggressively will have torn, crushed fibers that absorb stain like a sponge.
- No Conditioner on Softwood: This is the big one for pine, cherry, birch, and maple. These species have wildly variable density within a single board. A pre-stain conditioner (a thin, clear resin) partially seals the wood’s surface. It limits how much stain the thirsty, soft areas can drink, bringing them closer to the denser areas.
- Applying Too Much Stain: Flooding the surface doesn’t mean deeper color. It means excess pigment sits on top of the softer grains, creating a muddy, dark blob.
Your fixes depend on the severity.
For a major blotch disaster, sand back to bare wood. Start over with a disciplined sanding sequence (120, 150, 180 grit). Then, apply a pre-stain conditioner. Let it dry for the time specified on the can (usually 15-30 minutes), then apply your stain. Test this entire process on a scrap piece from the same board first.
For minor unevenness, you can use a glaze to even out color. After your stained piece has dried completely, apply a clear coat (like a dewaxed shellac or a thin coat of polyurethane). Once that seal coat is dry, you can brush on a pigmented glaze or even a heavily diluted gel stain. Wipe it across the entire surface; it will tint the lighter areas more than the already-dark blotches, helping to blend them.
Dealing with Tackiness, Poor Drying, and Lap Marks
If your stain stays sticky for days, you have a drying problem. Modern stains dry through solvent evaporation, not a curing chemical reaction. The pigments and dyes are left behind as the carrier (mineral spirits, water, etc.) flashes off.
Tackiness almost always traces back to the environment or incompatible products. Cold temperatures (below 10°C or 50°F) drastically slow solvent evaporation. Poor ventilation means the evaporating solvents have nowhere to go, hanging in the air and slowing the process further. Applying an oil-based stain over an old, uncured wax or silicone polish will also cause failure-the stain can’t penetrate and just sits on top.
Fix it by moving the piece to a warm, dry, and well-ventilated space. If it’s still tacky after 48 hours in good conditions, the stain likely failed to bond. You’ll need to remove it with the appropriate solvent (mineral spirits for oil-based, water for water-based) and start over with a clean surface.
Lap marks are those dark, overlapping lines you see on large, flat surfaces. They happen when you stain one area, and by the time you stain the area next to it, the first section has started to dry. You then overlap onto the semi-dry edge, applying more pigment there.
The solution is to maintain a “wet edge.” Work on a manageable section-like one drawer front or a third of a tabletop at a time. Apply the stain evenly across that entire section, then immediately move to the next section, slightly overlapping your brush or rag strokes into the still-wet stain of the previous section. Never stop in the middle of a broad, flat plane; plan your work flow from one end to the other in continuous, overlapping passes.
Sustainable Staining: Eco-Friendly Choices and Safe Disposal

Your choice of wood should guide your choice of stain. If you source wood from a sustainably managed forest, it makes sense to pair it with a finish that respects that ethos. Choosing a low-impact stain completes the cycle of responsible woodworking, from the tree to the finished piece. Understanding wood anatomy and stain absorption methods can explain why finishes react differently with different woods, guiding your approach.
Low-VOC stains are a strong first choice. VOC stands for Volatile Organic Compound. These are solvents that evaporate into the air as the stain dries, creating that strong shop smell and contributing to air pollution. Low-VOC formulas use different chemistry, often water-based, to reduce this off-gassing by a significant margin. Look for certifications like GreenGuard to verify a product’s claims.
For a deeper shift, consider plant-based options. Traditional linseed oil is a classic example. It’s made from flax seeds and cures by reacting with oxygen, not by solvent evaporation. You can also find stains that use natural pigments from clays and minerals suspended in plant-based oils. These stains work by soaking into the wood fibers and oxidizing, rather than forming a plastic-like film on top. The color tends to be more translucent and the working time is longer, which I prefer for complex projects.
Safe Shop Practices and Disposing of Stain Waste
Safety isn’t optional. For all stains, wear nitrile gloves and use active ventilation. I use a simple box fan in a window blowing outward. This is non-negotiable with oil-based stains, but a good habit even with water-based products to clear any fumes or dust.
The biggest hidden danger is oil-soaked rags. The oils in stains cure through an exothermic chemical reaction with oxygen. Wadded up in a trash can, that heat has nowhere to go and can build up until the rag ignites. To prevent this, you must break the chain of reaction.
- Lay each used rag out completely flat, single-layer, on a non-flammable surface like concrete until it is hard and dry. This can take a day or two.
- For immediate safety, submerge them in a sealed metal can full of water.
- Once fully cured and dry, you can dispose of them with your regular trash.
For leftover liquid stain, never pour it down a drain. The best practice is to reduce waste from the start. Buy only the amount you need for your project, and store leftovers properly for future touch-ups. Tightly seal the can, wipe the rim clean, and store it upside down. This creates a better seal and prevents a skin from forming on the surface. If you must dispose of it, take it to a local household hazardous waste collection facility.
Stain Science & Application: Frequently Asked Questions
Why does stain provide no protective finish on its own?
Stain is primarily a colorant system (pigments/dyes in a vehicle) designed for penetration, not film formation. Its minimal binder content is insufficient to create a continuous, durable surface layer resistant to abrasion or moisture.
How does binder chemistry dictate my topcoat compatibility?
The binder’s solvent base determines compatibility; applying a topcoat with a stronger solvent over an uncured stain can redissolve it, causing muddiness. Always follow the “like over like” rule, ensuring each layer is fully cured to prevent solvent disruption.
Is applying multiple thin coats of stain better than one heavy coat?
No, stain works via controlled penetration, not film build. A second coat typically adds negligible color depth and often creates a muddy, opaque finish by over-saturating surface fibers instead of penetrating anew.
Should my application technique change between dense and porous wood species?
Yes. On dense woods like maple, use a longer “wet” time before wiping to maximize limited penetration. On porous woods like oak, wipe sooner to manage darkness, as the open grain rapidly absorbs colorants.
Can I use any stain color on any wood species with predictable results?
No, the wood’s natural color and tannin content act as a filter, altering the final hue. Test on scrap to see how the stain’s chemistry interacts with the specific wood’s substrate, as underlying tones will show through translucent colorants.
Let the Wood Guide Your Stain Choices
The single most important practice is to test your stain on a scrap piece from the same board. Wood is a variable, biological material, and stain interacts with it chemically, not just cosmetically. This test reveals the true color and how the wood’s unique density and grain will affect the final look. Skipping this step is the most common reason for disappointing results.
Choose stains and finishes from companies committed to sustainable forestry and low-VOC formulations. Treat your woodworking as a lifelong conversation with the material, where every project deepens your practical understanding of its science, especially when it comes to environmentally friendly finishes.
References & External Links
- Wood stain – Wikipedia
- What is Wood Stain? A Look at the Ingredients | U-C Coatings
- How wood stain is made – material, history, used, components, product, machine, History, Raw Materials
- Understanding Wood Stains by Jeff Jewitt
David Ernst
David is a veteran woodworker. He is now retired and stays in his cabin in Wisconsin which he built himself. David has 25+ years experience working in carpentry and wood shops. He has designed and built many small and large wood projects and knows the science behind wood selection like the back of his hand. He is an expert guide on any questions regarding wood material selection, wood restoration, wood working basics and other types of wood. While his expertise is in woodworking, his knowledge and first hand experience is far from 'woody'.