What Are the Best Woods for Turning? A Wood Science Guide
Choosing wood for your next turning project can be frustrating. You might wonder why some woods cut like butter while others tear out, or why some finishes glow while others look dull.
This guide cuts through the guesswork. We will cover the cellular traits that make a wood turn easily, how different grains interact with finishes, and my top shop-tested species for predictable, beautiful results.
My advice comes from milling hundreds of blanks and examining their fiber structure under a microscope to see why they behave the way they do on the lathe.
What Makes a Wood “Good” to Turn?
Flatwork and turning ask different things from wood. For a table, you care about a flat gluing surface and dimensional stability across wide panels. On the lathe, you’re shaping a spinning object with a sharp tool. Your criteria shift to three core things.
First is workability: how the wood cuts. This is about feel. A great turning wood slices cleanly with minimal pressure. It doesn’t tear out or crumble. Think of the difference between cutting cold, hard butter and gritty, oily peanut butter. You want the butter.
The ideal cut produces long, thin shavings and leaves a smooth surface right off the tool, which saves you hours of sanding.
Second is stability. This means the wood holds its shape as you turn it and, more importantly, after it’s done. Some woods are prone to warping or cracking as moisture changes. A stable wood behaves predictably, whether you’re turning it thin for a bowl or detailed for a spindle.
Third is how it takes a finish. Some woods have large, open pores that need filling. Others have natural oils that can interfere with certain finishes. A good turning wood accepts a finish evenly, making its grain and color pop with minimal fuss.
The Turners’ Technical Spec Sheet: What the Numbers Mean
Wood databases list scientific properties. For turning, you only need to understand a few. They tell you what to expect before you even mount the blank.
Janka Hardness
This number measures resistance to denting. For turners, it’s a direct indicator of how much tool pressure you’ll need and how often you’ll need to sharpen. A low Janka (like Basswood, 410 lbf) feels soft and forgiving. A high Janka (like Hickory, 1,820 lbf) demands a razor edge and firm control.
Use Janka as your guide for tool sharpness; a hard wood will instantly blunt a dull tool and cause tear-out. Cutting wood with sharp tools and proper technique helps minimize tearout, yielding cleaner, more precise cuts.
Specific Gravity (Density)
This is the wood’s density compared to water. It predicts the final piece’s weight and heft. A wood with a high specific gravity (like Oak, 0.68) is heavy and feels solid. It also offers more cutting resistance. A low specific gravity wood (like Pine, 0.40) is light and cuts with almost effortless speed.
Toxicity & Dust
This is a safety note, not just a property. Many beautiful woods produce dust that can cause reactions. Walnut dust bothers some people and pets. Exotic woods like Cocobolo can cause severe respiratory and skin reactions.
Always treat unknown wood dust as potentially hazardous and wear a respirator; no project is worth a chronic cough or allergic sensitization. Even for known wood types, one should educate themselves on wood dust irritation vs. sensitization.
Movement Ratio
This number quantifies how much a wood shrinks or swells with moisture change. It’s critical for turners working with green (wet) wood. A low ratio wood moves less as it dries, reducing the risk of cracks. A high ratio wood moves a lot, which you can use to create intentional warping in artistic pieces, but it’s a gamble for functional work.
| Wood | Janka (lbf) | Specific Gravity | Stability (Movement Ratio) | Turning Notes |
|---|---|---|---|---|
| Basswood | 410 | 0.37 | Low (2.2%) | Exceptionally soft, perfect for beginners & carving details. |
| Maple (Soft) | 950 | 0.56 | Medium (4.8%) | Cuts cleanly, finishes glass-smooth. A reliable workhorse. |
| Cherry | 950 | 0.50 | Medium (4.5%) | Slightly fuzzy grain, sands easily. Prone to tear-out if tools are dull. |
| Walnut | 1,010 | 0.55 | High (3.7%) | Buttery cut, stunning finish. Use dust collection due to mild toxicity. |
| Oak (White) | 1,360 | 0.68 | High (5.6%) | Open pores require filler. Can be brittle on fine details. |
| Hickory | 1,820 | 0.72 | High (7.0%) | Extremely hard and tough. Demands sharp tools, creates a very durable object. |
Top Woods for Building Your Skills (Low Stress, High Reward)
Your first attempts at turning should build confidence, not frustration. Start with woods that are forgiving to your tools and your budget.
Basswood
Think of basswood as the training wheels of the turning world. Its pale, creamy color comes from an exceptionally uniform and diffuse cell structure. This means it has almost no visible grain pattern or density variation. Basswood cuts with a consistent, almost effortless “cold butter” feel that lets you focus purely on your tool’s edge and your hand motions. It’s perfect for practicing beads, coves, and simple shapes where tear-out from wild grain would distract you from learning proper technique. A word of caution: its very softness means it dents easily, so it’s not ideal for a final project you’ll handle daily.
Pine (especially Eastern White Pine)
Pine gets a bad rap for being stringy and prone to tear-out. That’s true if your tools are dull. The secret is that pine demands sharpness, teaching you a non-negotiable rule of the lathe. With a properly honed gouge, white pine cuts in long, clean shavings and is one of the most affordable ways to practice on large bowl blanks or spindles. Its soft, earlywood growth rings will compress under a dull tool, leaving a rough surface. Use this to your advantage. If you’re getting tear-out, stop and sharpen. It’s a direct, inexpensive feedback loop for your sharpening habits.
Poplar
Poplar is the utility player found in every big-box store. It turns predictably with a mild, pleasant scent and a straight, fine grain. Its natural color is a pale yellow-brown, but it often has streaks of green, gray, or even purple from mineral deposits. Don’t fight these streaks; design for them. They can add a striking, natural character to a practice piece. For a quick reference, a poplar wood properties profile condenses its density, hardness, and workability. That makes it easy to compare poplar with basswood and maple at a glance. Poplar sits right between basswood and maple in hardness. It’s firm enough to hold crisp details for things like practice finials but still very forgiving on your tools. It’s your go-to for turning a quick gift or testing a new chuck technique without wasting precious hardwoods.
Best Woods for Finished Projects That Get Used
Once your tool control is solid, move to woods that offer beauty and durability. These species combine good workability with the strength to make heirloom-quality bowls, cups, or tool handles.
Soft Maple
Soft maple (species like red or silver maple) is the gold standard for a reason. Scientifically, it has a Janka hardness around 950 lbf, which is hard enough to resist dents on a bowl rim but not so dense that it wears out your tools prematurely. Its closed, tight-pore structure sands to a glass-like surface and acts as a neutral canvas for any finish, from oil to lacquer. The shavings come off in crisp, slightly curly ribbons, and the final surface has a subtle, shimmering grain pattern. For your first “real” salad bowl, this is the wood I recommend every time.
Black Cherry
Cherry is a turner’s delight. Its fibers cut cleanly, producing smooth surfaces right off the tool with minimal sanding. The science behind its beauty is photochemistry. Freshly turned cherry has a warm pink hue, but exposure to UV light catalyzes a reaction in its extractives, deepening the color to a rich reddish-brown over months and years. Botanically, cherry wood comes from Prunus species, and its growth rings and fiber arrangement help create that straight, fine grain. These botanical characteristics—cell structure and extractive chemistry—also influence color behavior and aging. This predictable aging means your project improves with time. The grain is typically straight and fine, though it can occasionally have wild figuring. It’s less porous than oak or ash, so it finishes evenly without needing heavy pore filler.
Black Walnut
Walnut is a classic for its deep chocolate color and dramatic grain. It’s denser than maple or cherry (about 1010 lbf on the Janka scale), so you’ll feel more resistance, but it still turns cleanly with sharp tools. Applying a simple oil finish like tung or Danish oil feels like magic, instantly amplifying its color and depth with a warm glow. Understanding walnut’s Janka density helps tailor finishing—oil finishes absorb and cure differently because of density. This is a practical example of walnut Janka-density finishing in action. A critical safety note: walnut dust, especially from the bark and outer wood, contains juglone, a compound that can be a respiratory irritant. Always wear a good respirator. I source my walnut from local sawmills that practice sustainable forestry, as it’s a valuable native species.
Ash
Choose ash when you need toughness. Its pronounced ring-porous structure (alternating bands of hard latewood and more porous earlywood) gives it exceptional shock resistance, perfect for a mallet head or a tool handle. This open grain pattern can lead to a textured surface feel; you manage it by sanding thoroughly through the grits and considering a pore-filling finish for items like bowls. A razor-sharp skew chisel or scraper is key to shearing across those hard growth rings cleanly. While white ash is common, I seek out sustainably harvested local supplies, as the emerald ash borer has devastated many populations.
Anecdotal Evidence: Notes from the Lathe
Data sheets give you Janka hardness and specific gravity. They don’t tell you what it’s like to stand at the lathe. I keep a notebook by my bench for these details. They change how you choose wood, especially when using the Janka scale for selecting wood.
The first thing you notice is smell. Eastern Red Cedar is the best example. Shavings from a fresh blank fill the shop with a sharp, clean scent no candle can match. It’s the same reason it’s often cited for its best burning wood scent; the aromatic oils are volatile. That smell tells you the wood is full of natural preservatives, which is great for durability but can gum up sandpaper quickly if you aren’t careful.
Sound and feel are your first quality checks. A well-seasoned blank of dense maple or oak has a solid, hollow “thunk” when you tap it. A green or damp piece feels cooler, even heavy, and makes a dull thud. Turning green wood is a different game; the wet shavings fly off in long ribbons, but you must account for massive movement as it dries.
Then there’s spalted wood. The black lines from fungal growth create breathtaking figures. But that beauty is a trap. The spalt line itself is often soft and punky. Your tool will glide through the hard maple and then suddenly dive into the soft zone, ruining your cut. I stabilize these areas with a thin CA glue as I turn, soaking it into the punky spots before making the final passes. It turns a fragile blank into a durable piece.
Tool feel is everything. I learned this on a piece of very dry, brittle hackberry. A light scraper catch didn’t just dig in; it exploded a large chunk out of the rim. The same catch on green cherry just left a minor tear-out I could sand away. Brittle woods don’t bend; they break. Now, I use a much gentler presentation with supported cuts on any wood that sounds too dry or ringy.
Woods to Approach with Caution (After Some Practice)
Calling a wood “bad” is lazy. Some species simply have a steeper learning curve. They demand sharper tools, adjusted techniques, and more patience. Mastering them makes you a better turner.
Open-grained woods like Red Oak are a common challenge. Their large, open pores are perfect for absorbing stain, but they create a splintery surface on end grain, which is most of what you turn. The stringy fibers tend to tear out instead of shearing cleanly, leaving a surface that feels rough no matter how sharp your tool is. You must use very sharp gouges with a shear scraping angle or plan for extensive sanding, starting with a coarse grit to knock down the splinters.
Extreme density demands respect. Woods like Osage Orange, aged Rock Maple, or tropical exotics like Ipe are incredibly hard. The forces on your tools are immense. You must slow your lathe speed down, sometimes below 600 RPM for a large blank, to maintain control. Your tool rest must be absolutely locked down. Most importantly, your tools must be honed to a razor’s edge. A slightly dull edge will skate, burn, and catch violently in these woods.
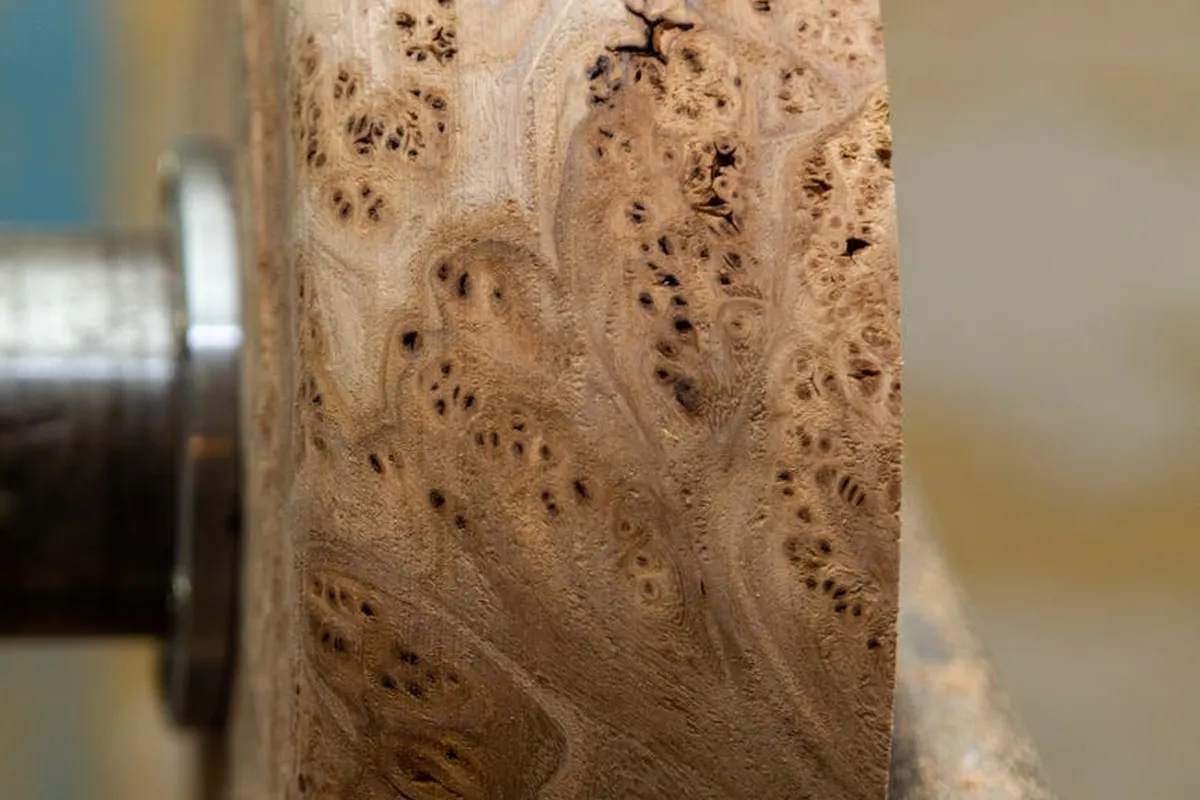
Finally, the wild grain of highly figured maple, elm, or ash. The grain switches direction constantly, creating stunning curls and eyes. This also means your cutting edge is alternating between downhill and uphill cuts every inch. Tear-out is almost guaranteed with standard peeling cuts. The solution is to use the sharpest possible tools, take very light final passes, and embrace a scraper for the final smoothing. The result is worth the extra time, but it tests your patience and skill to the limit.
How to Test a Wood Blank Before You Commit
You can’t judge a book by its cover, and you can’t judge a turning blank by its bark. Here is my method for figuring out what a piece of wood will do before I shape the final piece.
Start at a Low Speed and Take Light Initial Cuts
Never start at your final turning speed. Mount the blank securely and start your lathe at half its normal turning speed, around 500-800 RPM for a bowl blank. Take a single, light shear scraping cut with a sharp gouge. This first pass tells you everything.
You are testing for two things: the wood’s hardness and its tendency for tear-out. A buttery cut that produces a long, thin ribbon means a softer, cooperative wood like poplar or pine. If the tool requires firm pressure and makes fine, granular dust, you’re dealing with a dense hardwood like maple or oak. Watch for ragged edges in your cut; severe tear-out now means you’ll fight it the whole way.
Feel the Dust: Your Tactile Clue
Stop the lathe and pick up a pinch of the shavings and dust from your test cut. Rub it between your fingers. This simple act is a powerful diagnostic tool.
- Fluffy, light dust that feels like flour means softer wood.
- Fine, heavy dust that feels like fine sand signals dense hardwood.
- Long, cool, pliable shavings indicate a straight-grained, easy-turning species.
- Short, crumbly shavings can mean irregular grain or internal stress.
I keep a known sample of pine and oak dust on my bench for quick comparison. Your sense of touch doesn’t lie.
Do a Quick Finish Test
Grain and color can look flat and dry on a rough blank. Find a non-critical area, like the bottom face or a corner. Hand-sand a small spot up to 220 grit. Then, apply a single drop of mineral oil or the finish you plan to use.
This instant reveal shows you the true color and how much the grain will “pop.” Some woods, like cherry or walnut, transform dramatically. Others, like soft maple, show a more subtle glow. If the test spot looks blotchy, you know you’ll need a sanding sealer before your final finish. This two-minute step prevents a ten-hour disappointment.
Listen to the Sound of the Cut
Your ears are as important as your eyes and hands. A sharp tool on stable wood produces a consistent, quiet slicing sound. It’s almost a whisper.
Any other sound is a warning. A chattering or buzzing noise usually means your tool rest is too far from the work, your tool isn’t supported properly, or the wood has internal voids. A high-pitched screech often means your tool is dull and is rubbing, not cutting. Dense woods will naturally produce a slightly higher-pitched cut than softwoods. The goal is a steady, confident sound. If you hear trouble, stop and fix the cause before proceeding.
Frequently Asked Questions: Wood Selection for Turning
What are the best turning wood supplies for a beginner?
Prioritize dimensionally stable, low-Janka hardness woods like Basswood or Poplar from a reputable hardwood supplier. In janka hardness woodworking terms, these ratings guide tool choice and technique. Knowing the numbers helps you anticipate how the wood will respond to cuts. These species offer predictable behavior and minimal tear-out, allowing you to focus on foundational tool technique without fighting the material.
How do I prevent a scraper catch on difficult woods?
Ensure your scraper has a properly honed burr and use a supported, negative-rake presentation. On brittle or highly figured woods, this technique shears fibers cleanly instead of digging in and causing catastrophic catches.
What makes a wood ideal for durable handles, like for fly reels?
Select woods with a high shock resistance (toughness) and moderate to high Janka hardness. Dense, ring-porous hardwoods like Ash or Hickory provide the necessary durability and vibration dampening for repeated mechanical stress.
Which woods are best for turning bowls that are both beautiful and functional?
For functional bowls, use closed-grain, stable species with moderate density like Soft Maple or Cherry. Their tight cellular structure provides a smooth surface that is easily cleaned and resists staining, while offering excellent workability.
Why are some woods cited for both great turning and a strong burning scent?
Aromatic oils (extractives) like those in Eastern Red Cedar or some pines volatilize easily. These same oils produce a pronounced scent when burned and can act as natural preservatives, but they may gum up sandpaper during finishing.
Final Considerations for Your Turning Stock
The core of good woodturning lies in selecting a species that works with your tools, not against them. I find that a wood’s stability during the cut and its response to sanding are far more critical than its rarity or cost. Begin with stable, closed-grain woods like maple or cherry to master fundamental cuts and finish application. Test your finish on an offcut from the same board to see how the grain truly reacts before you touch it to your finished piece.
Seek out lumber certified by organizations like the Forest Stewardship Council to support ethical forestry with every project. Your growth as a turner is directly tied to understanding why wood moves and how different finishes interact with its cellular structure.
Relevant Resources for Further Exploration
- r/turning on Reddit: What is your most hated/loved wood to turn?
- Reader’s Choice – Top Woods to Turn
- How to Choose the Right Wood for Your Woodturning Journey – Hunter Tool Systems
- Good wood to get familiar with the lathe | Sawmill Creek Woodworking Community
- What is the best wood for turning bowls? | JB Woodcrafts
- Best Turning Speeds by Wood Species | LumberJocks Woodworking Forum
David is a veteran woodworker. He is now retired and stays in his cabin in Wisconsin which he built himself. David has 25+ years experience working in carpentry and wood shops. He has designed and built many small and large wood projects and knows the science behind wood selection like the back of his hand. He is an expert guide on any questions regarding wood material selection, wood restoration, wood working basics and other types of wood. While his expertise is in woodworking, his knowledge and first hand experience is far from 'woody'.