
How Does Wood Anatomy Dictate Stain and Paint Outcomes?
You choose a stain or paint, but the wood species controls the final look and durability. I see this as a materials problem, not a finishing flaw.
We will translate wood science into your shop practice, covering pore structure and stain absorption, natural resins and paint adhesion, grain density and finish clarity, and ethical sourcing impacts.
I’ve tested these interactions firsthand, finishing hundreds of samples from responsibly harvested woods to provide reliable, shop-proven data.
The Science of Staining: Why Wood Drinks Differently
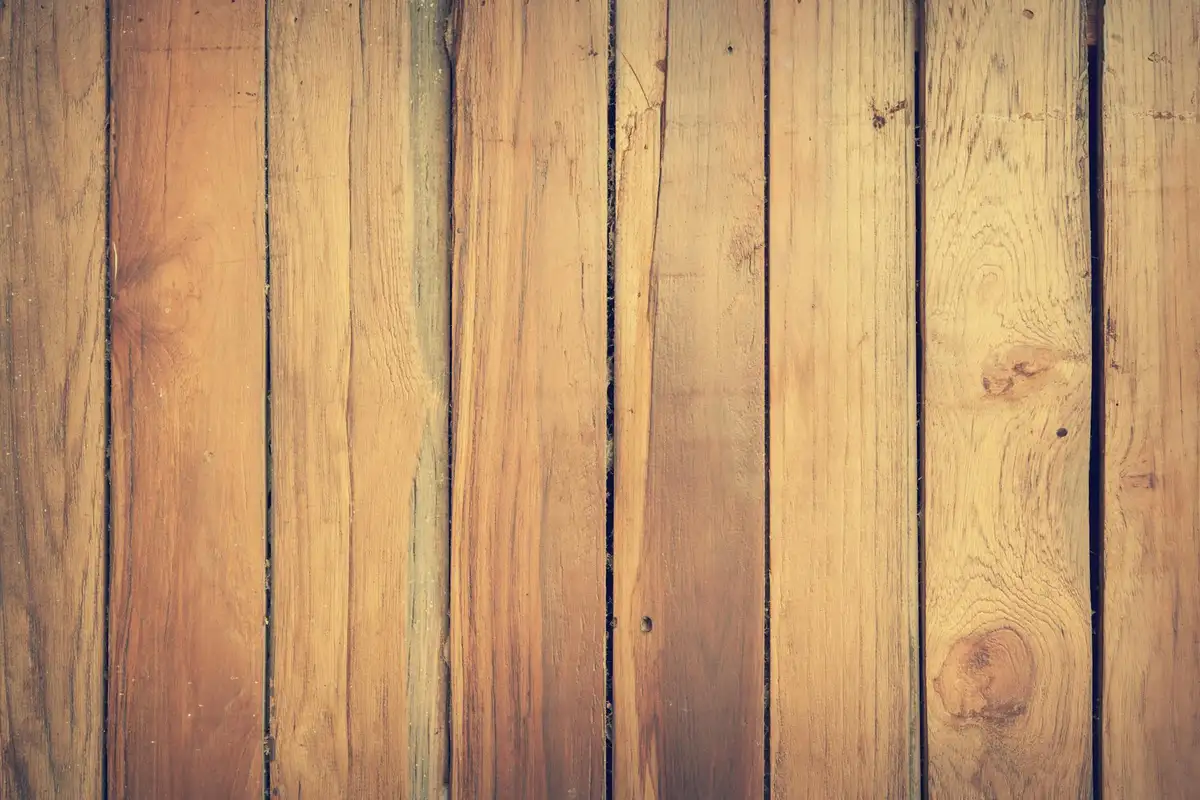
Think of wood as a bundle of microscopic straws, running parallel to the tree’s height. These “straws” are the wood cells. The open ends of these cells on the end grain are like the open mouth of a straw. The side of the straw is like the face grain. This network includes pores (vessels), which are the largest straws, and medullary rays, which are horizontal straws moving from the center outwards.
This cellular network is the main reason different woods stain so differently.
Two terms control everything: porosity and density. Porosity refers to the size and number of these open “straws.” Density is the mass of wood fibers packed around them. A wood like oak has high porosity with huge, open pores. A wood like maple has low porosity with very small, tight pores. A dense wood can still be porous if its large pores are widely spaced.
The end grain comparison is the clearest example. End grain exposes all those straw ends, allowing stain to plunge deep. Face grain only lets stain wick in through the sides of the straws. End grain will always absorb more stain and look drastically darker unless you use a specific technique called sealing to block those pores.
Wood isn’t a blank canvas. It has its own color from natural chemicals called extractives. The rich tannins in oak or the pink hues in cedar act like a tinted primer. A light oak stain on red oak will look golden. That same stain on pale maple will look more like its labeled color. A dark walnut stain on cedar will fight against the wood’s red tone, often creating a muddy purple-brown if you’re not careful.

Mechanism of Action: The Physics of a Stain Penetrating Wood
Stain moves into wood primarily through capillary action. This is the same force that draws water up a paper towel. The smaller the tube, the stronger the pull. But here’s the catch: if the pores are too small, the stain’s pigment particles can get stuck at the surface.
Capillary action is why open-pored woods drink stain deeply and why dense woods leave pigment sitting on top.
Your stain has two key parts: the carrier (oil or water) and the colorants (pigments and/or dyes). Pigments are like finely ground mud that sit in pores. Dyes are like colored water that stain the wood fibers themselves. Most common stains are pigment-based. The binder is the glue that holds the pigments together after the carrier evaporates.
Paint and stain are fundamentally different. A stain is designed to penetrate and color the wood while letting the texture show through. A paint is designed to form a continuous, opaque film on top of the wood, completely hiding it. Paint fails when it can’t adhere to the wood surface; stain fails when it can’t penetrate the wood’s structure. Staining over painted wood brings compatibility questions into play. In the next steps, we’ll look at how to prep and choose finishes for staining over paint.
Softwoods vs. Hardwoods: A Practical Guide for Your Project
First, let’s clear this up. “Hardwood” comes from deciduous trees (oak, maple). “Softwood” comes from conifers (pine, fir). But balsa is a hardwood and southern yellow pine is harder than many hardwoods. The botanical label doesn’t predict staining behavior.
Look at the grain instead. A hardwood like maple has a relatively uniform, fine-pored structure. A softwood like pine has a distinct pattern of alternating soft, porous earlywood bands and hard, dense latewood bands. This alternating banding is the source of most softwood staining challenges.
Here’s the rule: dense, fine-pored woods resist stain absorption, often leading to a pale, blotchy look. Open-pored woods absorb stain readily, which can lead to a dark, blotchy look if not controlled.
So, can cedar wood be stained? Yes, but it’s tricky. Cedar’s heartwood is full of extractives and oils that repel stain. You must wipe it down with a solvent like mineral spirits or use a special conditioner first. Can poplar wood be stained? Yes, and it usually takes stain quite evenly due to its uniform pore structure. But poplar’s green and purple mineral streaks can show through lighter stains, which is why it’s often painted.
The Challenge of Staining Softwoods Like Pine and Cedar
Look at a pine board. The light-colored bands (earlywood) are soft and sponge-like. The dark bands (latewood) are hard and dense. Apply a stain, and the earlywood soaks it up greedily, turning very dark. The latewood barely accepts any, staying light. The result is extreme, often unattractive grain contrast called “blotching.”
Sapwood and heartwood complicate this. In pines and cedars, the pale sapwood is less dense and often more absorbent than the darker, extractive-rich heartwood. Staining a board with both sapwood and heartwood will give you two different colors on one piece. For a consistent look, you must select boards from all heartwood or all sapwood.
What is the best stain for pine wood? The answer is less about the can and more about the prep. Gel stains are thicker and sit more on the surface, reducing the earlywood’s thirst. But the universal technique is using a pre-stain wood conditioner. This is a thin, clear sealant that partially fills the thirsty earlywood pores, slowing down its absorption rate so it matches the latewood better. You must apply it, wait about 15 minutes, then stain right over it.
The Challenge of Staining Hardwoods Like Maple and Cherry
Hardwoods like maple and cherry don’t have the hard/soft banding of pine. Their challenge is inconsistent porosity across the face grain. Tiny pores are packed tightly, but in some areas, the density varies. Stain absorbs quickly in the less-dense zones and slowly in the denser zones, creating a smeared, blotchy appearance with no relation to the beautiful grain pattern.
Compare oak to maple. Staining oak is like wiping a damp sponge across a textured concrete block. The liquid fills the obvious grooves (the large pores) evenly, highlighting the grain. Staining maple is like trying to wipe that sponge across a pane of slightly dusty glass. The liquid has nowhere consistent to go, so it pools and smears unpredictably.
For predictably even staining, choose woods with large, open pores like white oak, red oak, ash, or mahogany. For woods prone to blotching, you are working with maple, birch, cherry, beech, and pine. The solution for these is the same as for pine: careful sanding to a uniform grit (no skipping to 220 from 80) and the use of a pre-stain conditioner designed for hardwoods.
Your Best Practice Workflow: From Sanding to Final Coat
Consistency is your best tool for predictable results. Follow this sequence every time, adjusting only for the specific wood and product you are using.
Step 1: Surface Preparation is Everything
All finishes magnify the surface underneath. Any flaw you leave will be sealed in forever. Your goal is to create a uniformly porous and chemically clean canvas.
Start your sanding at 120-grit to remove mill marks or plane tracks. Move to 150-grit, then stop at 180-grit for most staining work. Stopping your sanding progression at too coarse a grit, like 80 or 100, leaves microscopic tears that will absorb more stain and appear as dark scratches. For hardwoods like maple, I sometimes go to 220-grit for an ultra-smooth base before a clear finish.
Clean the surface completely. I use a vacuum, followed by a wipe with mineral spirits on a lint-free rag. Mineral spirits will show you any glue spots or remaining dust. Let it evaporate fully.
The wood must be dry. Wood with a moisture content above 12% can repel oil-based stains and cause water-based finishes to dry cloudy. I keep a simple moisture meter in my shop. If you don’t have one, bring the wood into your conditioned workspace for at least 48 hours before finishing. Staining damp wood traps moisture under an impermeable film, which guarantees finish failure and mold growth. Finishing in high humidity can cause finishes to take longer to dry and may develop haze or blotching as solvents struggle to evaporate. Controlling the humidity during finishing is key to a durable, even coat.
Step 2: To Condition or Not to Condition?
A pre-stain conditioner is not a magic potion. It’s a controlled sealer. It partially fills the microscopic pores and vessels in the wood to slow down and equalize stain absorption. However, proper wood surface preparation is equally important for even stain uptake.
Think of wood grain like a network of drinking straws. In blotch-prone woods like pine, cherry, or maple, the size and density of these “straws” varies wildly across a single board. Conditioner partially plugs them, so stain can’t rush into the soft earlywood and barely touch the hard latewood.
You must use a conditioner on:
- Pine (especially white pine)
- Maple (it’s notoriously blotchy)
- Cherry
- Alder and Birch
You can often skip it on:
- Oak (the large, open pores absorb stain evenly)
- Ash (similar structure to oak)
- Mahogany and Walnut (these are typically stained for color correction, not grain uniformity)
The effect of a wood conditioner is a more even, slightly lighter, and more predictable stain color. It reduces contrast. If you love the dramatic, chatoyant grain of oak, conditioner will mute that effect. For pine, it’s the difference between a professional look and a messy, splotchy one.
Step 3: Applying Stain and Evaluating Color
Always test your exact process on a scrap piece from the same board. End grain will always absorb more stain and look darker. You can pre-sand end grain with a finer grit (one step finer than your face grain sanding) to mitigate this, or lightly pre-seal it with conditioner.
For wipe-on stains, flood a section, wait 5-15 minutes (check the can), then wipe off the excess with the grain. For brush-on stains, apply a heavy coat and then immediately wipe off. Gel stains are thicker and sit more on the surface, making them an excellent choice for minimizing blotch on tricky woods or for coloring plywood edges.
The wood’s natural color is the base coat for your stain. A red oak has strong yellow and pink undertones. A dark walnut gel stain will look browner on red oak and more gray on pale white oak. A golden oak stain on naturally reddish cherry will amplify the warmth, while the same stain on ash will look more like a honey tone. You are mixing pigments with the wood’s natural colorant.
Tackling Special Cases and Mixed Materials
Real-world projects rarely use only one perfect board of a single species. Here is how to manage the complexities.
Staining Plywood, Veneers, and Engineered Wood
Yes, you can stain wood veneer. The challenge is the thinness of the veneer layer, often less than 1/32″. Sanding through it is easy. Hand-sand carefully, never going coarser than 150-grit, and stop at 180-grit.
The real problem is the plywood edge. The end grain of the ply layers soaks up stain like a sponge, turning jet black. To fix this, you have two good options. You can apply edge banding of real wood veneer tape, which stains like solid wood. Or, you can pre-seal the raw plywood edge with a heavy coat of sanding sealer or wood glue diluted with water (50/50 mix), sand it smooth, then stain. The sealer prevents the edge from over-absorbing.
For composite woods like MDF, only the sealed surface can be painted. You cannot stain the raw MDF edge effectively. Use a tinted primer or seal and paint the edges.
How to Handle Mixed Wood Species in One Project
Making pine and oak look similar under a stain is a classic struggle. Pine is soft and porous, oak is hard with open grains. They absorb stain at completely different rates. The only reliable method is to use a dye stain, not a pigment stain. Dyes color the wood cells themselves more uniformly. You can follow a dye with a light pigment stain or glaze to add grain emphasis.
My step-by-step method for testing mixed species is this:
- Prepare sanded samples of all woods in the project.
- Apply your chosen conditioner (if needed) to all samples.
- Mix your stain or dye. For dyes, I use water- or alcohol-soluble powders for maximum control.
- Apply to all samples simultaneously, for the exact same duration.
- Wipe off and let dry.
- Evaluate. If one piece is too light, give it another very short, targeted application. If colors are wildly different, you need a different coloring approach, like a glaze over a sealed surface.
Sometimes, the best strategy is to highlight the difference. Use a clear finish only, or a stain that allows each wood’s character to show through differently for a deliberate, harmonious contrast.
Working with Resinous and Oily Exotic Woods
Woods like teak, rosewood, and cocobolo contain natural oils and resins that repel film-forming finishes. Your polyurethane or lacquer will bead up or peel off. Stains often sit on the surface and rub right off.
Before any finish, you must wash the surface. I wipe the raw wood down with a rag soaked in denatured alcohol or acetone. You will see yellow/orange residue come off on the rag. Let the solvent evaporate completely, then do it again. Wait 30 minutes after the final wash. This solvent wash removes surface oils and allows a mechanical bond for the finish.
For these woods, I typically use a simple, non-film-forming finish like pure tung oil (not a “tung oil finish” blend). It soaks in and cures slowly. Many exotic woods are so beautifully colored that staining them is a mistake. Your job is to protect and enhance what’s already there. Applying oil finishes properly is crucial to achieving the best results.
Troubleshooting Common Finishing Problems
Even with perfect technique, the wood itself can introduce challenges. The most common headaches-blotchy stain and unpredictable color-almost always trace back to the species you chose.
Fixing and Preventing Blotchy Stain
Blotchiness isn’t a mistake; it’s physics. It happens in woods with wildly variable density, like pine, cherry, and maple. The porous, soft earlywood soaks up stain like a sponge, turning dark. The dense, hard latewood resists it, staying light. The result is a distracting, uneven pattern.
If you’re already staring at a blotchy piece, you have three main paths forward.
- Strip and restart. Use a chemical stain stripper, then sand the surface back to bare wood. This is your clean slate.
- Switch to a gel stain or glaze. These are thicker, with suspended pigments that sit more on the surface rather than penetrating deeply. They color the peaks and valleys of the grain more uniformly. Gel stains are a reliable fix for woods prone to blotching, giving you color with far more control.
- Go opaque. If the blotchiness is severe, painting or using a solid-color stain hides everything. This is a perfectly valid, durable finish.
This leads to a common shop question: can you paint stained wood? Absolutely, but prep is non-negotiable. Painting directly over a traditional oil-based stain will fail. The paint will peel. You must create a sealed, uniform surface for the paint to grip. Proper preparation is key when painting over oil-based stains.
- Sand the stained surface lightly with 120-grit paper. You don’t need to remove all the stain, just scuff it up thoroughly.
- Wipe away all dust with a tack cloth.
- Apply a high-quality bonding primer. An oil-based or shellac-based primer (like BIN) will lock in any remaining stain tannins and provide the best grip for your topcoat.
- Once the primer is fully dry, sand it smooth with 220-grit paper, then apply your paint.
Why Did My Stain Turn Out Too Dark or Too Light?
The final color is a negotiation between you, your process, and the wood’s inherent character. If the result is a surprise, check these three factors first.
Your sanding job sets the stage for everything that follows. Sanding to a higher grit (like 220) closes the wood’s pores, creating a smoother surface that accepts less stain. For a darker, richer color, stop sanding at 120 or 150 grit. The slightly rougher surface has more microscopic openings for stain to enter. Always sand evenly; a dip you sanded more will appear darker.
A pre-stain conditioner is a must for thirsty, blotch-prone woods. It’s a thin, quick-drying sealant that partially fills the pores. I think of it as putting a speed bump in front of the stain. It slows down absorption, giving you more working time and a more even color, though often a shade lighter. Skip it on naturally even woods like ash or oak.
Never forget the wood’s starting color. Stain is a translucent glaze, not paint. It modifies the wood’s base color; it doesn’t replace it. Applying a light “Golden Oak” stain to dark walnut will do almost nothing; it will not darken the wood significantly. Applying the same stain to pale pine will give you a classic honey tone. Always test on scrap from the same board.
Wood also changes with age. Fresh, milled wood (called “green” even if it’s dry) is more receptive. Wood that has sat oxidizing for months develops a slightly hardened surface layer that can resist stain. If your aged wood won’t take color, try sanding it again with 150-grit to open fresh fibers.
To control intensity, think about your stain type. Dye stains (often sold as “liquid dye” or in NGR form) penetrate deeply and color the wood fibers themselves. They are brilliant and translucent but can fade in UV light. Pigment stains are for longer wear, sit in the pore structure, are more UV-stable, and are easier to control. For a lighter color, wipe off excess stain sooner. For a deeper color without going darker, use multiple thin coats, sanding lightly between each to build up layers in the pores.
Frequently Asked Questions: Wood Species and Finishing
How does the age of the wood impact staining results?
Freshly milled wood has open cell structures that readily absorb stain, while wood that has oxidized over months develops a hardened surface layer that can resist penetration. Lightly sanding aged wood with 150-grit abrasive opens fresh fibers to restore uniform absorption.
How do exotic woods react to common stains?
Oily exotics like teak or rosewood repel standard stains and film-forming finishes due to their natural extractives. A solvent wash with acetone or denatured alcohol is required to remove surface oils and enable any meaningful finish adhesion or stain penetration.
What are the best practices for staining plywood or engineered wood?
The thin veneer face can be stained but must be sanded carefully to avoid breakthrough, while the exposed edge must be pre-sealed to prevent gross over-absorption. Apply a heavy coat of sanding sealer or diluted glue to the edge, sand smooth, then proceed with staining the face.
What role does wood porosity play in finishing beyond stain absorption?
Porosity directly influences the choice between penetrating and film-forming finishes. Open-pored woods like oak benefit from pore fillers for a glass-smooth topcoat, while closed-pore woods like maple provide a naturally smooth substrate for clear film finishes like lacquer.
How to achieve a consistent stain color on mixed wood species?
Use a dye-based stain, which colors wood fibers more uniformly than pigment stains, followed by a light glaze if grain emphasis is needed. Always test the entire process on sanded scrap pieces from each species to calibrate application time and color saturation. Different techniques can significantly affect the final appearance, so it’s important to understand the application methods.
Your Finish Starts with the Board
The wood you choose is the first and most critical finish decision you make. Its density, pore structure, and natural chemistry dictate how stains absorb, how paint adheres, and how a clear coat highlights the grain. Always test your entire finishing process on a scrap piece of your actual project wood; it’s the only way to know for sure what your final result will be. In my shop, I’ve seen two pieces from the same poplar board stain differently, proving that sample tests are never wasted time.
Choose wood from responsibly managed forests, looking for certification like FSC, to ensure the material is as sound ethically as it is physically. Treat each finished piece as a lasting craft, maintaining it with care and letting its performance guide your learning for the next project.
Industry References
- Wood stain – Wikipedia
- Interior Wood Stains – The Home Depot
- Retique It Liquid Wood – Light Wood Half Pint (8oz) – Paint It Then Stain It – Stainable Wood Fiber Paint – Put a Fresh Coat of Wood On It
- Exterior Wood Stains – The Home Depot
David Ernst
David is a veteran woodworker. He is now retired and stays in his cabin in Wisconsin which he built himself. David has 25+ years experience working in carpentry and wood shops. He has designed and built many small and large wood projects and knows the science behind wood selection like the back of his hand. He is an expert guide on any questions regarding wood material selection, wood restoration, wood working basics and other types of wood. While his expertise is in woodworking, his knowledge and first hand experience is far from 'woody'.