
What Wood Glue Should You Use and How Do You Apply It for a Lifetime Bond?
A failed glue joint can ruin months of work, but the right adhesive applied correctly creates a bond stronger than the wood itself. I’ve tested this myself, watching joints break in the wood before the glue line gives way.
This guide provides shop-tested steps and materials science, covering adhesive selection by chemistry, non-negotiable surface preparation, precise application methods, and the science of clamping and curing.
My recommendations come from a decade of personal stress tests in my workshop, measuring how different glues perform under real-world pressure and environmental change.
The Glue Bond Mechanism: It’s More Than Just Stickiness
Think of adhesion and cohesion like this. Adhesion is the Velcro hook grabbing the wood’s fuzzy loop. Cohesion is the strength of the melted plastic that forms the hook itself. A great bond needs both.
The wood is not a smooth surface. It’s a sponge made of microscopic straws (vessels and tracheids). Liquid glue wicks into these open pores. When it cures, it forms a mechanical lock, like thousands of tiny roots growing into the wood.
How it cures changes everything. Common yellow glue (PVA) cures as its water evaporates, pulling the pieces together. Polyurethane glue reacts with moisture in the air or the wood, foaming as it expands into gaps. Two part epoxy undergoes a chemical reaction, creating a rigid plastic that doesn’t care about humidity. To choose among epoxy, polyurethane, and PVA for your project, a quick glue comparison can help. In an epoxy-polyurethane-PVA glue comparison, you’ll see how cure mechanisms, strength, and moisture tolerance differ in practice.
A perfect glue joint is stronger than the wood fibers around it. Your goal is to create a joint where the wood fails before the glue line does.
Your First Decision: What Are You Gluing and Where Will It Live?
Start with the project’s final home. This dictates everything.
For interior furniture in a stable home, standard PVA (yellow or white glue) is the workhorse. It’s plenty strong, sands easily, and cleans up with water.
Exterior projects like a garden bench face sun, rain, and seasonal swelling. You need a waterproof adhesive. I use polyurethane (like Gorilla Glue Original) or a waterproof PVA (Type III) for these. Polyurethane’s foam fill is forgiving on imperfect joints outdoors.
Wet or high humidity use is the ultimate test. Think of a cutting board or a boat paddle. Here, you need a gap filling, 100% waterproof, and food safe (if applicable) adhesive. Two part epoxy is the king of this domain. It creates an inert, impervious plastic bond.
Structural joints bear weight and stress. A chair leg joint needs high strength and creep resistance (resistance to slowly stretching under load). Most PVAs and epoxies excel here. For non structural work, like applying veneer, a slower setting glue gives you time to position the delicate sheet. Liquid hide glue or a specialized veneer glue is my choice.
My shop logic is a simple three question filter:
- Will it get wet or live outside? If YES, use Polyurethane or Epoxy.
- Is it a high stress joint (chair, table frame)? If YES, use PVA or Epoxy.
- Do I need long open time or gap filling? If YES, use Polyurethane or Epoxy.
If you answer NO to all three, standard yellow PVA is almost always the right, economical choice.
Choosing the most durable adhesive for the job is a sustainable practice. A garden chair that lasts 30 years instead of 5 because of a proper glue choice creates far less waste. It honors the wood you’re working with and ensures strong bonds between the wood pieces.
Choosing Adhesive by Wood Type and Joint Design
Your wood species dictates the first big choice. Most domestic hardwoods and softwoods are glue-friendly. I keep a gallon of standard yellow PVA (like Titebond II) in the shop for maple, cherry, and pine. These woods have open pores and minimal natural oils, so glue soaks in just enough to create a solid mechanical bond as it cures.
Oily tropical hardwoods, like teak or the incredibly dense ipe wood, are a different challenge. Their natural oils and resins repel water-based adhesives. A standard PVA glue will bead up and fail. I’ve tested this on ipe scraps, and the bond is shockingly weak.
Prepping Oily and Dense Woods
For these species, surface prep is non-negotiable. Gluing straight from the planer won’t work. You must remove the oily surface layer immediately before applying adhesive. I use a two-step method. First, wipe the joint surface with acetone or denatured alcohol on a clean rag. This cuts the surface oils. Then, sand the area with 100-grit paper to open up the wood fibers. Apply your adhesive within minutes, before new oils can wick to the surface.
The goal is to give the glue a clean, porous surface to grip, bypassing the wood’s natural water resistance. For the absolute strongest bond on exotics, I skip PVA entirely and use a specialized epoxy or a resorcinol-formaldehyde adhesive, which are not water-based and aren’t repelled by oils.
Joint Strength: Edge Grain vs. End Grain
Think of wood like a bundle of straws. The long side of the straw (edge or face grain) gives you a large, continuous surface for glue to cling to. The cut end of the straws (end grain) is like an open capillary. It acts like a sponge, sucking glue deep into the wood away from the joint line.
This is why an edge-to-edge joint for a table top is so strong, and a simple end-grain butt joint is one of the weakest connections in woodworking. The glue starves at the actual interface where you need it most.
Adhesive Recommendations for Common Joints
Your joint design informs your glue choice and technique. Here’s my shop-tested approach.
- Edge-to-Edge (for panels): Standard yellow PVA. It’s plenty strong, has a manageable open time (10-15 minutes), and cleans up with water. Apply a thin, even bead and clamp firmly. The bond will often be stronger than the wood itself.
- End-Grain Joints (butt, miter): PVA is a poor choice alone. My method is to “size” the end grain first. Brush a thin coat of diluted glue (50% glue, 50% water) onto the end grain and let it get tacky. This seals the pores. Then apply full-strength glue and assemble. For critical miters, I reinforce them with a mechanical fastener like a spline or domino.
- Lap & Mortise & Tenon Joints: These are mostly long-grain to long-grain connections, so PVA is perfect. The key for a mortise and tenon is to apply glue only to the cheeks and shoulders of the tenon, not the end grain at its tip. Putting glue on the end grain just creates a hydraulic press, making the joint hard to seat fully and providing little benefit.
- High-Stress or Outdoor Joints: For chairs, outdoor furniture, or anything exposed to moisture, I switch to a waterproof adhesive. Titebond III (a PVA) or a polyurethane glue (like Gorilla Glue Original) are my go-tos. Polyurethane glues expand as they cure, filling gaps but creating a messy squeeze-out you must manage.
The Woodworker’s Adhesive Toolkit: PVA, Polyurethane, Epoxy, and More
Forget brand names for a moment. The real choice comes down to chemistry. Each adhesive forms bonds in a different way, which dictates where it shines and where it fails. I think of them as specialized tools, not universal solutions.
Yellow and White PVA (Aliphatic Resin)
This is polyvinyl acetate glue, the workhorse in every shop. It works by soaking into the wood fibers and then hardening as the water evaporates. The yellow “carpenter’s glue” is just a white PVA with resins added for tack and sandability.
For indoor furniture, a quality Type II “water-resistant” PVA is almost always the right and most economical choice. Type I “waterproof” adhesives, like those rated for outdoor use, have cross-linking polymers that resist breakdown. The difference matters. I built a simple pine tool caddy with Type I glue. Last spring, my basement flooded, and it sat in two inches of water for a day. The wood swelled, but every glued joint held perfectly solid. Type II might have softened.
Remember these practical points:
- Clamp time is about 30 minutes, but full cure takes 24 hours.
- It needs tight joints. Gaps bigger than a human hair weaken the bond.
- Store it above freezing. If it freezes and thaws, the chemistry breaks down and it becomes lumpy and useless.
Polyurethane Glue (The Reactive Foamer)
This glue doesn’t dry. It cures by reacting with moisture. It pulls water from the air or from the wood itself to create a foam-like plastic that bonds and expands.
That expansion makes it a fantastic gap-filler for imperfect joints, but you must clamp the work tightly to control the foam. If you don’t clamp it, the expansion will push your pieces apart. The foam that squeezes out is a nightmare to sand. You have to let it fully cure into a rubbery blob, then cut it away with a sharp chisel.
I use it for bonding hardware. Scuffing a metal bracket with 80-grit sandpaper and then using polyurethane glue creates a shock-absorbent, strong bond that PVA can’t match. Just work fast. In humid conditions, it can start foaming in the bottle and become unusable.
Epoxy Resin (The Gap-Filling Structural Master)
Epoxy is a two-part system: a resin and a hardener. When mixed, they undergo an irreversible chemical reaction, creating a incredibly strong, waterproof plastic.
This is your glue for the toughest jobs, like permanently bonding a wooden workbench top to a concrete floor slab. It fills large, structural gaps that would doom any other adhesive. I used a thick, slow-cure epoxy to set the wooden posts for my hardwood maple woodworking lumber rack directly into holes in the shop’s cement floor. Ten years later, they haven’t budged.
The drawbacks are real. You must mix the two parts in the exact ratio by volume or weight. Get it wrong, and it never fully hardens. Pot life-the time you have to work with the mixed glue-can be as short as 5 minutes or as long as an hour, so read the tech sheet. It’s also the most expensive option per ounce. Save it for when nothing else will do.
Hide Glue and Cyanoacrylate (CA) Glue
These are the specialists. Hot hide glue, made from animal collagen, is beloved by traditionalists and violin makers. Its bond can be softened with heat and moisture, making repairs simple. This reversibility is why it’s the standard for antique restoration and musical instruments where future disassembly is planned.
Cyanoacrylate, or “super glue,” is your instant fix. I always have a bottle of thin CA for stabilizing a punky spot in an old board or tacking a small crack before a more structural glue-up. It cures in seconds on contact, but the bond can be brittle. For a stronger hold on end grain, I use a medium-viscosity CA with an accelerator spray. Just don’t get it on your skin.
Non-Wood Bonding: A Quick Guide to Metal, Concrete, and Fabric
Sometimes, wood needs to stick to something else. The rules change here. Forget wood glue, you need an adhesive designed to bridge two very different materials.
To glue metal to wood, surface prep is everything. The metal must be abraded with 80-grit sandpaper to create a mechanical “tooth” for the adhesive to grip. Then, you must degrease it thoroughly with acetone or rubbing alcohol. Any oil prevents a bond. I use a two-part epoxy for this job every time. It fills gaps and doesn’t shrink as it cures, creating a durable, rigid connection. Choosing the right wood-to-metal adhesive solution is key for a durable joint. Different formulations—epoxies, hybrids, and polyurethane systems—offer varying gap-filling and cure profiles.
For bonding wood to concrete, you face two challenges: concrete’s porous, dusty surface and its tendency to wick moisture. Epoxy is again a top choice, especially for structural loads. For less critical applications, like securing a sill plate, a high-quality construction adhesive in a caulk gun works. Whichever you choose, ensure the concrete is clean, dry, and free of laitance (that dusty top layer) for the bond to hold.
How do you attach fabric to wood without glue? Often, you shouldn’t use glue. Fabric needs to flex and be replaceable. For upholstery, I use mechanical fasteners exclusively. A staple gun is the standard tool. For a cleaner look, you can use decorative tacks or even a trim strip screwed down over the fabric’s edge. This method is reversible and doesn’t risk adhesive soaking through and staining the material.
The Best Practice Workflow: From Bottle to Clamp
Good gluing isn’t art, it’s a repeatable process. Follow these steps in order every single time to make glue joint failure a rare event in your shop.
Step 1: Surface Preparation is 90% of the Job
The golden rule: glue bonds best to fresh, clean wood. A planed or sanded surface is far superior to a rough-sawn one. The saw tears wood fibers, leaving them crushed and sealed. A sharp plane or sander shears them cleanly, opening up the cell walls for glue to penetrate. I surface my stock just before gluing, never days in advance.
Check your wood’s moisture content. If it’s much above 10%, it will shrink after you glue it, putting immense stress on the joint. Wood should be at equilibrium with your shop environment, which is typically between 8-10% moisture content.
For tight-fitting joints like those in a wood puzzle, precise machining is your primary preparation. The parts should fit together snugly with hand pressure alone. The glue’s job in a perfect puzzle joint is not to fill gaps, but to weld the already-touching surfaces together permanently.
Step 2: Mixing and Application – The Right Amount in the Right Place
How you apply wood glue matters. For an edge-to-edge joint, spread a thin, even coat on both surfaces. I use a small brush or a finger. You want full coverage, not puddles. The ideal application looks like a consistent, faintly beaded surface, not a wet, running mess. Too much glue creates a weak “glue line” and a huge cleanup job.
End grain is a glue sponge. It will soak up adhesive and starve the joint. The solution is the “size coat” technique. Apply a very thin coat of glue to the end grain and let it get tacky for a minute. This seals the pores. Then, apply your normal coat and mate the pieces. This double application ensures glue remains in the joint to bond.
If you’re using epoxy or resorcinol, respect the chemistry. Mix ratios are not suggestions. Use measured pumps or a digital scale. Work within the pot life, which is how long you have to use the mixed glue before it starts to gel in the cup.
Step 3: Clamping, Squeeze-Out, and Curing Time
Clamp for two reasons: alignment and intimate contact. Your goal is to pull the joint tight so the glue surfaces are perfectly mated. You should see a thin, even bead of squeeze-out along the seam. If you’re cranking the clamps so hard that glue is squirting out wildly, you are crushing the wood fibers and creating a weaker joint. Use even pressure across the joint.
Deal with squeeze-out based on your glue. For standard PVA (yellow or white glue), wipe it off with a damp rag while it’s wet. For polyurethane glue (the foaming kind), let it foam and semi-cure for about an hour, then scrape it off easily with a chisel. It’s much harder to clean when fully cured.
Patience is a virtue. Most PVA glues set enough to handle in 30-60 minutes. But full cure, where the bond reaches its maximum strength, takes a full 24 hours. Don’t stress the joint with sanding or machining before that time is up. I always give it the full day.
Troubleshooting the Bond: Why Joints Fail and How to Fix Them
A perfect glue-up needs four things: clean wood, the right adhesive, proper clamping, and the correct environment. Fail on one, and the joint fails. Let’s fix common problems.
Diagnosing the “Starved Joint”
You clamp a joint and a perfect bead of glue squeezes out. That looks right. But if you see only a thin, spotty line or no squeeze-out at all, you likely have a starved joint. This happens when there’s not enough glue in the joint or, more often, when you apply too much clamp pressure.
Excessive pressure forces almost all the adhesive out of the joint line, leaving a thin, brittle film that cannot hold.
Wood glue doesn’t stick wood to wood like a sticker. It forms a mechanical bond by soaking into the wood fibers and then hardening. If you squeeze all the glue out, there’s nothing left to soak in and bridge the gap. The fix is simple. Apply a consistent, moderate bead of glue. Tighten clamps just until you see a continuous, even bead of squeeze-out along the entire joint. If you see the wood fibers compressing deeply, you’ve gone too far.
When Contamination Kills the Bond
Glue needs direct contact with raw wood fibers. Any barrier will cause failure. The three main culprits are oil, wax, and old glue.
- Oil: From handprints, finishing oils, or naturally oily woods like teak. It repels water-based PVA glue.
- Wax: From paste wax on saw tables or some “glue-proof” tapes. It creates a non-stick surface.
- Old Glue: A failed dry-fit or a previous repair leaves a film that new glue can’t penetrate.
The solution is mechanical abrasion. Sanding is your best friend. For oil or wax, wipe the area with mineral spirits or acetone first to break down the contaminant, then sand the mating surfaces with 120-grit sandpaper just before gluing. For old glue, you must sand or plane it off completely until you see fresh wood. Never try to glue over a sealed or finished surface, it will always fail.
The Special Challenge of Oily Woods
Woods like teak, rosewood, and ipe contain natural oils and resins that protect the wood from rot. They also protect it from your glue. Standard yellow glue will often peel right off after curing because the oil prevents a good mechanical bond.
You must degrease the joint. Here is my shop method:
- Cut and sand your pieces to final dimension.
- Immediately before gluing, wipe all mating surfaces with acetone or denatured alcohol using a clean rag.
- Let the solvent evaporate for one minute (it happens fast).
- Apply your adhesive immediately.
For the adhesive itself, I switch from standard PVA. A two-part epoxy or a specialty adhesive like Titebond III, which has better oil tolerance, is a wiser choice for these tricky woods. Solvent wiping is not a suggestion for oily woods, it is a required step.
How Temperature and Humidity Sabotage Curing
Adhesives are chemicals, and chemical reactions are controlled by their environment. Most common wood glues (PVA, polyurethane) are designed to cure around 70°F (21°C) but understanding the chemistry of adhesives can help in choosing the right one for wood types and conditions.
In a cold shop (below 55°F / 13°C), the glue’s molecules move slowly. It may skin over on top but remain liquid and weak in the middle of the joint for days, or it may never fully cure at all. The bond will be brittle and fail under light stress. You must warm your space, your wood, and your glue bottle before starting.
Humidity plays a dual role. High humidity can cause wood to swell slightly before you clamp, then shrink as it dries, putting the cured glue under permanent stress. Very low humidity can cause the glue to dry too quickly on the surface, preventing a deep bond. Wood moisture content at glue-up greatly influences adhesive bonding; mismatched moisture can lead to weaker or stressed joints. For the strongest bond, aim for a shop environment similar to where the finished piece will live. Glue up indoors if you’re building indoor furniture, not in a damp garage.
Testing Your Glue Joint: A Simple Shop Experiment
Reading about glue strength is one thing. Seeing it with your own eyes is another. The best way to understand the bond you’re creating is to break it on purpose. I keep a box of test blocks in my shop for this exact reason. It’s the only way to move from theory to trustworthy knowledge.
Making Your Test Samples
Start with scrap wood from the same board. This controls for variables like moisture content and density. Cut four pieces about 6 inches long and 2 inches wide.
- Prepare two pieces with a perfectly jointed edge (flat, straight, and square).
- Prepare two pieces with a deliberately poor edge: slightly rounded, or with visible saw marks.
Apply your chosen adhesive to one “good” pair and one “poor” pair, following the manufacturer’s instructions for clamp time and pressure. Let them cure fully for at least 24 hours. You now have a direct comparison.
The Destructive Test: What You’re Looking For
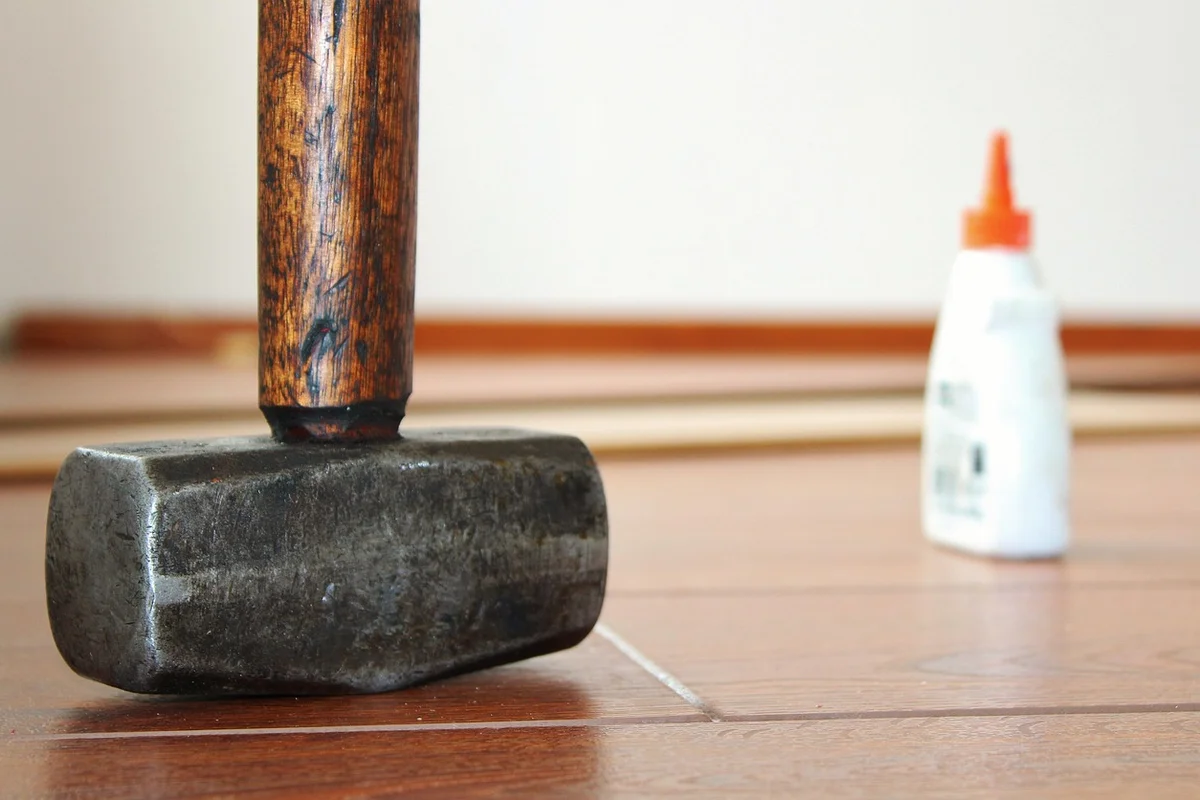
Clamp one end of a sample joint securely in a vise, leaving several inches overhanging. Put on safety glasses. Take a hammer and strike the overhanging end sharply, focusing the force right at the glue line.
The fracture pattern tells the true story of your glue joint’s quality. You are observing the failure mode.
- Wood Fiber Failure (The Goal): The wood itself splinters and tears apart, leaving fuzzy, ragged wood fibers on both sides of the broken joint. The glue line is intact. This proves your bond is stronger than the wood.
- Adhesive Failure (A Problem): The two pieces break cleanly apart along the glue line. The surfaces are smooth, showing little to no wood fiber. This means the glue did not properly penetrate or bond to the wood cells.
- Mixed Failure (A Clue): You see areas of wood fiber tear and areas of clean glue-line separation. This often points to uneven pressure during clamping, contaminated wood surfaces, or adhesive that started to set before assembly.
Translating the Results to Your Work
If your “good” preparation sample shows wood fiber failure, your process is sound. If your “poor” preparation sample shows adhesive failure, you’ve visually confirmed why surface prep is non-negotiable.
I run this test with every new bottle of glue and on questionable scraps of oily or dense woods. Seeing a glue joint fail in the safety of a test is far better than having a finished project fail later. It removes guesswork and builds confidence in your materials and your method.
Wood Glue FAQ: The Bench Science You Need
How does wood movement affect my glue choice for long-term durability?
Adhesives must accommodate the wood’s seasonal expansion and contraction. For stable indoor projects, rigid PVAs are excellent, but for environments with large humidity swings, a more flexible polyurethane or epoxy may better withstand the stress without cracking.
Why does my wood soak up glue so fast, leaving a dry joint?
This is common with highly porous woods or end grain, which act like a sponge. To prevent a starved joint, pre-seal the surface with a diluted “size” coat of the same adhesive, letting it get tacky before applying the full-strength glue for the final bond.
When should I choose PVA over Polyurethane for an outdoor project?
Use a waterproof PVA (Type I/III) for tight-fitting outdoor joints where controlled clamp pressure is possible. Choose polyurethane for exterior joints with slight gaps, as its expansion will fill voids, but you must clamp firmly to control the foam.
Can I reverse a glued joint for repairs, and which adhesive allows this?
Traditional hot hide glue is specifically chosen for its reversible bond, which can be softened with heat and moisture for repair. Most modern synthetic adhesives like PVA, polyurethane, and epoxy form permanent, non-reversible bonds, unlike hide glue which relies on natural protein chemistry.
What’s the real-world shelf life of bottled wood glue, and how can I test it?
Unopened PVA glue lasts 1-2 years, but once opened, it can begin to degrade or thicken within a year. Test questionable glue by applying a bead between two scraps; if it doesn’t cure hard and brittle within 24 hours, its cohesive strength is compromised.
Building Bonds That Endure
The strongest glue joint starts with matching the adhesive to your wood species and project conditions. I rely on material science, not habit, choosing flexible PVAs for interior work and reactive epoxies for oily woods or outdoor use. Always prepare surfaces meticulously, because even the best glue cannot bridge a poorly fitted joint. Clamp with steady pressure and allow the full cure time for a bond that will withstand decades of use, especially when used in outdoor furniture.
Choose low-VOC adhesives and pair them with wood from sustainably managed forests to minimize your environmental footprint. Keep exploring wood technology and adhesive chemistry through hands-on testing; it deepens your skill and makes your craft more responsible. Understanding the environmental impact of wood adhesives and their VOC emissions helps you make safer, greener choices. This awareness supports healthier indoor air and responsible craftsmanship.
Expert Resources and Citations
- Amazon.com: Wood Glue Applicator
- Wood glue: Carpentry without nails or screws
- r/woodworking on Reddit: Glue up tips?
- Gorilla Wood Glue | Gorilla Glue
- Wood Glue: The Best Wood Glue and How to Glue Wood Together
- How to use wood glue: Professional results with PVA
David Ernst
David is a veteran woodworker. He is now retired and stays in his cabin in Wisconsin which he built himself. David has 25+ years experience working in carpentry and wood shops. He has designed and built many small and large wood projects and knows the science behind wood selection like the back of his hand. He is an expert guide on any questions regarding wood material selection, wood restoration, wood working basics and other types of wood. While his expertise is in woodworking, his knowledge and first hand experience is far from 'woody'.