
What Sanding Grit Sequence Prevents Blotchy Wood Stain?
You’ve sanded a project smooth, applied your stain, and ended up with a dark, blotchy mess. This common frustration isn’t just about the stain itself; it’s a sign your wood’s surface wasn’t prepared correctly at a microscopic level.
This guide provides a shop-tested, materials-focused method. We will cover the cellular science behind uneven stain absorption, the exact grit progression I use in my shop, and the critical mistakes that guarantee blotchy results.
My advice comes from pressure-testing these sequences on dozens of wood species and examining the results under magnification.
Why sanding is the key to perfect stain (and how it goes wrong)
Think of wood stain like a dye for fabric. The color comes from tiny pigment particles suspended in a carrier. These particles don’t paint the surface. They lodge themselves into the microscopic valleys and pores you create with sandpaper. If those valleys are uneven in depth or size, the stain collects unevenly. That’s blotchiness.
Your goal is not merely a smooth feel. It’s a uniform, predictable texture for the stain to absorb into. Imagine preparing a garden bed. You wouldn’t plant seeds in rocky, lumpy soil and expect even growth. You rake it level first. Sanding does the same for stain.
This is the critical difference between preparing for stain and preparing for a clear finish like lacquer or varnish. For a clear coat, you often sand to an ultra-fine grit (320 or higher) to create a glass-smooth surface that feels perfect to the touch. For stain, that polished surface can actually reject color. You need just the right amount of texture.
The core sequence: moving through the grits
How to pick your starting grit
“What grit sandpaper should I start with?” I get this question weekly. The honest answer? It depends. You must read the wood’s surface like a map, and understand the grit sandpaper you’ll need for different types of wood.
- Run your fingernail across it. Can you feel ridges from the planer or table saw? Those are mill marks.
- Look for dents, deep scratches, or uneven glue spots. This is damage that needs leveling.
Here’s my shop-tested decision guide:
- 80 or 100 grit: For lumber straight from the mill with visible saw or planer marks, or for repairing significant dings and imperfections. This is your bulldozer.
- 120 grit: For wood that’s already been surfaced by a planer or drum sander and is flat but has minor texture. This is where I start 80% of my projects.
- 150 grit: For fine hardwoods like maple or cherry that are already in excellent, flat condition. You’re just refining the surface.
The rule is simple: start with the finest grit that will efficiently remove the imperfections. Do not automatically grab the coarsest paper. Starting too coarse just creates deeper scratches you’ll have to spend more time removing later.
The progression and the magic of each step
You’ve started with 120 grit. What’s next? You can’t jump straight to 220. The scratches from the 120-grit paper are too deep for the 220-grit abrasives to reach. You need a middle step.
I follow the 50% rule. Increase your grit by about 50-60% of the previous number. A practical sequence is 100 > 150 > 220. Or 120 > 180 > 220. Each stage has a specific job:
- Coarse Grits (80-120): Their job is flattening and leveling. They remove material quickly but leave pronounced, deep scratches.
- Medium Grits (150-180): Their job is erasure. The scratches from these grits are designed to completely overwrite and remove the deeper scratches from the previous stage.
- Fine Grits (220): Their job is refinement. They create the final, consistent micro-texture that allows stain to absorb evenly.
You are not done with a grit until every single scratch from the previous, coarser grit is gone. The best way to check is with a raking light. Hold a lamp or bright shop light at a low angle to the wood surface. Those lingering coarse scratches will show up as shiny lines. Sand until they disappear under that light, then move on.
Finding the final grit for your project
This is where most woodworkers go wrong. For a stain finish, smoother is not always better. Sanding to too fine a grit can burnish the wood fibers, essentially polishing them closed, which can affect stain absorption and finish.
For most woods and most oil or gel-based stains, 180 or 220 grit is the ideal final grit. This leaves the wood pores open and creates a perfect, uniform scratch pattern for the pigment to settle into. I almost always stop at 220 for staining pine, oak, or walnut.
For very dense, close-grained woods like hard maple or cherry, blotchiness is a famous problem. The stain absorbs rapidly into the porous earlywood but struggles with the dense latewood. Sometimes, stopping at a slightly coarser 150 grit can help by opening up the dense areas just enough to promote more even absorption. Test this on scrap first.
Remember the contrast: if you were applying only a clear polyurethane, you might sand to 320 grit after staining for a perfectly smooth top coat. But for the stain itself, 220 is often your finishing line. Going beyond it can lead to a pale, uneven, and disappointing color.
Sanding different woods: pine, cherry, oak, and tricky species
Think of sanding as a conversation with the wood’s structure. Different species have different anatomies, and your sanding strategy must adapt. A one-size-fits-all grit sequence leads to frustration and blotchy finishes.
The softwood challenge (Pine, Fir, Poplar)
Blotchy stain on pine isn’t your fault, it’s the wood’s design. The light-colored bands (earlywood) are soft and porous, while the darker bands (latewood) are hard and dense. The most common mistake is sanding softwoods too aggressively, which polishes the hard latewood and tears the soft earlywood, creating a surface that absorbs stain at wildly different rates.
Power sanders generate heat. On pine, that heat can slightly melt the resins and burnish the surface, creating a glaze that blocks stain. For the final stages, put the power sander down. I sand pine entirely by hand for the last two grits, using a block and moving steadily with the grain at 150, then 180 grit. This creates a uniformly open surface without glazing. That careful surface conditioning is part of preparing the pine for finishing. In the next steps, this stage ties directly into applying stain and topcoat for a smooth, durable finish.
Even perfect sanding can’t equalize the density difference. This is where a washcoat comes in. A washcoat of diluted shellac (1 lb. cut) or a commercial pre-stain conditioner is a necessary step after sanding, not a replacement for it. It partially seals the thirsty earlywood so the later stain absorbs more evenly. Sanding prepares the canvas; the washcoat manages the paint.
Hardwood strategies (Oak, Mahogany, Walnut)
Open-grained woods like oak and mahogany are stained beautifully by their large pore structure. Your sanding goal here is fundamentally different. You are not trying to fill the pores, but to ensure they are clean, open, and free of sanding debris that would muddy the stain’s color. A good grit progression (e.g., 100 > 120 > 150) knocks down mill marks and cleans the pores without crushing the delicate edges around them.
Mahogany demands a light touch. Its interlocked grain can burnish quickly under a powered sander, creating shiny spots that reject stain. Use lighter pressure on your final passes with a random orbital sander, and consider a final hand-sand at 180 grit to ensure a consistently matte, absorbent surface. A proper finish for mahogany helps prevent blotching and uneven absorption. Using a pre-stain conditioner or blotch-preventing sealer can further even out tone before staining.
Walnut is a forgiving hardwood. Its rich natural color and tannins often look best with just a clear finish. If you do stain, you can usually stop at a lower grit. I often stop sanding walnut at 150 grit, as the slightly more textured surface accepts gel stains and dyes more evenly and retains a vibrant, natural look. Going to 220 or higher can make it too smooth, causing some stains to sit on the surface. Walnut’s Janka density influences how finishes penetrate and wear, guiding your choice of coating. Knowing this helps plan for color depth and durability.
Dense and exotic woods (Maple, Cherry, Ipe)
These woods have very fine, tight grain and can be the most frustrating to stain evenly. The blotching comes from subtle differences in density and porosity within a single growth ring that your eye can’t see until the stain hits it.
Cherry is the classic example. It sands beautifully but reveals every imperfection under stain. Any scratch or sanding mark left behind will soak up extra pigment and darken dramatically, creating visible lines and swirls. You must progress meticulously through each grit (100, 120, 150, 180) to fully remove the scratches from the previous one. A final, careful hand-sand at 180 grit with the grain is non-negotiable for a flawless base.
Ipe and other ultra-dense tropical woods are a different beast. They are so hard they can quickly dull standard aluminum oxide sandpaper. Carbide-edged abrasive disks last much longer on woods like ipe and reduce loading. Furthermore, their high natural oil content often resists penetrating stains. Because of this, you frequently don’t need to sand beyond 150 grit, as the stain won’t penetrate deeply regardless. The goal is a clean, flat surface for a film-forming finish instead.
Best practice workflow: from bare wood to stain-ready
This is the universal sequence that works under all the species-specific advice. It’s your foundation.
Flatten first, then refine
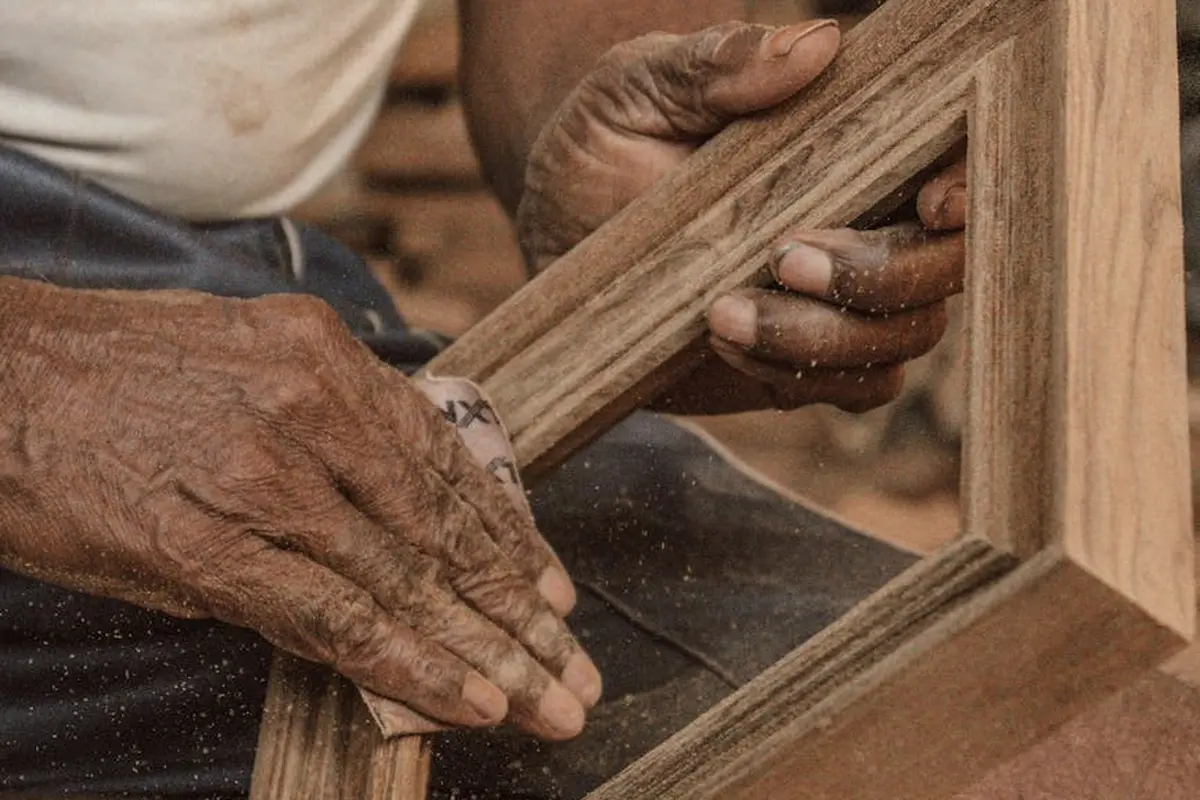
A random orbital sander is your best tool for efficiently creating a flat surface on larger panels. For hand sanding or edges, always use a rigid sanding block. Let the abrasive do the work; pressing too hard creates heat, gums up the paper, and leaves behind deep, uneven scratches. Move the sander in overlapping passes at a slow, steady pace.
The cardinal rule: sand with the grain
Cross-grain scratches are microscopic ravines. When you apply a liquid stain, pigment flows into these ravines and pools there. Under a finish, these pools become dark, glaring lines that scream “poor preparation.” While a random orbital sander’s pattern helps mask this, your final passes with any tool, and every pass when hand-sanding, must follow the wood’s grain direction.
The dust removal ritual
Sanding dust is fine powder. A dry rag just pushes it around and into the pores. Your removal process has three steps:
- Use compressed air to blast dust out of pores, joints, and corners.
- Vacuum the entire surface thoroughly with a brush attachment.
- Wipe the surface with a tack cloth slightly dampened with mineral spirits. The tackiness grabs micronsized dust, and the spirits evaporate cleanly.
Never skip from sanding directly to staining; the dust will mix with your stain, creating a muddy, gritty finish.
The final test: the mineral spirits reveal
Your eyes can lie. A dry, dusty surface hides scratches. Wiping the wood with a clean rag dampened with mineral spirits is the only reliable way to see the surface as the stain will see it. The spirits wet the wood without adding color, highlighting every scratch, mill mark, and sanding imperfection in sharp relief. If you see flaws, go back a grit and fix them. This one simple test saves countless ruined projects. Understanding how the wood absorbs stain is the next essential step in prep. It tells you whether more sanding or a conditioner is needed to prevent blotching.
Why it Fails: Fixing Common Sanding-Before-Stain Mistakes

You can do everything else right, but a bad sanding job will sabotage your stain. I’ve seen it ruin projects that had perfect joinery. The problems come down to a few key, fixable errors.
Skipping Grits and Seeing Ghosts
Jumping from a coarse 80-grit paper straight to 220-grit is a classic mistake. Your eyes might tell you the surface feels smooth, but stain reveals the truth. Stain is a liquid that soaks into the wood, reaching deeper than your finest scratches. Those deep 80-grit furrows are still down there, hidden under a layer of finer, crushed wood fibers.
When you apply stain, it absorbs more heavily into those deeper scratches, turning them into dark, visible lines. They look like ghostly sanding marks haunting your finish. The only fix is to sand back down and remove them completely.
Think of it like leveling a dirt road. Using 80-grit makes big ruts. Going to 220-grit only smooths the very top layer of dirt. A heavy rain (the stain) will still pool in the old ruts. You need intermediate grits-120, then 150-to gradually fill and level those grooves for good.
The Burnishing Effect
More sanding is good, right? Not always. Using an excessively fine grit like 320 or 400 on softwoods like pine or cherry before staining often creates a worse problem: burnishing.
As you sand, you’re not just cutting fibers; you’re generating heat and pressure. With very fine paper or a worn-out pad that’s lost its abrasive grit, you essentially polish the wood. You compact and melt the surface fibers shut. Burnishing creates a non-porous, almost glassy surface that stain cannot penetrate evenly.
The result is a cloudy, splotchy finish where the stain beads up or only tints small areas. It looks lifeless. For most staining projects, stopping at 180-grit or 220-grit is the sweet spot. You’ve cut the fibers cleanly, leaving them open to absorb color. Sanding beyond that is for smoothing between coats of clear finish, not for prep.
Dust and Oil Contamination
After sanding, your wood isn’t ready. It’s covered in an invisible layer of trouble: dust and oil. Sanding dust isn’t just loose; it gets ground into the pores. Skin oils from your fingers transfer easily.
Both act as a resist. Where they sit, the stain is blocked. You get light, blotchy spots, sometimes in the perfect shape of a fingerprint. The solution is simple but non-negotiable.
- First, use compressed air or a vacuum to blow out pores after your final sanding pass.
- Then, wipe the entire surface with a clean, lint-free cloth dampened with mineral spirits. This lifts any remaining dust and oils. Let it dry completely.
The mineral spirits trick also shows you exactly what the raw wood will look like under an oil-based stain, letting you spot potential blotchiness before you commit.
A quick note on related questions: You can sand after applying an oil or a stain, but it’s a correction. Sanding after oil means you’re removing that sealed layer to start over. Sanding after a stain (before it fully cures) can lighten or unevenly remove color. It resets the clock. For pressure-treated or chemically treated wood, I don’t recommend sanding at all. You risk inhaling or spreading the treatment chemicals, which is a health hazard best avoided.
Frequently Asked Questions: Sanding for Stain
Why is 180 or 220 grit typically the final grit for stain, and what happens if I sand finer?
Sanding to 180 or 220 grit creates a uniform, open micro-texture that allows for even pigment lodging without burnishing the wood fibers. Using finer grits (320+ polishes and compacts the surface), which can lead to pale, blotchy stain absorption by partially sealing the wood’s pores.
What is the specific risk of not sanding with the grain on the final passes?
Cross-grain scratches create deeper, torn troughs in the wood’s cellular structure that readily pool excess stain pigment. This results in dark, visible lines under a finish that cannot be fixed without removing the stain and re-sanding properly.
Why is compressed air recommended before the final wipe-down with a tack cloth?
Compressed air forcibly ejects fine sanding dust lodged deep within the wood’s pores, where vacuuming alone may not reach. If this dust remains, it mixes with the stain to create a muddy, occluded color and a gritty final surface.
Besides mineral spirits, how can I verify all scratches from a previous grit are removed?
Use a raking light held at a low angle across the surface; scratches from the previous, coarser grit will appear as shiny lines. You must sand under consistent, direct light until this “grit ghosting” is completely eliminated before progressing.
How does powered sanding contribute to blotchiness on softwoods like pine?
The heat and pressure from a power sander can burnish dense latewood bands and tear soft earlywood, creating a surface with wildly variable absorption rates. For final grits on softwoods, hand-sanding with a block is critical to achieve a uniformly open texture.
Mastering Your Sanding for a Perfect Stain
The single best way to prevent blotchy stain is to view sanding as preparing the wood’s surface for a chemical reaction, not just making it smooth. I always sand through a full sequence of grits, like from 120 to 220, because each step erases the scratches left by the previous one. This creates a uniformly open grain so the stain pigments absorb evenly, instead of pooling in soft, porous areas. Skipping grits might save ten minutes, but it guarantees a finish that highlights every sanding mistake instead of the wood’s beauty, unlike staining without sanding methods.
Choose wood from sources committed to sustainable forestry, and care for your finished pieces so they last for generations. Your next project will always teach you something new about how wood reacts to your tools, your shop, and your finish.
Deep Dive: Further Reading
- Grit Sequence: Let (gr)it do the hard work for you. | Uneeda
- Avoid (or fix) Blotchy Stain
- Wood Staining is blotchy and black…HELP! – Woodworking Stack Exchange
- Sanding Wood Before Staining: Grit Sequence for a Flawless Finish – eQualle Sandpaper
- Blotchy oak floor stain – Canadian Woodworking and Home Improvement Forum
David is a veteran woodworker. He is now retired and stays in his cabin in Wisconsin which he built himself. David has 25+ years experience working in carpentry and wood shops. He has designed and built many small and large wood projects and knows the science behind wood selection like the back of his hand. He is an expert guide on any questions regarding wood material selection, wood restoration, wood working basics and other types of wood. While his expertise is in woodworking, his knowledge and first hand experience is far from 'woody'.