
How Does Wood’s Porosity Control Your Finish and Glue?
You’ve probably seen glue squeeze-out disappear into oak but bead up on maple, or watched a stain turn pine blotchy while cherry glows. Wood porosity is the hidden material science behind these workshop mysteries.
This isn’t just theory. We will connect the cellular structure of wood to your hands-on results, covering how pore size dictates absorption, why adhesion fails on closed-grain woods, and the method to predict a perfect surface finish.
My advice comes from years of testing finishes and adhesives side-by-side on species across the porosity spectrum, right at the workbench.
What Exactly Is Wood Porosity? (And Is All Wood Porous?)
Think of wood less like a solid block and more like a microscopic bundle of straws. That’s porosity. It’s the network of tiny tubes and voids that run through wood, conducting water and nutrients when the tree is alive. You can’t always see them with your naked eye, but they’re there.
Yes, all wood is a porous material; the real difference lies in how big those pores are and how they’re organized. This isn’t an academic fact. It’s the reason your kitchen table warps in humidity, why glue soaks in, and why some woods blotch with stain. Porosity is wood’s most fundamental characteristic—distinct from its grain pattern and density that help identify wood species.
It’s All About the Cells: Vessels, Tracheids, and Grain
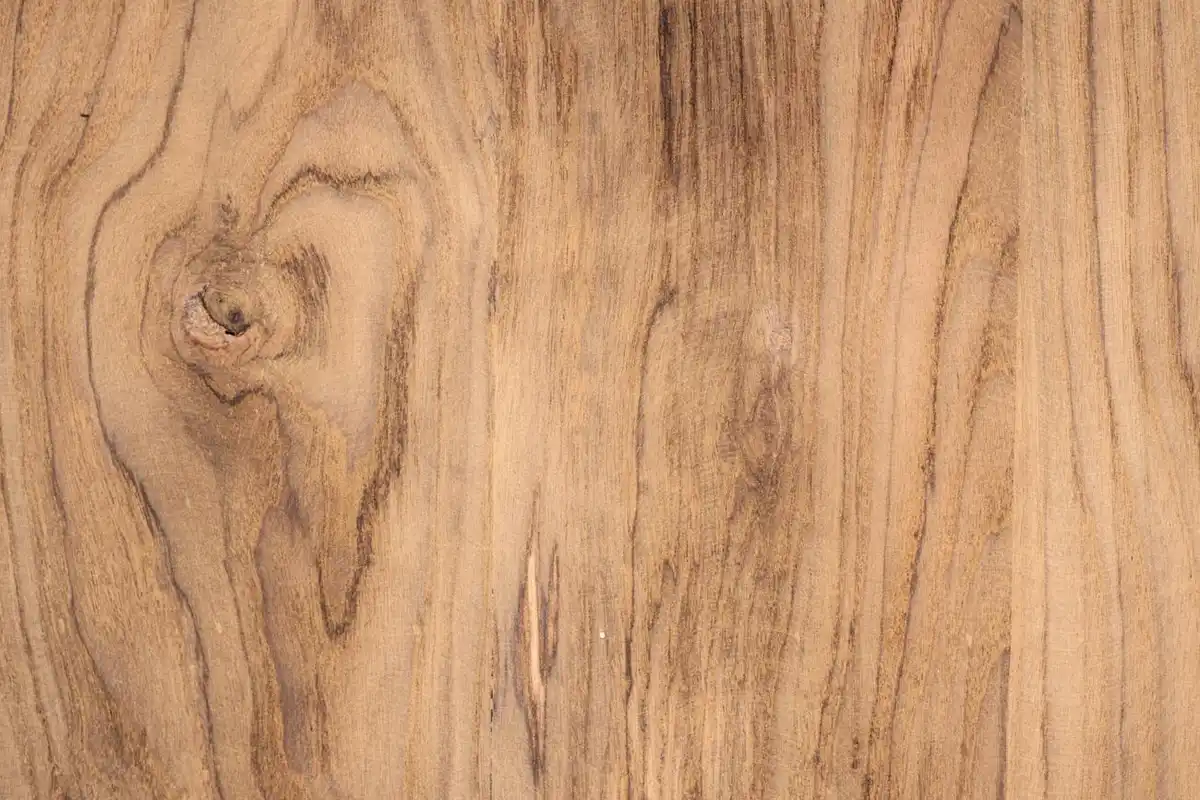
Hardwoods and softwoods build their plumbing differently. Hardwoods have vessel elements. Imagine them as a cluster of drinking straws running up the tree. In some species, these vessels are huge. In others, they’re almost invisible.
This gives us two main categories for hardwoods. Ring-porous woods, like oak and ash, pack their largest vessels into the earlywood (the fast-growing spring wood). If you look at the end grain, you see a ring of distinct, open pores. Diffuse-porous woods, like maple, cherry, and poplar, have vessels that are much smaller and evenly scattered throughout the growth ring. Their end grain looks smooth and uniform.
Softwoods like pine don’t have true vessels. They rely on tracheids, which are long, thin cells that perform both support and fluid transport. Their structure is more uniform but still very porous. You experience this when pine soaks up a coat of paint almost instantly.
The takeaway is simple: a wood with large, open pores will behave very differently from one with tight, small pores when you apply any liquid to it.
The Science Behind the Sponge: How Wood Cells Work
Wood doesn’t just passively get wet. It actively pulls liquids in. The primary force at play is capillary action, or capillarity. This is the same principle that draws water up a paper towel or sap up a tree. It happens because of the attraction between the liquid molecules and the walls of the tiny tubes (the pores), combined with the liquid’s own surface tension.
Hygroscopy is a related but separate concept. It describes wood’s tendency to absorb and release water vapor from the air, which causes it to swell and shrink. That’s a reaction to humidity. Capillary action is about liquid water, glue, or finish being physically pulled into the pores. In the shop, you deal with capillarity every time you apply a finish. You fight hygroscopic movement every time a panel cracks in winter.
Capillary Action: The Invisible Straw
The size of the pore is everything. A large pore, like those in oak, acts like a wide drinking straw. It can move a lot of liquid quickly, but the driving force (the capillary pressure) is relatively weak. A tiny pore, like those in maple or in the latewood of pine, acts like a super-thin coffee stirrer. It generates much stronger suction, pulling liquid upward with more force but through a narrower channel.
This explains why a water drop vanishes into an oak end grain in seconds, while it might bead up on a piece of maple. It’s also the key to glue adhesion and finishing. A thin, watery glue like Titebond Original relies on capillary action to wick into the pores and create a mechanical bond. If the pores are plugged with sanding dust or a previous finish, that glue sits on the surface and makes a starved, weak joint.
For a perfect finish, you must control this suction. On a thirsty, open-pored wood like oak, I often use a shellac seal coat to fill those giant pores and create a uniform surface for the topcoat. On dense maple, I might skip that step, as the finish will lay on the surface more predictably. Understanding this invisible force lets you work with the wood, not against it.
How Porosity Steers Liquid Absorption in Your Shop
How does wood porosity affect absorption? Think of it like a sponge. The more pores, the faster and deeper a liquid soaks in. This isn’t just academic. It dictates everything from how you finish a piece to how you clean it.
I use a simple water-drop test on scrap wood before any project. Place a single drop of water on a sanded surface and time how long it takes to disappear. Under five seconds means very porous wood, like oak or ash. Thirty seconds or more indicates low porosity, like maple or cherry. This one-minute test saves hours of finishing headaches.
This absorption rate has real consequences for anything you build. Are wood floors porous? Absolutely. A sealed oak floor has thousands of tiny pores that can trap liquid if the finish wears thin. This is why spills need quick attention.
Cleaning porous wood requires a gentle touch. How do you clean porous wood? Use a barely damp cloth, never a wet mop. Soap or cleaner should be mild and diluted. The goal is to clean the surface finish, not force liquid into the wood fibers beneath.
Disinfecting is trickier. How do you disinfect porous wood? You can’t truly sterilize it. I use a cloth lightly dampened with 70% isopropyl alcohol. It evaporates quickly, limiting deep absorption that could damage the wood or finish over time. Harsh bleach solutions will follow the pores inward and can break down the wood’s structure.
Why Your Stain Goes Blotchy on Pine
Pine is the classic teacher of uneven porosity. Look at the end grain. You’ll see distinct bands of earlywood (light, spongy, large pores) and latewood (darker, denser, small pores). The earlywood acts like a straw, sucking up stain rapidly and turning very dark. The dense latewood resists the stain, staying light. The result is a high-contrast, blotchy pattern.
Contrast this with cherry. Its pores are smaller and distributed more evenly throughout the growth ring. A drop of stain on cherry spreads and absorbs at a consistent rate. You get a gradual, uniform color change that deepens evenly. The key difference isn’t just porosity, but the uniformity of the pore structure from one spot to the next.
The fix for pine is a pre-stain wood conditioner. This is a thin, clear sealant that partially fills those thirsty earlywood pores. It creates a more even starting surface so the stain absorbs more uniformly. It’s a non-negotiable step for a professional look on softwoods.
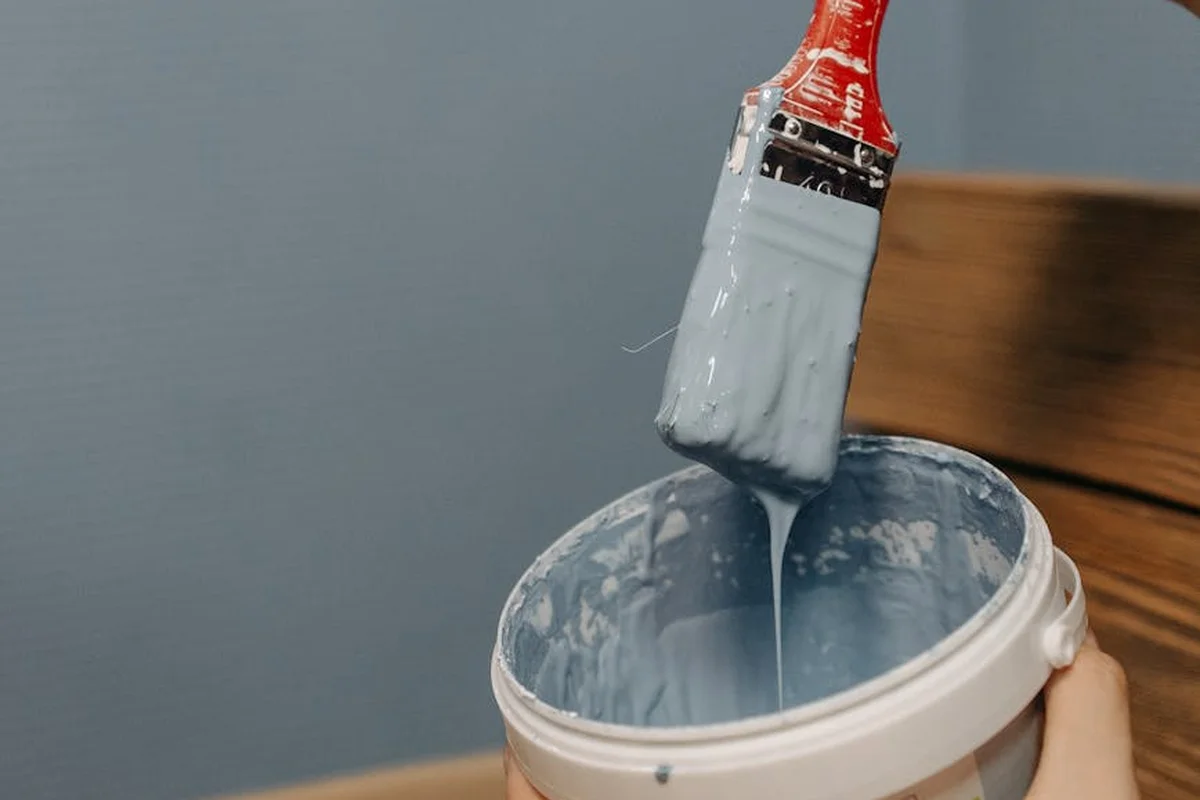
Getting Glue to Stick: The Adhesion Equation
How does wood porosity affect adhesion? A strong glue bond is a two-part process. First, you need surface adhesion, where the glue sticks to the wood cell walls. Second, you need mechanical interlock, where the liquid glue flows into pores and hardens, creating physical “fingers” that lock the joint together. This illustrates the importance of grain and porosity in wood bonding.
This creates two common shop problems. On low-porosity woods like maple or teak, you risk a glue-starved joint. The glue can’t penetrate, so it sits on the surface. Under stress, it may peel off like a sticker. On high-porosity woods like oak or ash, you get excessive squeeze-out. The glue runs deep into the pores, starving the joint line and making a huge mess to clean up.
For a perfect bond, you need just enough glue to wet the surfaces and get slight penetration, without draining the joint line. I check my joints by clamping a test piece. When I open it, I want to see a consistent, slightly shiny film of transferred glue across both surfaces.
Choosing Glue for the Grain
You can match your adhesive to the wood’s porosity. For porous woods like oak, ash, or mahogany, I use a thinner, more watery glue. Standard Titebond I (Original) is perfect. Its viscosity lets it flow into those large pores to establish a deep mechanical lock without being too runny. This choice is a key part of selecting and applying wood adhesive. In the next steps, we’ll cover how to apply it properly for best results.
For less porous, dense woods like maple, cherry, or exotic hardwoods, I switch to a thicker glue. Titebond III has a creamier consistency. It stays put on the surface better, ensuring the joint line stays wet for a strong surface adhesion. You can also use a standard glue but apply lighter clamping pressure to control squeeze-out.
The rule in my shop is simple: thin glue for thirsty woods, thick glue for tight-grained woods. Getting this right means stronger joints and less time spent cleaning up dried glue beads.
Conquering the Surface: Porosity and Finish
How does wood porosity affect surface finish? It comes down to one simple fact: a finish can either fill the pores or try to bridge them. The finish doesn’t know what you want. Your job is to pick the right one for the texture you’re after.
You cannot make wood non-porous. That’s its nature. But you can seal its surface so it acts that way. When someone asks how to make wood non-porous, they really want to know how to create an impervious barrier.
The central challenge is choosing between filling the pores for a flat surface or coating over them and accepting some texture.
Pore-Filling Finishes vs. Film-Building Finishes
These are your two strategic options. A pore filler, like a paste wood grain filler or a thin epoxy seal coat, is designed to sink in and physically plug the holes. You sand it back level with the wood surface. A film-building finish, like polyurethane, shellac, or lacquer, builds layers on top of the wood, creating a skin that spans the pores like a drumhead.
In my tests, a single coat of oil-based polyurethane on open-grained oak left a distinctly rough, textured feel. The finish was hard, but the pores were still valleys under the film. To get that glass-smooth feel on a tabletop, you need a filler first. For a bookshelf that won’t be touched much, a few coats of film finish is perfectly fine and far less work.
Use this rule: fill pores for surfaces you feel (tabletops, chair arms); use a film finish for surfaces you mostly see (cabinets, frames).
How to Paint Porous Wood Without a Hassle
The secret is never in the paint. It’s in the primer. A high-quality, solvent-based sealing primer is non-negotiable for porous woods like oak or fir. It creates a uniform, sealed base that prevents the paint from soaking in unevenly, which causes a blotchy, rough finish.
So, is painted wood porous? It shouldn’t be. A properly primed and painted surface is sealed. If you skip the primer or use a poor one, the paint film itself can be porous and will likely fail, letting moisture through and causing peeling.
Always use a sealing primer on porous wood. It’s the only way to get a smooth, durable paint job that lasts.
Porosity in Practice: A Guide to Common Species
Think of wood porosity as a spectrum. On one end, you have woods with wide, open vessels. On the other, woods with pores so small they feel solid. Your finishing plan should start the moment you pick the lumber.
High & Open Pores: Oak, Ash, Mahogany
These are the classic open-grained woods. You can see and feel the distinct pore patterns. They absorb stain rapidly and deeply, which can lead to dark, dramatic color but also easy blotching if you’re not careful. For a perfectly smooth finish, a paste wood filler is almost a requirement. Understanding wood anatomy and stain absorption methods can help you achieve better results.
Is acacia wood porous? Yes, absolutely. It belongs in this group. Its prominent grain and open pores mean it behaves very much like oak or ash. Expect it to soak up stain and benefit from a filler for a mirror-like topcoat.
With open-grained woods, plan for an extra step-either a pre-stain conditioner for even color or a grain filler for smoothness.
Low & Fine Pores: Maple, Cherry, Birch
These woods have much smaller, diffuse pores. To the finger, they feel almost like a dense sheet of paper. They take a clear, smooth finish with less effort because there are no large valleys to fill. The challenge shifts to glue and sanding.
Any excess glue that seeps out will sit on the surface, rejecting stain and creating visible white lines. Sand meticulously to remove all mill marks, as these tight-grained woods show every imperfection under a clear finish.
The smooth surface of fine-pored woods is a gift, but it demands perfect prep work as every flaw will be visible.
Special Cases: Pine, Bamboo, and Engineered Woods
Is pine wood porous? Yes, but in a tricky way. The earlywood (lighter bands) is very soft and porous, while the latewood (darker bands) is dense. This uneven absorption causes stain to blotch terribly. A pre-stain wood conditioner is mandatory to slow absorption and get even color.
Is bamboo wood porous? This is a trick question. Bamboo is a grass. Its structure is a dense mat of fibers, not rings and pores. It acts like an extremely low-porosity material. Finishes sit on its surface, and adhesion can be tricky. Lightly sanding with fine grit (220+) is key for any finish to grab hold.
Pine needs help to absorb evenly; bamboo needs a perfectly prepped surface for finishes to stick.
Your Best Practice Workflow: Managing Porosity from Start to Finish
You can master how to seal porous wood by following a consistent process. This four-step protocol moves from diagnosis to final finish, ensuring you never fight your material again.
Step 1: Identify and Test Your Wood
Never assume you know how a board will behave. I test every new batch, even of the same species. Grab a clean scrap piece and place a single drop of water on the face grain. Time how long it takes to disappear completely.
- 0-30 seconds: Highly porous. Expect wild stain absorption and glue starvation. Oak, ash, and mahogany often do this.
- 30 seconds to 2 minutes: Moderately porous. Most common hardwoods like cherry and maple fall here.
- Over 2 minutes: Dense and closed-pore. Woods like maple or poplar need less pore-filling but can resist some finishes.
Next, look at the end grain. If you see distinct rows of large pores following the growth rings, you have ring-porous wood (oak, ash). This structure acts like a series of tiny straws, pulling liquid deep into the wood and leading to blotchy stains. If the pores look evenly sized and scattered, you have diffuse-porous wood (maple, birch). It absorbs more evenly but can still surprise you.
Step 2: Surface Preparation is Everything
Proper sanding doesn’t just make wood smooth, it prepares the pores for staining. Always sand through a progression, like 120-grit, then 150-grit, then 180-grit. Skipping to a fine grit too fast rolls over and clogs the pores with crushed wood dust.
After your final sanding pass, you must clean the pores. A dry cloth just spreads dust. I use a tack cloth lightly, or I dampen a rag with mineral spirits and wipe the surface. The mineral spirits cuts through oils and floats out the fine dust trapped in the pores, giving your sealer a clean channel to penetrate. Let it fully evaporate before moving on.
Step 3: Apply Sealers, Conditioners, or Primers
This is the core of how to seal porous wood. Your choice here dictates everything that follows. Think of these products as pore traffic controllers.
- Pre-Stain Wood Conditioner: Use this only if you plan to stain a ring-porous or blotch-prone wood like pine. It’s a thin, fast-drying resin that partially fills the largest pores. It slows stain absorption in those spots for a more even color. It is not a sealer for a final finish.
- Sanding Sealer: This is your go-to for a clear topcoat. It’s a finish (usually shellac or lacquer-based) with a stearate added that sands to a fine powder. It seals the surface and builds up in the pores. You sand it back lightly after it dries, leaving a perfectly level, sealed base for your varnish or polyurethane.
- Bonding Primer: This is for painting. On oily woods (teak, rosewood) or very porous woods, a standard primer can soak in and fail. A bonding primer, often shellac or epoxy-based, sticks to the difficult surface and creates a uniform, non-porous layer for your paint.
Step 4: Execute Your Glue-Up and Finishing Plan
Now, apply everything you’ve learned. For glue-up, remember: porous woods suck moisture from adhesive. Use a thicker glue (like a standard PVA yellow glue) and apply a medium, even coat. Clamp firmly but don’t crush the wood; you want to close the joint, not squeeze all the glue into the pores. For dense woods, a thinner glue can penetrate better for a strong bond.
Your final finish application must match your sealed surface. For a hand-rubbed oil finish on a moderately porous wood, flood the surface and wipe off the excess, letting it cure in the pores. For a film finish like lacquer on sealed wood, use thin, even coats. Spraying often gives the most uniform result on tricky porous surfaces, as it doesn’t drag and redistribute material like a brush can on large-pore woods. These insights align with applying oil finishes in wood methods. When applying oil finishes, choose the technique—hand-rubbed, wipe-on, or spray—based on porosity and the desired look.
Frequently Asked Questions: Wood Porosity in Practice
What does a fast versus slow water-drop test actually tell me?
Fast absorption (under 30 seconds) indicates large, open pores that will aggressively pull in stains and thin glues, often leading to uneven results. A slow test (over 2 minutes) reveals a dense, closed-pore surface that may resist adhesion and cause finishes to sit on top, requiring different preparation.
Why do some dense woods still show glue stains after cleanup?
On low-porosity woods like maple, excess glue cannot penetrate and sits on the surface. If not fully removed before finishing, it seals the wood beneath it, creating a visible, blotchy barrier that rejects stain and finish, highlighting the joint.
When should I use a pore filler versus a sanding sealer?
Use a dedicated pore filler like paste wood filler when your goal is a perfectly smooth, glass-like surface on open-grained woods like oak. A sanding sealer is a better first coat for most clear topcoats, as it seals the surface and sands easily to prepare for subsequent film-building layers.
How can I fix a blotchy stain job after it’s already dried?
You must remove the stain completely by sanding back to bare wood. Then, apply a proper pre-stain wood conditioner to the porous areas to regulate absorption before restaining, as the initial blotchiness is caused by uneven pore structure that stain has now permanently highlighted.
Can I modify a finish or glue to work better with very porous wood?
For finishing, you can thicken a finish by allowing solvent evaporation to create a viscous pore-filling first coat. For gluing, slightly thinning a standard PVA glue with a few drops of water can improve its capillary action into large pores, but test this on scrap to avoid over-thinning and weakening the bond.
Mastering Porosity for Lasting Results
Think of wood porosity as the hidden instruction manual for your project. The single most important step is to always test your finish on a scrap piece from the same board. I keep a jar of mineral spirits in my shop for a quick absorption check before I even pick up a brush. This tells me exactly how much sealant or glue I’ll need. Knowing your wood’s porosity is the difference between a professional outcome and a frustrating repair job.
Source your wood from suppliers committed to sustainable forestry, honoring the material’s origin. Continuous learning about wood science makes you a better steward of both your projects and the environment.
References & External Links
- Does wood glue work on nonporous surfaces? I have reclaimed the oak sides and fronts of old drawers. The pieces are only ½’ thick. Can they be glued together to make thicker pieces, without removing the polyurethane finish? – Quora
- Gorilla Wood Glue | Gorilla Glue
- A DIYer’s Guide Glue and Adhesives | The Family Handyman
- technique – Best way to glue two finished surfaces – Woodworking Stack Exchange
David is a veteran woodworker. He is now retired and stays in his cabin in Wisconsin which he built himself. David has 25+ years experience working in carpentry and wood shops. He has designed and built many small and large wood projects and knows the science behind wood selection like the back of his hand. He is an expert guide on any questions regarding wood material selection, wood restoration, wood working basics and other types of wood. While his expertise is in woodworking, his knowledge and first hand experience is far from 'woody'.