
Can You Paint Over Polyurethane? A Woodworker’s Guide to Adhesion and Alternatives
You have a finished piece coated in polyurethane and now you want to paint it. The success of your project depends entirely on understanding and manipulating the surface for proper paint adhesion.
We will move from theory to practice, explaining the material science behind the process and giving you reliable, shop-tested steps. We will cover why polyurethane resists paint, the non-negotiable sanding and cleaning routine, how to choose a bonding primer, and practical finish alternatives like polyacrylic and hardwax oils.
My recommendations are based on years of mixing finishes in the shop and observing how coatings interact at a microscopic level to either stick or fail.
The Short Answer to Painting Over Polyurethane
Yes, you can paint over a polyurethane finish, but only if you prepare the surface correctly. Skipping the preparation steps is the single most common reason paint peels or chips off later. Painting over raw wood is straightforward because the surface is porous and absorbs paint. Painting over an old, worn oil-based varnish is easier because it often has micro-cracks for the new finish to grip. Polyurethane is different. It’s designed to be a tough, sealed barrier, and your paint job has to work around that.
Why Polyurethane Makes Paint Slip Off: The Science of Adhesion
When polyurethane cures, it undergoes a process called polymerization. The liquid resins link together into long, tight chains, forming a solid plastic film on the wood. This film is non-porous and incredibly slick. Think of it like a sheet of smooth, flexible plastic laminate glued to your table.
Paint needs something to hold onto, a texture called “tooth.” A glossy poly finish has almost zero tooth. Trying to paint directly onto a glossy poly coat is like trying to glue two smooth plastic sheets together with white glue; it just won’t stick. For a durable finish, you need to create both a mechanical bond and a chemical bond.
A mechanical bond is physical. Sandpaper scratches create tiny grooves for the paint to seep into and lock onto. A chemical bond happens at a molecular level, where the chemistry of the primer is specifically formulated to bite into the slick poly surface.

The Role of Sanding: Creating Mechanical “Tooth”
Sanding does not remove the polyurethane. It roughens it. You are using the abrasive grit to create a landscape of microscopic scratches across the entire surface. This drastically increases the surface area for the primer to grip.
I start with 120-grit sandpaper to cut through the gloss quickly, then move to 150 or 180-grit to smooth out the deep scratches. Going finer than 220-grit can sometimes make the surface too smooth again, defeating the purpose. The goal is not a perfectly smooth finish at this stage, but a uniformly dull, matte surface with no shiny spots. Run your hand over it. If you feel any smooth, glossy patches, you missed a spot. Go back and sand it. For more detail on grit progression and finishing sequences, refer to a grit sandpaper wood finishing guide. This will help you tailor grits and steps as you move to the next phase.
The Role of Primer: The Chemical Bridge
Primer is the essential chemical bridge. A quality bonding primer contains resins that are “stickier” and more flexible than standard paint. They are engineered to adhere to difficult, non-porous surfaces like plastic, laminate, and yes, polyurethane.
You have two main, reliable choices:
- Oil-Based Bonding Primer: This is my go-to for most projects. It provides a superb, hard bond and seals the surface consistently. It does have a strong odor and requires mineral spirits for cleanup.
- Shellac-Based Primer (like B-I-N): This is the powerhouse. It sticks to anything, blocks stubborn stains, and dries incredibly fast. It is also very smelly and requires denatured alcohol for cleanup.
Some modern “high-adhesion” or “direct-to-metal” paints claim to work without a separate primer. I have tested these. While they can work on lightly sanded poly, I don’t risk it on furniture or high-touch areas. For a result that lasts decades, a dedicated bonding primer applied over a properly sanded surface is the only method I trust in my shop.

Your Step-by-Step Shop Method for Success
Forget theory. This is the process I use in my own shop when a client wants a painted update over an old polyurethane finish. It’s born from fixing my own early mistakes, like when a beautifully painted cabinet door peeled off in one sheet.
Step 1: Clean the Polyurethane Surface
This step is non-negotiable. Polyurethane often has wax from polishes, silicone from furniture sprays, or just kitchen grease. These contaminants repel paint. I wipe the surface with mineral spirits on a clean, lint-free rag. For tougher grime, a TSP (trisodium phosphate) substitute mixed with water works. Denatured alcohol is my go-to for a final, quick evaporating clean. Unlike when cleaning finished polyurethane surfaces, ensure you test any cleaning method on a small, inconspicuous area first.
The true test is the white cloth wipe: after cleaning, rub a section with a clean white cloth. If any grime shows, clean it again. Skipping this guarantees failure, no matter how good your paint is.
Step 2: Scuff-Sand for Grip
You are not removing the finish. You are creating microscopic valleys for the primer to lock into. Think of it like giving a smooth ice rink some texture for boots to grip. I use 180 to 220-grit stearated sandpaper. The stearate coating helps prevent the paper from clogging with polyurethane dust.
You can sand by hand for smaller projects. For larger areas, I use a random orbital sander with a fine-grit interface pad to keep the scratch pattern even. Apply light pressure. Your goal is to uniformly dull the entire glossy surface. If you see raw wood peeking through, you’ve sanded too deep. This creates an uneven surface that may telegraph through your paint.
Step 3: Apply a Bonding Primer
This is your chemical bridge. Regular primer sticks to wood. Bonding primer is formulated to stick to slick surfaces like plastic, laminate, and yes, polyurethane. My two reliable choices are an oil-based bonding primer or a water-based primer with shellac (often labeled as a “stain-blocking” primer). Both create a tenacious, slightly chalky surface for your topcoat. On wood that already has a polyurethane finish, you’ll usually need to remove the finish or abrade it to expose fresh wood before priming. This extra step—removing polyurethane finish wood—helps the primer bond and yields a smoother, longer-lasting topcoat.
Apply a thin, even coat with a brush or roller. A thick coat can wrinkle or stay soft. Let it dry completely, often longer than the can says. I wait overnight. This step is why the question “can you paint over polyurethane without sanding?” has a firm answer: you must sand. The primer needs that scuffed surface to anchor to.
Troubleshooting Step 3:
- If the primer feels rubbery or doesn’t sand to a fine powder after drying, it hasn’t fully cured. Give it more time.
- Lightly sand the primed surface with 220-grit paper before painting. This knocks down any dust nibs for a glass-smooth final coat.
Step 4: Paint with the Right Topcoat
Now for the color. For durability on furniture, I recommend a satin or semi-gloss sheen. They have more resins (the hard, protective part of paint) than flat finishes. The choice between acrylic/latex and oil-based paint is closer than it used to be.
Modern high-quality acrylic paints are incredibly tough and low-odor. I use them for most indoor pieces. Oil-based paints still offer a slightly harder film and longer open time for brushing, but they yellow more over time and require solvent cleanup. For a kitchen table or desk, a good acrylic enamel is my pick.
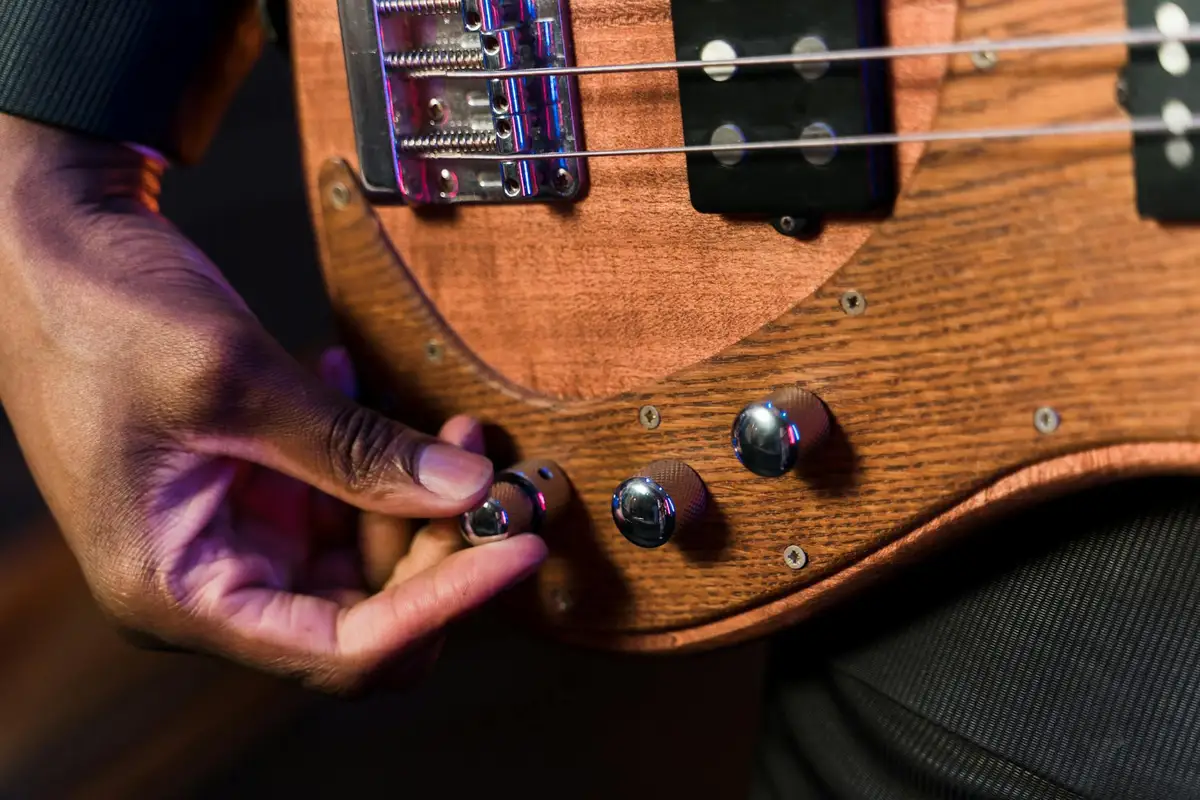
For specialized work like refinishing a guitar body or a detailed furniture piece, spray painting over your prepared polyurethane is an option. The key is using an adhesion promoter spray first, which acts like a primer in a can, before applying your color coats. Always test your full process on a hidden area or scrap piece first.
Troubleshooting: When Painting Over Polyurethane Goes Wrong
Even with careful prep, things can go sideways. I’ve seen it in my shop. Each failure tells a clear story about a missed step.
Peeling or Flaking Paint
This is a classic adhesion failure. The paint forms a skin, but it has no grip on the polyurethane beneath. This almost always means the surface was not sanded enough. Polyurethane is too smooth and non-porous for paint to mechanically bond to. A light scuff isn’t enough; you need to create a uniform, visibly dull surface with 120-150 grit sandpaper. If it’s peeling, the fix is total removal. Sand or strip back to bare wood and restart the process correctly.
Wrinkling or Alligator Skin
This is a chemical reaction, not just poor grip. The solvents in your new paint coat are aggressively attacking the underlying polyurethane, causing it to swell and distort. Wrinkling signals a severe solvent incompatibility between the old finish and the new paint. It often happens when using a “hot” solvent-based paint over an older, uncured, or incompatible poly. The solution is the same: strip it off. You cannot fix this by painting over it.
Fisheyes (Small, Crater-Like Holes)
These maddening little craters are caused by localized contamination. Fisheyes are a telltale sign that silicone, oil, or wax was on the surface before painting. Common culprits are furniture polish, certain cleaning sprays, or even oils from your hands. The contaminant repels the paint, causing it to pull away. Wiping with mineral spirits isn’t enough to remove silicone. You must sand the contaminated layer off completely and then clean the surface with a dedicated degreaser like trisodium phosphate (TSP) substitute before repriming.
The Universal Fix
For any of these failures, spot repairs rarely work. Paint and polyurethane form a single, failed system. Your only reliable fix is to remove the entire affected area back to a stable base, which often means bare wood. Use a chemical stripper for detail work or a sander for flat surfaces. It’s more work now, but it saves you from repeating the failure later.
What About Floors, Trim, or Outdoor Furniture?
The rules change when the polyurethane is on a high-stress element. The prep is the same, but your product choices must be much more specific.
Painting Over Polyurethane Floors
This is a major commitment. Floor polyurethane is designed for extreme abrasion resistance. To succeed, you must use a paint system specifically engineered for floor traffic. Standard wall paint will chip and wear through in weeks. Look for “porch and floor” enamel or dedicated floor paints. These are harder, more flexible, and contain additives for slip resistance. Even with perfect prep and the right paint, expect to recoat high-traffic areas like hallways more frequently than a wall.
Painting Outdoor Furniture with a Poly Base
Here, UV and water resistance are the priorities. An oil-based polyurethane finish outdoors will eventually crack and peel as it weathers. Painting over it is a band-aid. For a lasting job on exterior pieces, I strip the old poly completely and use a dedicated exterior primer and 100% acrylic latex paint. Acrylic paint remains flexible, resists UV fading, and allows moisture vapor to escape, which is critical for wood that swells and shrinks outdoors. Encasing weathered poly in new paint often traps moisture, leading to faster failure.
Dealing with Polyurethane-Trim
Painting over polyurethane trim, like baseboards or window casings, is common in renovations. The challenge is the seams and nail holes. You cannot just caulk over the polyurethane. You must apply a bond-promoting primer over your sanded polyurethane first, then use a paintable caulk. The caulk adheres to the primer, not the slick poly. If you caulk directly to the poly, it will likely shrink and crack away from the surface over time, leaving a visible gap.
Material Substitution: When to Skip Paint and Use a Different Finish
Painting over polyurethane is a workaround. Before you commit to that process, consider if a different finish would solve your problem better. Often, the simplest and most durable solution isn’t paint at all, but a different clear or tinted coating designed for the job.
For a Clear, Protective Topcoat
If you like the wood’s look but not the plastic-like feel of polyurethane, you have excellent options. Each creates a different kind of film.
Hardwax Oil vs. Polyurethane: Products like Osmo or Rubio Monocoat soak into the wood fibers and harden there, leaving a thin, protective layer of wax and oil on top. The feel is warm and natural, not plasticky. In my shop, I use it on tables and counters. Scratches? You sand the spot lightly and reapply a dab of oil. Polyurethane, in contrast, sits on the surface as a thick, continuous plastic sheet. Repair means sanding through that entire sheet and recoating a large area.
Lacquer vs. Polyurethane: Lacquer dries in minutes, not hours. You can build and sand multiple coats in a single day. This speed makes it the choice for professional shops. The trade-off? Lacquer is more brittle than poly and can be damaged by alcohol or heat. Polyurethane is slower and easier for DIYers to brush on without leaving lap marks, and it forms a more flexible, chemical-resistant barrier. For many wood projects, you start with a stain to color the wood, then apply polyurethane coats for protection. The right mix of coats, stain, and polyurethane is essential for durable wood protection.
Shellac vs. Polyurethane: Shellac is my go-to for antique repairs and interior pieces. It’s a natural resin dissolved in alcohol. You can fix a damaged area by wiping it with alcohol to melt the existing shellac, then brushing on more. It bonds to almost anything. Polyurethane is far superior for water resistance, but shellac is the undisputed champion for easy, invisible repairs. Just keep it away from wet glasses.
For Changing Color Without Hiding Wood Grain
You want to change the color but keep the wood texture visible. This is a staining job, not a painting job.
First, a common question: can you mix stain with polyurethane? I do not recommend it. Stain contains pigments or dyes and solvents designed to penetrate wood. Polyurethane is a designed plastic resin. Mixing them can prevent the poly from curing properly, creating a gummy, weak film. The solvents fight each other and might ruin your finish, unlike properly applied stain followed by a polyurethane finish.
The correct sequence is always stain first, clear topcoat second. Here is the process:
- Sand the existing polyurethane finish thoroughly with 220-grit paper to scuff the surface. You don’t need to remove all the poly, just dull its shine.
- Apply your chosen wood stain. Wipe off the excess. Let it dry completely, often 24 hours.
- Seal the stained wood with two to three fresh coats of clear polyurethane.
What if you have an existing finish you don’t want to strip? Gel stain can be a clever alternative. It’s thicker, like a thin pudding, and sits more on the surface. Because it doesn’t penetrate deeply, you can often apply a gel stain directly over a lightly sanded, sealed surface to add a tint without a full strip-and-restain. To achieve a uniform finish, apply thin, even coats and wipe away any excess while it’s still workable. Consistent, controlled application helps ensure the tint looks even across the surface when applying gel stain for a uniform finish. Test this in an inconspicuous spot first.
For Painting Raw Wood (Instead of Painting Over Poly)
Sometimes, the best path is to start fresh. If you want a solid, opaque paint job that will last for decades, painting directly onto raw wood is more reliable than forcing paint to stick to polyurethane.
Stripping the old polyurethane is the better long-term choice when you want a perfect, permanent bond for a painted piece. Yes, it’s more initial work. But you eliminate the risk of the new paint peeling off the slick poly layer in a few years.
The process for painting raw wood is straightforward:
- Remove the old finish completely using a chemical stripper and/or a scraper and sandpaper.
- Sand the bare wood smooth, up to 150-grit.
- Apply a high-quality bonding primer made for wood. This primer locks into the wood fibers and creates a perfect surface for paint.
- Apply your paint. I prefer acrylic latex or specialized furniture paint for its durability.
For a bookshelf or cabinet, this method is often easier than the extensive sanding and priming needed to make paint adhere to polyurethane. You work with the material, not against its chemistry.
Related Finish Scenarios: Your Quick Guide
You don’t always start with bare wood. Here are the rules for other common starting points.
Can You Put Polyurethane Over Painted Wood?
You can, but success depends entirely on the paint’s condition. Polyurethane is a coating, not a magical adhesive. It needs a clean, sound, and slightly rough surface to grip.
Modern latex or acrylic paints form a film that can be too slick. A gloss finish is the worst for adhesion. You must sand it. I use 220-grit sandpaper and scuff the entire surface until the shine is gone and you see a uniform, dull finish.
Paint must be fully cured, not just dry to the touch. This can take weeks. If you paint over a soft film, the solvents in the polyurethane can re-liquefy it, causing wrinkles and peeling.
My shop process is simple:
- Let the paint cure for at least 30 days in a well-ventilated space.
- Sand thoroughly with 220-grit to de-gloss.
- Wipe away all dust with a tack cloth.
- Do a test patch on the bottom or back. Apply your poly. Let it dry for 48 hours. Try to scratch it off with your fingernail. If it stays put, you’re good.
Can You Put Polyurethane Over Stained Wood?
This is the textbook sequence for a reason. Oil-based stains penetrate the wood fibers. Water-based stains sit more on the surface. Both create a porous, matte layer that polyurethane bonds to mechanically with no issues.
The single critical factor is dryness. An oil stain can feel dry in hours but may still have solvents trapped deep in the wood. Applying poly too soon traps those solvents, leading to a finish that stays tacky for months.
I wait 72 hours for an oil stain in good drying conditions. For a water-based stain, 24 hours is usually enough. To test, press your nose to the wood and smell it. If you get a strong solvent odor, it’s not ready. A safer test is to wet a rag with mineral spirits and rub an inconspicuous spot. If color comes off, the stain isn’t fully cured. Later, if you need to remove oil stains from the wood finish, follow targeted removal steps. This approach helps you restore the surface without harming the wood.
Does the Wood Species Matter? (Like Acacia)
For the common question “can I put polyurethane on acacia wood?” the answer is a direct yes. Acacia is a dense hardwood with a moderately open grain. It takes polyurethane beautifully. The species itself is rarely the problem.
The real issue is natural oils and resins. Woods like teak, rosewood, or some tropical species exude oils that can prevent proper adhesion. The polyurethane film can bead up or peel away in sheets over time.
The universal fix for oily woods is a barrier coat of dewaxed shellac, like Zinsser SealCoat. Shellac sticks to almost anything, and almost anything sticks to shellaf. It seals the oils in. I apply one thin coat, let it dry for 2 hours, sand lightly with 320-grit, then apply my polyurethane. It works every time.
Paint Over Polyurethane: Targeted Questions & Answers
Can you paint over a polyurethane floor?
Yes, but you must use a paint system engineered for floor traffic, such as a 2-part epoxy or a dedicated porch and floor enamel. These finishes are formulated with higher levels of plasticizers and cross-linking resins for the flexibility and abrasion resistance that standard wall paint lacks.
Is it possible to paint over polyurethane caulk or sealant?
Only if you use a paintable caulk and first apply a bonding primer over the sanded polyurethane surface. The primer provides a chemically receptive substrate; caulk adheres poorly to the slick, flexible polyurethane directly, leading to cracking and separation.
Can you paint a polyurethane-coated guitar body?
Yes, but it requires meticulous sanding and an adhesion promoter spray before applying specialized paints like automotive lacquers or polyester finishes. The complex curves and need for a ultra-smooth, thin film make proper mechanical tooth and chemical bonding absolutely critical.
What happens if you try to paint over polyurethane foam?
Standard paints will fail because the flexible, porous foam moves and the solvents can degrade it. You must use a flexible primer designed for plastics or foam, followed by a compatible flexible acrylic paint, to accommodate the substrate’s movement without cracking.
Why does paint sometimes wrinkle when applied over polyurethane?
Wrinkling indicates a severe solvent incompatibility, where the aggressive solvents in a new coating re-dissolve and swell the underlying polyurethane film. This is a chemical failure, not just poor adhesion, and necessitates complete removal of the damaged finish system.
Key Steps for a Successful Finish Overhaul
If you remember one thing from this article, let it be that preparation dictates success when painting over polyurethane. I’ve seen too many projects fail because of skipped sanding steps or incompatible primer. Always degloss the polyurethane surface with fine-grit sandpaper and use a bonding primer designed for slick surfaces. This method, backed by material science, creates a mechanical bond that lasts for years.
As woodworkers, we have a responsibility to select finishes that are both effective for the project and gentle on the environment. Stay curious about new products and techniques, as the science of wood finishes continues to evolve.
Research and Related Sources
- How To Professionally Paint Over Polyurethane | Precision Painting Plus
- Simple Ways to Paint over Polyurethane: 15 Steps (with Pictures)
- Can You Paint Over Polyurethane? Tips for Success
David Ernst
David is a veteran woodworker. He is now retired and stays in his cabin in Wisconsin which he built himself. David has 25+ years experience working in carpentry and wood shops. He has designed and built many small and large wood projects and knows the science behind wood selection like the back of his hand. He is an expert guide on any questions regarding wood material selection, wood restoration, wood working basics and other types of wood. While his expertise is in woodworking, his knowledge and first hand experience is far from 'woody'.