
How Does Wood’s Material Behavior Dictate the Right Repair Strategy?
You’re staring at a crack in a tabletop or a wobbling chair leg and wondering how to fix it for good. The permanent solution lies not in the glue you choose, but in first understanding how wood moves and how joints bear load.
This article translates materials science into shop-tested methods. We will cover how wood’s anisotropic structure dictates movement, the physics of why joints fail, and a practical framework for selecting a repair based on force and grain direction.
My advice comes from years of testing repair methods under shop conditions and dissecting why they succeed or fail.
What is Wood Anisotropy and Why Does It Dictate How Wood Breaks?
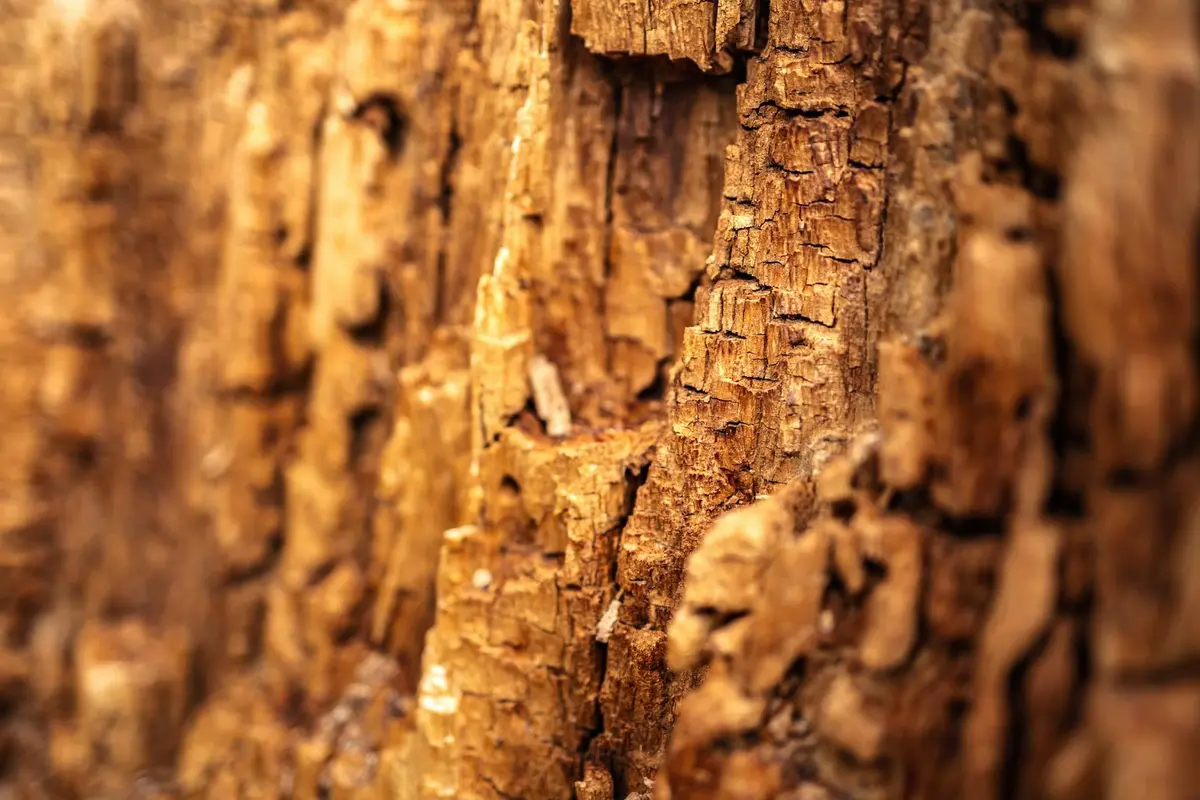
Think of a piece of wood not as a uniform block, but as a tightly packed bundle of tiny, hollow straws. This is its grain. This directional structure, called anisotropy, is the single most important factor in understanding why wood breaks, cracks, and joints fail. It’s the reason wood behaves so differently depending on which way you push, pull, or bend it.
Those “straws” are the wood cells, called tracheids and vessels. They are strong and stiff along their length, like a fiberglass rod. But they are only loosely bonded to their neighbors with a weak, glue-like substance called lignin. This makes the connection between cells the weakest link. A force across the grain easily pulls these cells apart, while a force along the grain has to break the strong straws themselves.
This creates three distinct failure modes. Imagine a log as a coordinate system.
- Longitudinal (with the grain): Incredibly strong. You rarely break wood this way unless you use extreme force, like a splitting maul.
- Radial (from the center out, like a pie slice): The wood splits along the rays. This is a common, clean failure path.
- Tangential (parallel to the growth rings): The weakest plane. It peels apart between growth rings, which is why boards often cup.
This is why cracks always follow the grain and never run across it like a broken cookie. A loose mortise and tenon joint fails when the tenon shears the weak cross-grain walls of the mortise, not by snapping the tenon itself. Every failure has a grain direction story.
What Type of Crack Am I Dealing With? A Diagnostic Guide
Not all cracks are created equal. The type tells you the cause, and the cause tells you the fix. Here’s how to read the damage.
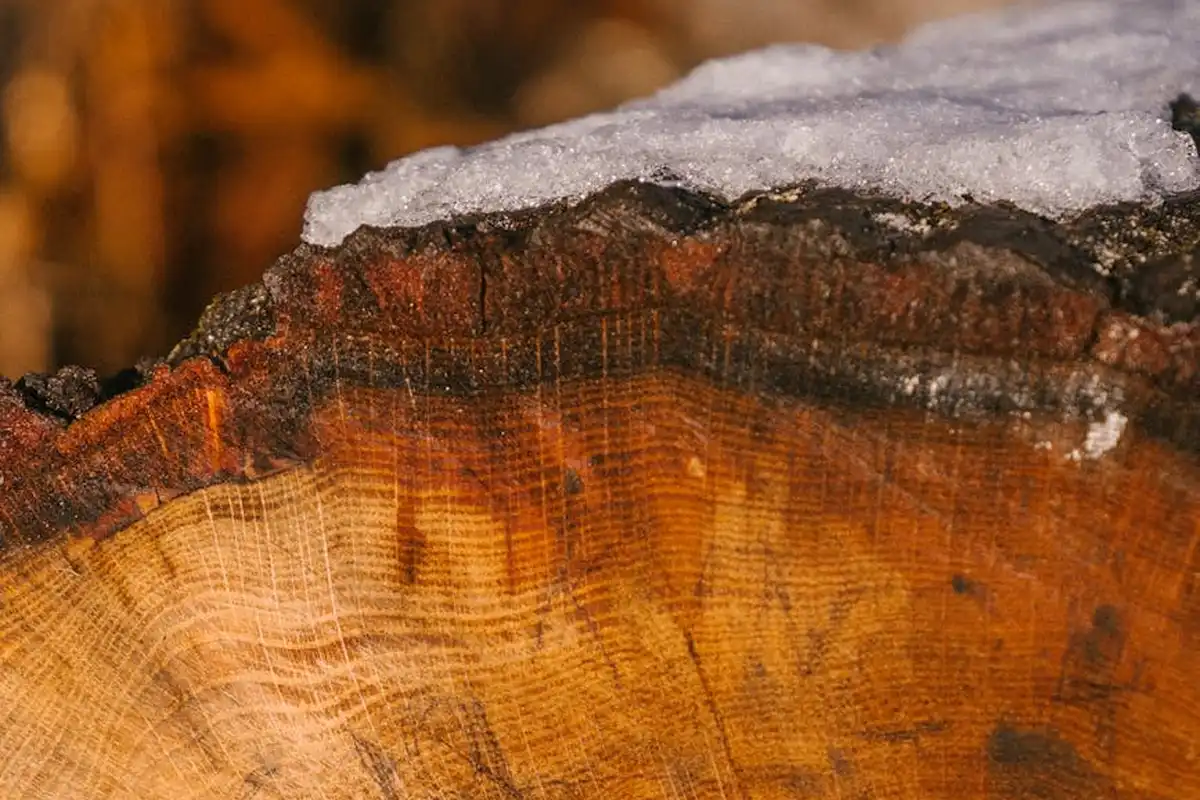
End Check: A crack running from the end of a board into its length. It’s caused by moisture leaving the end grain much faster than the faces, creating severe internal tension. This is the most common drying defect you will encounter in lumber.
Surface Check (Seasoning Check): A shallow crack on the face or edge of a board that doesn’t reach the core. It happens when the outer shell dries and shrinks faster than the wet interior, causing the surface to split under tension.
Split: A deep, through-and-through crack along the grain, often the full length of a board. This is usually from mechanical stress (like overloading a shelf) or the progression of a severe end check.
Shake: A separation between growth rings, often found in logs or very thick slabs. It’s a weakness that existed in the living tree, not caused by drying.
Here is a quick visual guide. Look at the crack’s location and direction.
- If it’s on the board end and runs inward, it’s an end check.
- If it’s on the face, is shallow, and follows the grain, it’s a surface check.
- If it goes all the way through and the pieces can be moved, it’s a split.
- If the crack follows a growth ring curve, it’s shake.
A small hole in wood paneling or a hollow door is a localized material failure, often from impact. A structural split along the grain is a fundamental failure of the wood’s anisotropic integrity. You repair them with completely different philosophies.
How Do Wood’s Anisotropic Properties Affect Crack Propagation and Repair?
Grain direction is the roadmap for a crack. A crack will always travel along the path of least resistance, which is between those weak cell walls. This means a crack with the grain can propagate almost indefinitely if stress continues. Your first repair job is always to stop this propagation, often by drilling a small hole at the crack’s tip to blunt it and redistribute the stress.
A true crack running across the grain, breaking those long “straws,” is a catastrophic failure. It means the wood was subjected to a force greater than its longitudinal strength. This is often beyond repair for structural purposes. A crack with the grain, however, is just the material separating at its built-in weak plane. We can often glue it back together stronger than the surrounding wood.
This leads to the three sacred rules of crack repair, dictated by the wood’s structure.
- Clean: You must remove all dust, oil, and old finish from the crack faces. Glue bonds to wood, not to dirt.
- Stabilize: The wood must be at or near its Equilibrium Moisture Content for your shop. Gluing a wet crack in dry air guarantees a new crack as the wood continues to shrink.
- Create a Mechanical Key: Because glue is strongest in shear, you need to design the repair so forces try to slide the glue joint, not pull it apart. For a simple split, this means clamping pressure. For a large void, it means fitting a shaped wood splint with grain direction aligned to lock the crack in place.
The wood’s anatomy gives us the problem, but it also gives us the rules for the solution. Work with the grain, not against it. Understanding how wood absorbs stain is crucial for a successful finish.
How to Choose the Best Glue: Adhesive Science for Anisotropic Materials
Choosing glue isn’t about picking the strongest one. It’s about matching the adhesive’s properties to the wood’s behavior and the repair’s geometry. Think of it as selecting a tool. It’s not the strength, but the right fit.
Let’s compare the three main contenders for structural repairs.
- PVA (Yellow or White Wood Glue): This is your standard shop glue. It works by soaking into the wood fibers and forming a mechanical bond as it cures. It requires tight-fitting joints. Yellow PVA (aliphatic resin) is slightly more rigid and sands better than white PVA, making it my default for general joinery and clean splits.
- Epoxy: Epoxy is a two-part adhesive that cures through a chemical reaction. It doesn’t rely on soaking in. Instead, it creates a powerful mechanical lock by filling voids. Use epoxy when you have a gap to fill (over 0.5mm) or when repairing wood that will be exposed to moisture.
- Polyurethane Glue: This glue expands as it cures, foaming into cracks and crevices. That sounds great, but the foam is weak. The bond relies on the adhesive that isn’t expanded. It can be messy and requires clamping. I use it sparingly, typically for outdoor projects where its moisture resistance is key.
Here’s a simple way to decide:
- Clean, tight split along the grain: Use PVA glue.
- Crack with a visible gap, or end-grain repair: Use a gap-filling epoxy.
- Repair in a damp environment (like a garden bench): Use epoxy or polyurethane.
How Does Wood’s Anisotropic Nature Influence the Choice of Adhesive for Splits?
Wood is not a uniform material. Its long cellulose fibers make it incredibly strong along the grain but weak across it. This anisotropy sets the rules for any repair, and understanding grain and density is crucial before you start.
A well-glued joint along the grain is actually stronger than the surrounding wood fibers across the grain. This means if you stress the repair, the wood will fail next to the glue line, not the glue line itself. That’s your goal. The ceiling for your repair’s strength is the wood’s cross-grain strength.
Grain alignment is non-negotiable for a split. You must match the grain patterns perfectly when closing the split. If the grain is misaligned, you’re gluing weak cross-grain surfaces together, guaranteeing a future failure.
For hairline cracks, your choice depends on visibility and closure. Thin, watery cyanoacrylate (CA) glue wicks into cracks you can barely see and locks them solid, which is perfect for stabilizing cracks you don’t want to clamp shut. For a hairline crack you *can* close, use PVA. If the hairline crack can’t be closed and is structural, use a low-viscosity epoxy that can penetrate before curing.
How Joinery Physics Dictate the Fix for Loose Joints
A loose joint is a symptom. The fix depends on diagnosing the cause. The physics of the joint type tells you what went wrong.
Joints fail for three main reasons:
- Glue Starvation: The original glue bond has failed, often due to improper application, old glue, or contamination.
- Wood Compression: The wood fibers inside the joint have permanently crushed from stress, creating a gap. This is common in softwoods.
- Seasonal Movement: Wood expands and contracts across the grain. If a joint restricts this movement, it can tear itself apart over years.
Approaches differ by joint:
- Mortise & Tenon: Often fails from glue starvation or wood compression. It usually requires disassembly for a proper fix.
- Dovetail: Its mechanical interlock is powerful. If loose, it’s almost always just a glue failure. Regluing is often sufficient.
- Simple Butt Joint: The weakest joint. Looseness usually means the glue has failed and the joint needs both regluing and mechanical reinforcement.
To tighten a loose mortise and tenon, you must first determine if the tenon is loose in the mortise, or if the entire joint is rocking. For a slightly loose tenon, you can inject glue. For a very loose one, disassembly is better. If the tenon is loose due to crushed fibers, adding a thin wood shim to the tenon’s cheeks is the permanent solution.
How Do Joinery Physics Determine the Best Method for Tightening Loose Mortise and Tenon Joints?
You have two main options: inject glue or take it apart.
Injecting glue with a syringe is fast and preserves the piece’s finish. The major downside to injection is you cannot clean out the old, failed glue, so you are bonding new glue to old glue, which is inherently weaker. It’s a good fix for a recently failed joint where surfaces are still clean.
Disassembling, scraping all old glue off, and regluing is the gold standard. It creates a fresh, wood-to-wood bond. It is more work and risks damaging the piece during takedown.
A related joinery fix is a stripped screw hole. The physics are the same: you’ve lost mechanical purchase. For a permanent fix, drill out the hole, glue in a dowel plug of the same wood, then re-drill your pilot hole. For a quick fix in non-structural areas, you can fill the hole with epoxy and reset the screw before it cures.
Butt joints and simple rabbets are forgiving. They just need fresh glue and pressure. Dovetails are also forgiving if the fit is still reasonably tight. A loose mortise and tenon, however, requires near-perfect re-fitting to regain its structural integrity; a sloppy fit will fail again quickly.
How Do the Physics of Different Joint Types Dictate Repair Approaches for Looseness?
The joint’s design dictates its repair. A dovetail’s strength comes from its mechanical interlock. The glue is almost a backup. Because of this mechanical lock, a loose dovetail can frequently be repaired simply by flowing fresh glue into the joint and clamping it shut.
A butt joint has no mechanical lock. Its strength is 100% from the glue surface area and any fasteners. When it fails, glue alone is rarely enough. You must add mechanical reinforcement.
Reinforcement is a smart fix that respects the joint’s limits. For a loose chair rung in a leg, a cross-drilled screw with a plug can work. For a case corner, a glued-in corner block adds tremendous strength. Adding a screw or block isn’t cheating; it’s applying physics to supplement a joint that has proven insufficient for the load.
Clamping Strategies and Gap-Filling: Working With, Not Against, the Grain
Think of wood cells like a bundle of drinking straws. They are incredibly strong along their length but crush easily from the sides. Your clamping force must always respect this directionality.
Apply pressure parallel to the grain, not perpendicular across it. Clamping directly across the grain on a delicate edge risks leaving permanent, crushed dimples in your workpiece that no amount of sanding will fix.
For irregular splits that won’t sit flat, you need to distribute pressure. I keep a collection of shop-made cauls-straight blocks of scrap wood-to bridge uneven surfaces. Pair them with padded clamp heads, using thick leather or dense felt, to prevent new bruises.
The decision to close a gap or fill it comes down to the gap’s size and the joint’s function. If you can close the crack with moderate clamp pressure and see a continuous bead of glue squeeze-out, do it. A tight, rejoined wood-to-wood bond is always stronger than any filler. If the gap remains under pressure, you must fill it.
How Do Anisotropic Properties Dictate the Clamping Strategy for a Split Repair?
Choose your clamp based on the crack’s orientation. For a split running with the grain on a tabletop, use parallel jaw clamps or a series of F-clamps aligned with the split. For a crack that runs around a curved leg or a chair stile, a band clamp is your best friend, as it applies uniform, radial pressure that works with the circular grain.
Good glue squeeze-out looks like a continuous, fine bead, not a flooding river. A consistent bead of squeeze-out along the entire joint confirms even pressure and full glue coverage, which is critical for a durable repair. Wipe it with a damp rag before it sets, never after.
If a small, persistent gap remains after your best clamping effort, don’t rely on glue alone to fill it. For gaps under 1/16 inch, a mix of fine sanding dust from the same wood and your glue makes a serviceable paste. For anything larger or structural, a gap-filling epoxy is necessary. Epoxy bridges voids without shrinking, but remember, it is a filler, not a substitute for proper wood-to-wood contact.
How Do Wood’s Directional Properties Influence Filling Versus Rejoining a Crack?
Follow this simple rule: always try to rejoin cracks that run with the grain, as they are structurally sound once glued. Only fill cracks that run across the grain or are purely cosmetic, like finish checks.
Filling holes in softwoods like pine requires a different touch than hardwoods. Pine is more compressible and has larger pores. A standard wood filler can sink and look terrible. For pine, I often use a shellac stick or a tinted epoxy putty, which resist sinking into the soft grain. Let any filler sit slightly proud and sand it flush after it fully cures. This is especially important when preparing pine for finishing.
Specialty fillers like epoxy putty or shellac sticks are for final cosmetics, not for creating structural strength. Use them after the joint is mechanically sound, to hide the repair and prepare the surface for a new finish.
When to Repair and When to Replace: A Science-Based Decision
Some damage tells you to stop. Red flags include breaks that run directly across the grain, wood that is soft and rotten (probing with an awl will tell you), and old repairs made with brittle hide glue that have completely failed. A modern adhesive like PVA or epoxy cannot bond to a failed glue surface; you must remove all the old adhesive first, which is often impossible. Understanding why adhesives fail is crucial for any repair work.
The piece’s history matters. A clean, scientific repair on a family heirloom is worthwhile. Performing major surgery on a particle-board dresser from a big-box store is not. Let the object’s intrinsic value guide your effort.
Apply the principles of wood anisotropy and joinery physics to judge each problem separately. A loose tenon can be shimmed and re-glued because the joint geometry is intact. A tenon shattered across its short grain cannot hold force and must be replaced.
How Do Joinery Physics and Wood Anisotropy Together Determine When to Replace Versus Repair a Component?
Consider a split chair rung. If the split runs along the grain and you can clamp it closed, repair it. If the rung is broken across its thickness, creating a short-grain situation where the tenon is hanging on by weak cross-grain fibers, you must replace it. That break has no long-grain fibers left to carry the load.
Grain direction is everything. A long-grain break has surface area for glue. A short-grain break does not. A short-grain break is a fatal flaw for a load-bearing part; replacement is the only safe option.
Aim for a repair that restores the original strength, not exceeds it. If you reinforce a broken leg with steel plates and epoxy, you create a hard spot. The next failure will happen in the weaker wood right next to your super-repair, often causing more catastrophic damage. The repair should match the flexibility and strength of the original material to allow stress to distribute naturally.
Frequently Asked Questions: Anisotropy and Joinery in Repair
How do wood movement and joinery physics interact when repairing splits in a panel?
For a panel split within a frame, you must first ensure the panel is floating freely in its groove to allow for seasonal movement. A rigid glued repair that locks the panel to the frame will guarantee a new split as the wood expands and contracts.
How do the physics of different joint types (e.g., dovetail vs. butt) dictate repair approaches for looseness?
A dovetail’s mechanical interlock often allows for simple regluing, while a failed butt joint almost always requires added reinforcement like blocks or fasteners. The repair must restore the original joint’s intended load path.
How do wood’s directional properties influence the feasibility of filling versus rejoining a crack?
Always prioritize rejoining cracks that run with the grain, as a glued long-grain bond is structural. Filling is only viable for stabilizing cosmetic checks or non-structural gaps across the grain.
How do anisotropic properties dictate the clamping strategy for a split repair?
Apply clamping force parallel to the grain to avoid crushing the wood’s cellular structure. Use cauls to distribute pressure evenly and always confirm a continuous, fine glue line for a complete bond. This is especially important when bonding wood surfaces with varying grain and porosity.
How do joinery physics and wood anisotropy together determine when to replace versus repair a component?
Replace a part if the break creates a critical short-grain situation with no long-grain surface area for a glue bond. Repair is viable if the joint’s geometry remains intact and the break offers sufficient long-grain gluing surface.
Final Thoughts on Wood Movement and Joint Integrity
Successful repair starts with a simple truth. You are not just fixing a broken part, you are managing a living material that expands, contracts, and exerts immense force. The single most important piece of advice is to always diagnose the why before you execute the how. Your repair must respect the wood’s inherent movement or it will fail, often causing more damage than the original problem. Choose a method that works with the wood’s physics, not against them. That mindset also helps prevent wood checking and splitting over time. By respecting moisture movement and selecting joints that allow for that movement, you reduce future checks and splits.
Every repair is a commitment to stewardship, both of the object and the material’s source. Seek out sustainably harvested lumber and traditional, durable methods that honor the wood’s life cycle. The craft deepens when you pair hands-on skill with a curiosity for the material science behind every board you handle, especially when working with historic woodwork.
Expert Resources and Citations
- How to Fix Damaged Wood | DAP Global
- Here’s Some Tips To Repair Damaged Wood | Woodsmith
- Repairing wood beams under bending using carbon–epoxy composites – ScienceDirect
- How to Repair Wooden Furniture Surfaces: Tips | HowStuffWorks
- r/DIY on Reddit: How do I repair manufactured wood?
- Rotten Wood Repair: A Two Prong Attack with the Help of Elmer
- How to Repair Damaged Furniture: Fix Missing Trim, Hardware, and Gouges – prettydistressed
David is a veteran woodworker. He is now retired and stays in his cabin in Wisconsin which he built himself. David has 25+ years experience working in carpentry and wood shops. He has designed and built many small and large wood projects and knows the science behind wood selection like the back of his hand. He is an expert guide on any questions regarding wood material selection, wood restoration, wood working basics and other types of wood. While his expertise is in woodworking, his knowledge and first hand experience is far from 'woody'.