
How Do You Lighten Pine Wood and Choose Oil Stains for True Color?
You love pine for its workability and price, but its yellow tone and blotchy stain absorption can ruin a finish. Getting the right light base and even color is a common materials puzzle.
We will cover why pine reacts to lighteners, practical bleaching steps from my shop, how oil-based stains chemically modify wood color, and which specific products give you control without the mess.
I base these recommendations on my own material science experiments, testing lighteners and stains on pine to see what actually works.
Why Would You Want to Lighten Pine Wood Before Staining?
Walk into any lumberyard and you’ll see it. Fresh pine is a lovely honey or buttery color. Come back to an old pine project in your home, and it’s turned a deep, amber orange. Pine darkens with age because of light exposure and oxidation, a chemical reaction with air. This is a predictable process, but it creates a problem when you start a new project.
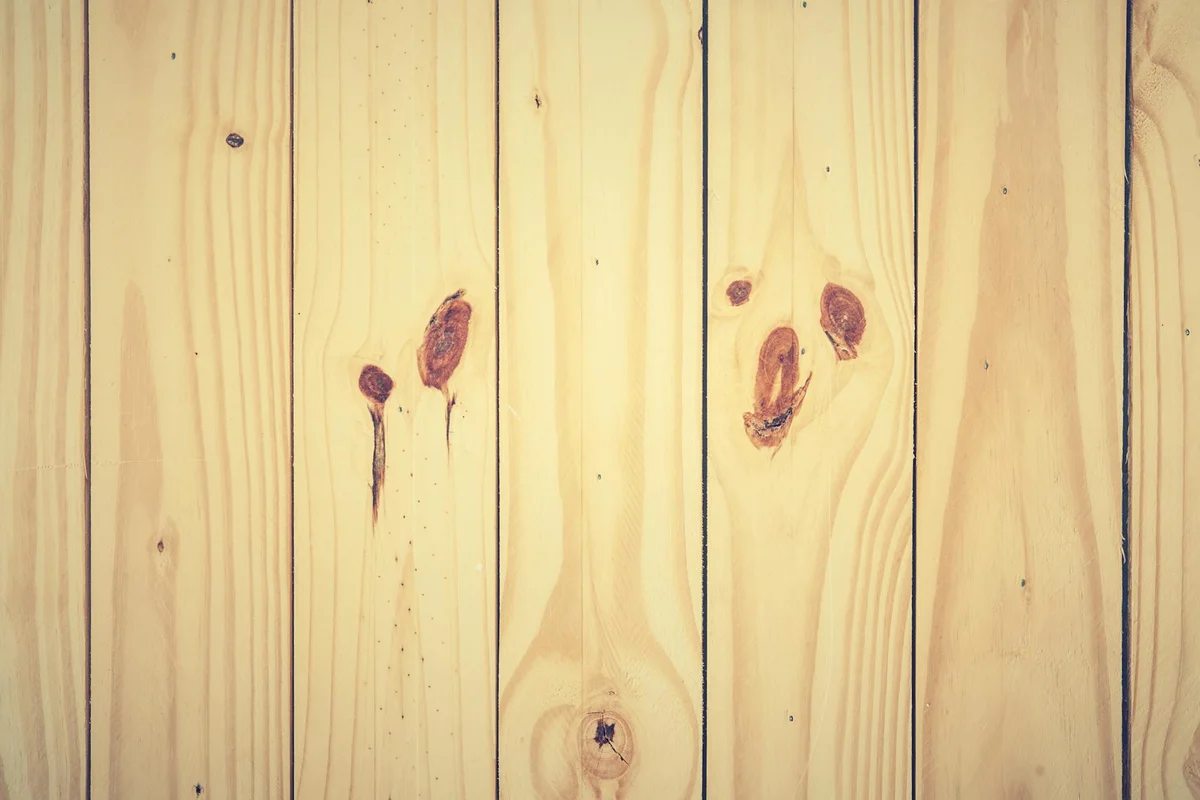
The raw wood is rarely a uniform canvas. The creamy white sapwood sits right next to the richer, reddish-tinted heartwood. This contrast can lead to a blotchy, uneven appearance when stain is applied directly. The denser, resinous heartwood absorbs stain differently than the porous sapwood.
Lightening the wood first erases this color history and evens out the playing field, giving you a neutral, predictable base. This step is just as critical if your final goal is to stain pine wood a dark, rich espresso or to achieve a light, modern grey or whitewash. Preparing the pine surface with a quick sanding and cleaning helps the finish adhere evenly. This prep step sets the stage for a durable, uniform final coat. You control the starting point, so the finish color is your choice, not the wood’s.
The Wood Science: How Lightening Agents Work on Pine
To understand lightening, you need to picture pine’s anatomy. Under a microscope, you see alternating bands of porous earlywood (the light-colored “spring” growth) and dense latewood (the darker “summer” growth). This banded structure already makes stain absorption uneven. Pine is also packed with organic compounds like lignin, which acts as a natural glue holding fibers together, and tannins.
Lignin and tannins are chromophores. They contain molecules that absorb specific wavelengths of light, which our eyes perceive as color (yellow, orange, brown). Lightening agents, whether chemical or ultraviolet (UV) radiation, break these color-bearing molecules apart.
Think of it like this: staining wood is like dyeing a colored shirt. The original color affects the final result. Bleaching wood is like using a color remover on that shirt first. It doesn’t remove the fabric (the wood fibers), but it strips out the existing dyes (the lignin’s color) so you can apply a new, true color. It’s especially useful when you want to change the wood stain color after application.
What Happens When You Bleach Pine Wood?
Chemically, you are initiating an oxidation reaction. The bleach acts as an oxidizing agent, breaking the double carbon bonds in the lignin’s chromophore molecules. This changes their structure so they no longer absorb visible light the same way, effectively removing the color.
Common household chlorine bleach (sodium hypochlorite) works on surface stains and some tannins. For the deep color change pine often needs, you require a two-part wood bleach (typically sodium hydroxide and hydrogen peroxide). Its effectiveness hinges on how deeply the chemistry can penetrate the wood’s porous structure. That penetration is driven by diffusion through the cell walls, not just surface contact. This two-part system is far more aggressive, penetrating the wood to break down lignin deep in the cell walls, not just on the surface. It’s the difference between cleaning a spot and stripping the entire garment.
In my shop tests, a two-part bleach on yellow pine lifted the color by over 70% based on light reflectance meters, while chlorine bleach only managed about 20%. Remember, bleaching also raises the grain. You must lightly sand with 220-grit after the wood is completely dry and neutralized.
Why Sunlight Naturally Lightens Wood
Sunlight is a slow, natural bleach. The UV component of solar radiation provides enough energy to break down lignin at the wood’s surface. This process is called photodegradation, much like UV bleaching in wood. The lignin breaks down into simpler, water-soluble compounds that often wash or weather away.
This leaves behind a higher concentration of bleached cellulose fibers, resulting in that silvery-grey patina on old barnwood. While beautiful for some projects, this sun-bleaching is superficial and uneven, making it a poor substitute for controlled chemical lightening when you need a uniform base for staining. The sun only affects the top few millimeters, and it takes months or years.
Three Shop-Tested Methods to Lighten Pine
You have options to lighten pine, each with different trade-offs. I compare them by the control they offer, their speed, and cost.
- Control: Chemical bleaching offers the most predictable, uniform lightening.
- Speed: A chemical process works in hours; sun bleaching takes months.
- Cost: Washing and sanding is virtually free; chemical kits are a moderate investment.
Your first step with any method is to test it on a scrap piece from the same board. Pine is variable, and results can differ. Always work in a well-ventilated area and wear appropriate safety gear.
Method 1: Controlled Chemical Bleaching
This is the most effective method for significant, uniform lightening or stain removal. You’ll typically use a two-part wood bleach (acid and base) or oxalic acid crystals for rust or water stain removal.
Here is a reliable process for how to bleach pine wood safely.
- Put on nitrile gloves, safety goggles, and ensure strong ventilation.
- Sand the wood smooth to open the grain, then wipe away all dust with mineral spirits.
- Mix and apply the bleach according to the product label. For two-part bleaches, you apply Part A, then Part B.
- Allow it to work for the specified time, then neutralize. Oxalic acid requires a baking soda and water rinse.
- Let the wood dry completely for 24-48 hours. The wood will look dry and feel slightly fuzzy.
- Sand lightly with 220-grit paper to remove the raised grain and achieve a smooth surface for finishing.
Chemical bleaching alters the wood’s color at a molecular level, providing a clean base that accepts new stains more evenly.
Method 2: Sun Bleaching (The Patient Approach)
Ultraviolet light from the sun naturally breaks down lignin, the compound that gives wood its brown color. It’s free but requires patience.
Place your sanded boards outdoors where they will get full, consistent sun exposure. Elevate them on stickers to allow air circulation on all sides. Rotate the boards every few weeks to prevent uneven bleaching from shadows.
Expect this process to take several weeks to a few months for noticeable lightening. It works best on fresh, unsealed wood. This method will not remove deep stains, ink, or pitch marks, only lighten the overall surface tone.
Method 3: Washing and Sanding for Subtle Lightening
Often, pine looks dark simply due to surface grime, oxidation, or mill glaze. A good wash can reveal a lighter, fresher color.
Wipe the wood down with a damp cloth and a mild soap like dish detergent or a 50/50 vinegar and water solution. This lifts dirt and can neutralize surface tannins, slightly lightening the tone.
This process will raise the grain, making the surface rough. If you want to know how to lighten pine without sanding, the honest answer is you can’t get a good finish that way. Let the wood dry, then sand it smooth with 180-grit paper. This combination of washing and sanding removes the darkened surface fibers, revealing lighter wood underneath.
Does Pine Wood Stain Well? Choosing an Oil-Based Modifier
So, can you stain pine wood? Absolutely. But staining pine directly often leads to a blotchy, uneven mess because of its wildly variable density between earlywood and latewood.
Oil-based stains are superior for pine. The slow-drying oils and solvents penetrate deeper into the porous softwood before evaporating, allowing pigment to lodge more evenly. Water-based stains can sit on the surface and flash-dry, accentuating pine’s uneven absorbency.
For control, consider gel stains. Their thicker consistency sits more on the surface, giving you more time to wipe and manipulate the color, which is helpful on porous softwoods. Traditional liquid oil stains penetrate faster for a deeper, more traditional look.
What to Look for in an Oil Stain for Lightened Pine
After lightening, you’re modifying a neutral canvas. Choose a stain with these features:
- Good Penetration: Look for stains listing linseed oil, tung oil, or modified alkyd resins.
- Slow Dry Time: This gives you a longer working window to achieve an even coat.
- Clear Base Options: Many brands offer “natural” or “clear” base stains you can tint precisely.
To darken pine wood without creating a muddy, opaque look, always use multiple thin coats. Wipe on a thin layer, wait 5-15 minutes, then wipe off all excess. Let it dry fully, then assess if you need another coat. This build-up method allows depth and clarity, unlike one heavy, sticky application that sits on top.
Modifying Color: From Light Wash to Deep Tone
Your lightened pine base gives you total control. For a light wash that lets the wood grain show through, dilute your oil stain 50/50 with mineral spirits. Apply, wait 3 minutes, and wipe off completely.
For deeper, richer tones, apply full-strength stain in successive thin coats as described above. Sand lightly with 320-grit paper between coats for a super-smooth finish.
These techniques work for any project. Whether you’re finishing pine wood floors, a farmhouse table, or simple trim, the principle is the same: control absorption through preparation and thin, layered applications.
Best Practice Workflow: From Lightened Wood to Finished Color
Treat this process like a chemistry experiment. Each step builds on the last, and skipping one can ruin your work.
Rushing the steps between lightening and topcoating is the surest way to get a finish you’ll hate. Patience here is a tool, just like your sander.
Step 1: Surface Prep and the Non-Negotiable Test Piece
After your wood is lightened and fully dry, you must create a perfect canvas. Start with a final sanding sequence. I go from 120-grit to 150-grit, then to 180-grit. This removes any raised grain from the lightening solution and creates a smooth, open surface for stain. This step is a key part of sanding sequence for wood stain preparation, helping ensure even color uptake. When you’re ready, you’ll move on to applying the stain with confidence.
Blow off the dust with compressed air. Then, wipe the entire piece with a tack cloth dampened with mineral spirits. This grabs every speck regular cloths miss.
You must test your entire finish schedule on a scrap from the same board. The color and absorbency of your actual project piece will match this scrap perfectly. This test piece is your only chance to see the final color and fix problems before they are permanent.
Step 2: Applying Oil-Based Stain for an Even Coat
For most pine projects, a simple, lint-free cotton rag is my go to. For larger surfaces like a table top, a foam brush or pad helps spread the stain quickly before wiping. The goal is uniform penetration.
Use the “flood and wipe” technique. Liberally apply stain along the grain, flooding the surface. Let it sit for 5 to 15 minutes-check your product’s instructions. This lets the pigment settle into the wood fibers.
Then, with a clean rag, wipe off the excess thoroughly and uniformly. Wipe with the grain. Inconsistent wiping time or pressure is what creates dark spots and streaks, not the stain itself.
Step 3: Curing and Top-Coating Your Stained Pine
Oil-based stains need time for the carriers to evaporate and the resins to harden. In a warm, dry shop, give it a full 24 hours. If it’s humid or cold, wait 48 hours. Touch the test piece. If it feels cool or tacky, it’s not ready.
The topcoat does two critical jobs. It seals the modified color in place, and it provides a durable surface for use. For pine, I often use a wipe on polyurethane for its foolproof application. A pure oil finish, like tung oil, will deepen the color slightly but offers less protection.
Applying a topcoat completes the color modification process by locking your chosen hue under a protective layer.
Solving Common Problems: Blotchiness, Bleed-Back, and Color Fixes
Even with perfect technique, pine can be unpredictable. Here is how to solve the most common headaches.
Fixing and Preventing Blotchy Stain
Blotchiness happens because pine has areas of wildly different density. Soft, spongy earlywood soaks up stain like a straw and turns dark. Hard, dense latewood resists it and stays light.
A pre-stain wood conditioner is a thin varnish that partially seals the wood, slowing absorption to create a more even color. This is a key step in wood surface prep to influence stain absorption. Apply it before staining, following its specific dry time. For an even more reliable barrier, use a 1-pound cut of dewaxed shellac as a seal coat after lightening. A consistent absorption helps the final color stay uniform across the piece.
If blotches appear on your project, you must sand them out. Start with 180-grit paper and sand just enough to remove the stained surface. Re apply your conditioner or shellac, then stain again.
When the Wood Color Shifts After Staining
Sometimes, a yellow or amber tint emerges hours or days after you apply a light colored stain. This is called “bleed back.” Natural tannins and resins in the pine are dissolving in the stain’s solvents and rising to the surface.
A shellac seal coat after lightening isolates these compounds and prevents bleed back entirely. If you see it happening on an unfinished piece, your only fix is to let it fully cure, then sand it off and restart with a proper seal coat.
Is your stain too dark? Let it dry, then lightly sand the surface with 220 grit paper to remove some of the top pigment. Too light? You can usually apply a second coat of stain after the first is fully dry to deepen the color incrementally. Always check this method on your test piece first.
Frequently Asked Questions on Lightening and Staining Pine
1. Should I seal pine after lightening and before applying an oil stain?
Yes, applying a thin seal coat of dewaxed shellac is recommended after lightening to prevent blotchiness and tannin bleed-back. This barrier ensures the oil stain modifies color evenly without interacting with residual wood chemistry.
2. How does a gel stain differ from a liquid oil stain on lightened pine?
Gel stains, with their thicker formulation, sit more on the wood surface, offering greater control and minimizing absorption differences in pine’s grain. Liquid oil stains penetrate deeper for a more traditional, integrated color but require meticulous application to avoid blotchiness on porous softwoods.
3. Does chemical bleaching affect pine’s long-term durability or adhesion?
Properly neutralized and sanded bleaching does not compromise the wood’s structural integrity. It can slightly harden the surface cellulose, but thorough cleaning and sanding are critical to ensure strong adhesion for subsequent stains and topcoats.
4. What are the practical limitations of sun bleaching versus chemical methods?
Sun bleaching only affects the surface millimeters and requires months for a subtle shift, making it unsuitable for achieving a uniform base. Chemical bleaching provides a deep, rapid, and controlled color reset essential for consistent stain results on interior projects.
5. Can I adjust the color of an oil stain if the result is too intense on lightened pine?
Yes, you can lightly sand the cured stain surface to remove top-layer pigment, effectively lightening the hue. For future control, always build color incrementally using multiple thin, wiped coats rather than a single heavy application.
Final Thoughts on Working With Pine
The most reliable method is always a test piece. I keep a stack of sanded pine off-cuts specifically for testing stains and finishes before they touch my project. Lightening with wood bleach requires careful handling, while an oil-based stain modifies color by adding pigment to the wood’s pores. Your final result depends entirely on this preparatory experimentation.
Choose pine sourced from responsibly managed forests, and maintain your finished piece with simple, periodic care. Every project, successful or not, builds your material science knowledge for the next one.
References & External Links
- How to Get a Beautiful Stain on Pine (Wood Staining Tips for Newbies Like Me!) – Dani Koch
- Light Pine Stain – How to Keep Pine from Yellowing
- How to Lighten Pine Wood & Remove Orange Tones
- How to Lighten Stained Wood | 7 Options That Work – Grace In My Space
- How To Stain Pine A Warm Medium Brown While Minimizing Ugly Pine Grain – Addicted 2 Decorating®
- How to Bleach Wood – Jenna Sue Design
- How To Bleach Knotty Pine – Hunker
David is a veteran woodworker. He is now retired and stays in his cabin in Wisconsin which he built himself. David has 25+ years experience working in carpentry and wood shops. He has designed and built many small and large wood projects and knows the science behind wood selection like the back of his hand. He is an expert guide on any questions regarding wood material selection, wood restoration, wood working basics and other types of wood. While his expertise is in woodworking, his knowledge and first hand experience is far from 'woody'.