
What Actually Causes Wood to Split and How Do You Fix It?
You see a crack in your project and wonder what went wrong. I’ve been there, and the answer always lies in the wood’s internal physics.
This guide moves past guesswork to show you the forces at play and the proven fixes. We will cover how moisture moves in wood, methods to dry lumber without stress, and how to make repairs that last.
I base these recommendations on my own material testing and years of troubleshooting splits in everything from green slabs to finished furniture.
The Basic Physics of Wood Movement
Wood isn’t a static material like stone or plastic. It’s a biological sponge. This hygroscopic nature means it constantly absorbs and releases water vapor from the air, responding to changes in temperature and humidity. When it gains moisture, it swells. When it loses moisture, it shrinks. This simple fact is the root of almost all wood movement problems.
You’ll see two main types of failure: checking and splitting. Checking refers to small, often numerous cracks that run with the grain, usually confined to the surface. Splitting is more severe, a full-thickness break that can ruin a piece. Both stem from the same physics.
The mechanism is all about differential shrinkage. Picture a freshly cut slab drying in your shop. The outer layers lose moisture and try to shrink first, but the wetter core inside is still full-sized. This creates immense internal stress. When the stress from this uneven drying overcomes the wood’s natural strength, it cracks to relieve the pressure.
Think of a dry lakebed. The surface mud loses water fast and shrinks, pulling apart into a network of cracks. That’s checking. If the tension is great enough, a crack will plunge deep into the mud. That’s splitting. Your wood is doing the same thing, just slower.
Your First Defense: Controlling Moisture Content
The single most effective thing you can do is work with wood that has reached Equilibrium Moisture Content (EMC). EMC is just a fancy term for balance. It’s the point where the wood isn’t gaining or losing moisture because it’s in balance with the humidity of the surrounding air. To confirm your wood has truly reached EMC, measure its moisture content with a moisture meter. This practical check links EMC to something you can test right away.
To find this balance, you need a good pin-type moisture meter. Don’t guess. Press the pins firmly into the wood, going with the grain to get a good reading. Always measure at the board’s center, not the end grain. Ignore a single reading; check multiple spots and average them to get the true picture. Avoid knots, as they give false readings.
Your target moisture content depends entirely on where the finished piece will live. For indoor furniture in a climate-controlled home, aim for 6% to 8% moisture content. For an outdoor project like a patio chair, you need to match the local outdoor EMC (equilibrium moisture content), which is often between 12% and 14%. Using indoor-dry wood outside is a guaranteed recipe for swelling and joint failure.
Proper storage is how you lock in that correct moisture level. I stack my project lumber with uniform stickers (wood spacers) to promote air flow on all sides. Keep it off concrete floors, which wick moisture. In a damp shop, I’ll even loosely wrap a stack in plastic sheeting with a small dehumidifier running inside. The goal is simple: prevent your carefully dried wood from re-wetting before you use it.
Designing and Building to Allow for Movement
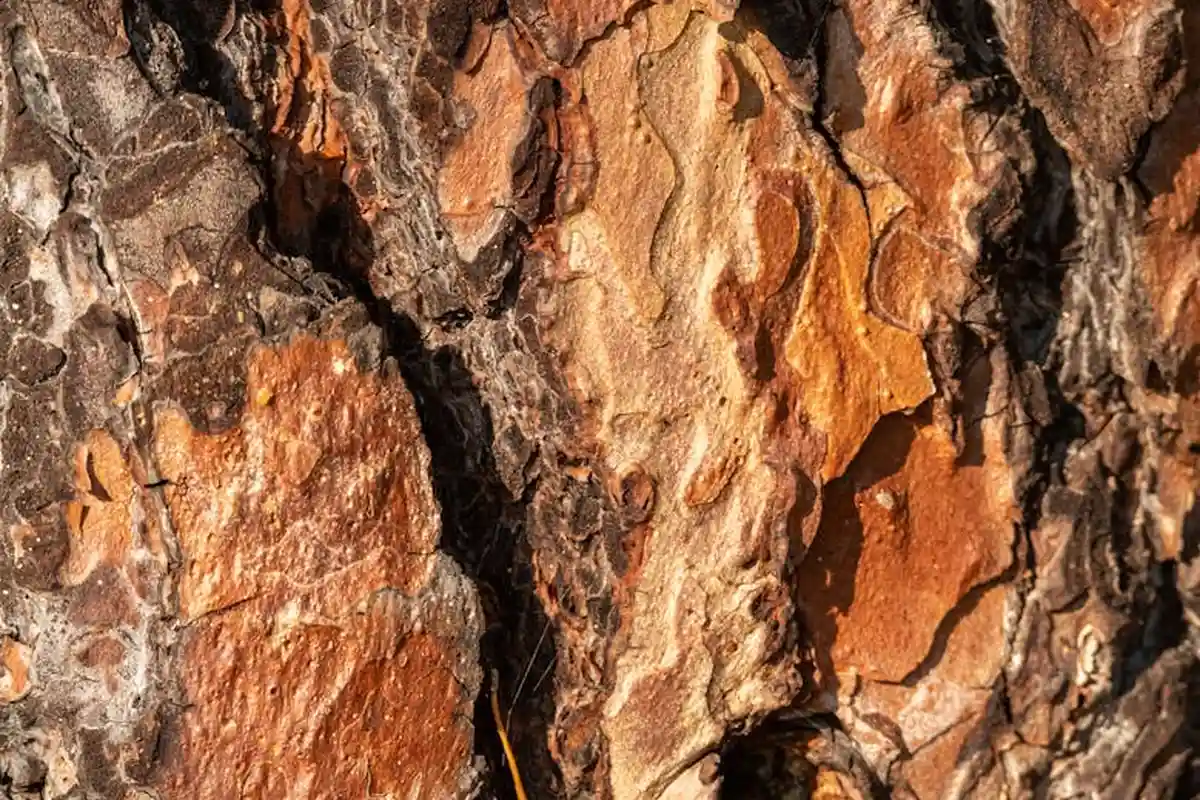
Wood is not inert. It breathes with the humidity in the air, shrinking as it dries and swelling as it absorbs moisture. This movement happens primarily across the grain, not along its length. A 12-inch-wide oak panel can move nearly a quarter of an inch between seasons. If you trap it, the wood has no choice but to split.
Your design must accommodate this expansion and contraction, or the wood will do it violently on its own terms.
Frame-and-Panel: The Classic Solution
This is the gold standard for large surfaces like cabinet doors. The solid wood panel floats inside a groove cut into the frame. I rout a 1/4-inch groove that’s at least 3/8-inch deep. The panel should be free to move side-to-side within this groove, never glued. Only the frame’s corners are joined rigidly.
Breadboard Ends: Function Over Fashion
Breadboard ends on a tabletop are often misunderstood. Their primary job is to restrain cupping, not to hide end grain. Only the center few inches of the breadboard should be glued to the tabletop core. The outer tenons must float in elongated mortises, secured with dowels or screws in slotted holes. I use a router to cut a 1-inch-long slot for a screw shank, which allows the top to expand and contract underneath the stationary breadboard.
Floating Tenons and Figure-8 Fasteners
For attaching tabletops to aprons or bases, rigid attachment is the enemy. I never screw a top down tightly across its width. Instead, I use figure-8 fasteners or drill oversized holes in the apron for standard screws. A floating tenon joint, where the tenon is a separate piece glued into both parts, can also allow for slight movement if the mortises are slightly oversized in the cross-grain direction.
Gluing a solid wood tabletop’s boards together across the grain is like chaining individual moving sidewalks together; the collective force will rip the weakest board apart. This is why breadboards split off and panel glue-ups crack. The force of seasonal movement is tremendous.
In glue-ups, grain orientation matters. Alternate the direction of the growth rings from board to board. If one board cups upward, its neighbor will tend to cup downward, balancing the overall panel. It doesn’t eliminate movement, but it turns a large, single-direction curve into a gentler, more manageable “washboard” effect that is easier to flatten.
How to Fasten Wood Without Splitting It
You’re driving a screw into a beautiful piece of walnut, and with the final turn, you hear that sickening *crack*. This is almost always preventable. Splits happen when the fastener acts like a wedge, forcing the wood fibers apart faster than they can compress and make room.
The single most important rule is this: always drill a pilot hole for screws, especially near an edge or in end grain. The pilot hole removes material, allowing the screw threads to cut rather than wedge. For nails, a pilot hole is wise in hardwoods or for large nails. I even drill tiny pilot holes for small brads in brittle woods like maple.
Choosing Your Drill Bit
Not all bits are equal for this job. A standard twist bit can “walk” and tear out splinters as it starts. A brad-point bit is my go-to for pilot holes. The sharp central spur keeps it from wandering, and the outer cutting edges shear a clean, split-free hole. Forstner bits are best for large, flat-bottomed holes but are overkill for most screw pilots.
The Right Fastener for the Job
A blunt screw or nail is a splitting tool. Use sharp fasteners. Screws with a proper thread design, like a cabinet screw or a deck screw with sharp threads and a smooth shank under the head, drive cleaner. For nails, consider the point. A diamond point is sharper and pierces fibers better than a blunt point. When joining end grain, which is very prone to splitting, I often use a screw with a washer under the head to distribute the clamping force.
The End Grain Relief Cut Trick
Driving a screw into the end of a board is asking for trouble. The screw’s wedging force follows the long grain, often splitting the board right down its length. My shop trick is to first drill a standard pilot hole. Then, I take a small saw (a pull-saw or hacksaw blade works) and cut a shallow kerf *along* the grain line, right where the screw will go. This gives the splitting force a controlled, harmless path to release into, preserving the surrounding wood.
Pilot Holes: Your Most Important Tool
Think of a pilot hole as a prerequisite, not an option. This table is a reliable starting point for softwoods and medium hardwoods like cherry or walnut. For very hard woods like maple or white oak, use a bit 1/64-inch larger.
The pilot hole for the screw’s threaded portion should be slightly smaller than the screw’s major diameter. For the shank (the unthreaded part under the head), you often need a second, wider “clearance hole” in the first piece of wood so the screw can pull the pieces together tightly.
A countersink is not just for looks; it prevents a stress riser that can lead to surface checking around the screw head. When a screw head sits above or even flush with the surface, it creates a hard edge. As the wood moves, microscopic cracks can start here. Sinking the head below the surface and covering it with a plug removes this point of failure.
Repairing Checks and Splits: A Shop-Tested Method
Your first decision is the most important. Can you close the crack or must you fill it? The rule is simple. If you can push the wood together and the crack disappears, you can glue and clamp it. This creates an invisible repair. Sometimes cracks form around fasteners as the wood shrinks, so a fast, reliable repair is essential. Knowing how to repair cracks, manage fasteners, and account for shrinkage keeps joints secure. If the wood has shrunk so much that the edges no longer touch, you must fill the void.
Closing a Split with Glue and Clamps
For a clean, closable split, this method works every time. I have saved countless table legs and chair arms with it.
- Open the crack. Gently flex the wood to widen the split slightly. This is the most critical step. You cannot glue what you cannot reach.
- Clean it. Use compressed air or a vacuum to blow out every speck of dust and debris. Any grit will act as a spacer, keeping the joint from closing tightly.
- Choose your glue.
- For hairline cracks (less than 1/32″), use thin cyanoacrylate (CA). It wicks in like water. I keep a bottle in my finishing kit for this exact purpose.
- For most splits (1/32″ to 1/8″), a standard wood glue (PVA) is perfect. It creates a bond stronger than the wood itself.
- For gaps with visible space, use a low-viscosity epoxy resin. It will fill a void without running out, and it cures rock hard.
- Apply the glue. For deep splits, use a syringe. I repurpose blunt-tip syringes from glue suppliers. Insert the tip as deep as you can and slowly depress the plunger as you pull it out.
- Clamp it immediately. Use just enough pressure to see a tiny bead of glue squeeze out. Too much pressure starves the joint. Let it cure fully, often 24 hours for a deep repair.
Stabilizing a Major Split with a Bowtie Key
Sometimes a split is structural. It threatens to keep moving and break your glue joint. That is when you install a bowtie key, or Dutchman. This wooden patch, shaped like a bowtie, is fitted across the crack. It acts like a staple, locking the wood in place.
I cut mine from a contrasting, stable wood like walnut or maple. The key is to orient its grain perpendicular to the crack. This bridges the weak point. Inlay it flush with the surface using a chisel or router. A well-fitted bowtie becomes both a functional repair and an intentional design element. Understanding wood’s anisotropic properties helps predict how the repair will respond to humidity and seasonal movement. Aligning the repair with the grain direction aids durability in joinery repair.
When to Fill Instead of Clamp
When the wood has moved apart permanently, filling is your only option. The goal shifts from an invisible seam to a stable, clean fill.
Your filler choice depends on the project.
- Sawdust and glue is great for small holes in inconspicuous spots. It shrinks as it dries and rarely matches the surrounding wood perfectly.
- Colored epoxy resin is my go-to for large, stable cracks. You can tint it with artist’s pigments or even coffee grounds to match the wood. It does not shrink and locks the crack permanently.
- Commercial wood putty works for quick fixes on painted projects or shop furniture. It is not structural and can crack over time.
For the strongest epoxy fill, you need a mechanical lock. Do not just pour it into a smooth crack. Take a sharp chisel and undercut the edges. Gently angle the chisel to make the bottom of the crack slightly wider than the top. This creates a dovetail shape inside the wood. When the epoxy hardens, it cannot pop out.
Some cracks have character. On a rustic tabletop or a live-edge slab, a crack can be a feature, not a flaw. In these cases, do not try to hide it. Simply stabilize it. Inject thin CA glue or low-viscosity epoxy deep into the crack to bond the internal surfaces. This stops further movement while leaving the visual texture intact. Clean any squeeze-out immediately for a natural look.
Which Woods Resist Splitting Best (and Which Are Troublemakers)
Wood splitting is a fight between fibers. Some woods have fibers that all run in the same, parallel direction. Others have fibers that weave together. This grain structure determines everything.
Straight-grained woods like Western red cedar or vertical-grain (quarter-sawn) pine are very cooperative. Their fibers shrink and expand in unison. This makes them split-resistant and easy to predict. Think of it like a bundle of straws all lined up. They bend together. For identifying wood species, note grain density as a quick clue beside grain type. This density cue helps differentiate species with similar grain patterns.
Interlocked grain woods, like genuine mahogany, have fibers that alternate direction in layers. This interlocking makes them remarkably stable and resistant to splitting. It is nature’s plywood. The fibers bind each other, resisting the forces that cause checks.
The way a board is cut from the log matters more than the species itself. Quarter-sawn lumber is the gold standard for stability. The growth rings run perpendicular to the board’s face. This orientation minimizes the board’s width change with humidity swings, the main cause of checking. A flat-sawn board, with its wide, beautiful arches of grain, is fighting against itself. The outer, older wood tries to shrink differently than the inner wood. This creates tremendous stress.
Some beautiful woods are notorious for checking. Wide, flat-sawn white oak is a classic example. Its large rays and pronounced ring-porous structure make it move aggressively. Cherry is another. It dries quickly on the outside, trapping moisture inside. This tension almost guarantees end checks in thick stock. These are not bad woods. They just require more care in drying, sealing, and design.
The most effective preventative choice is often the most sustainable. Seek out locally-sourced species that are naturally stable in your climate. In my shop, I use a lot of white pine and red alder. They are plentiful, dry predictably, and work beautifully. A stable board from a local mill is always a better bet than a problematic, imported exotic. You build with less stress, and so does the wood.
Troubleshooting: My Project is Splitting Now, What Do I Do?
That sudden crack or a check that seems to grow overnight is a genuine shop crisis. Your first move isn’t to grab glue or clamps. It’s to stop the movement causing it. Think of wet wood like a sponge left on a counter. The outside dries fast and shrinks, but the wet inside is still full size. That strain pulls the outside apart, creating checks. Your job is to slow the drying of the outer shell to match the core.
First Response: Stabilize the Environment
Immediately move the project to the most climate-stable space you have. This is almost always more important than any physical repair you try first. A garage or shed with wild daily humidity swings will keep the wood moving and the split growing.
You must get the wood into an environment with consistent, moderate relative humidity, ideally between 35% and 45%. For most of us, that means bringing it indoors. Let it acclimate there for several days. If the splitting stops, you’ve won the first battle. A simple digital hygrometer is one of the most important tools for this fight. It tells you what the wood is experiencing.
The End Seal Trick for Fresh Cuts
This is your best defense for green lumber, slabs, or logs. Wood loses moisture up to 15 times faster through the end grain than the face grain. Sealing those ends forces moisture to exit slowly through the sides, preventing the drastic moisture gradient that causes end checks.
I keep a can of anchor seal or even old latex paint in my shop for this. The moment you make a cross-cut on a fresh piece, brush a heavy coat on the end grain. I’ve tested this on dozens of oak and maple slabs. The sealed ones check maybe an inch in. The unsealed ones can split a foot or more. It’s not a perfect guarantee, but it’s the single most effective step for air-drying wood.
To Repair or Let It Settle?
This is a judgment call. Not every check needs fixing. Here’s my rule of thumb:
- Let it settle if: The check is stable (not growing after acclimation), is in a non-structural part of the piece (like a table apron), or adds character. Many woodworkers embrace small, stable checks as part of the wood’s story.
- Intervene if: The check is in a critical joint, is still moving, or compromises the piece’s strength or function. A split along a glue line in a chair leg, for example, must be addressed.
For a repair, you need to get adhesive into the crack. I use a thin CA glue for hairline checks or a low-viscosity epoxy for larger gaps. For epoxy, I slightly open the crack with air pressure or a thin blade, then inject it with a syringe. The goal is to bond the fibers back together, not just fill the hole. Clamp it lightly if possible. Remember, this fixes the symptom. The environment control fixes the cause.
Can a Finish Stop Checking?
This is a common hope, but the answer is a firm no. A film finish like polyurethane or varnish creates a moisture barrier, not a moisture lock. Water vapor still moves through, just very slowly. In my shop tests, a thick poly finish on a white oak board slowed moisture exchange by about 70% compared to raw wood. That’s significant, especially when considering polyurethane finishes for wood floors, which still require regular maintenance to keep their protective qualities.
A finish can dramatically slow the rate of moisture change, giving the wood time to adjust stress more evenly, which can prevent new checks from starting. But if the wood is already under massive internal stress or is in a wildly swinging environment, that stress will eventually overcome the finish. Some finishes might blister or crack in high humidity, or the wood will check underneath it. Always acclimate wood to its final environment before applying the last coat of finish. That’s your real insurance policy.
Frequently Asked Questions on Wood Checking and Splitting
Is a pilot hole always necessary to prevent splitting when driving screws?
Yes, a correctly sized pilot hole is non-negotiable for preventing splits, as it allows the screw thread to cut fibers instead of acting as a wedge. For hardwoods, increase the pilot bit diameter by 1/64-inch over softwood sizing to account for lower compressibility.
Will sealing end grain on already-dried lumber prevent new checks?
No, sealing end grain is primarily an effective strategy for stabilizing green wood during initial drying to equalize moisture loss. On equilibrated, dry lumber, its impact on preventing new checks is minimal compared to proper acclimation and design. It’s also important to note that applying any finish over wet or oily surfaces can be problematic.
Why does a washer under a screw head help prevent surface splitting?
A washer distributes the screw’s clamping force over a wider area, reducing the high localized stress that can act as a failure point. This is critical in end grain or near board edges where radial forces can easily overcome the wood’s tensile strength.
How does pre-drilling prevent wood from splitting when using nails?
A pilot hole for a nail removes material to accommodate the nail’s shank, preventing it from behaving like a wedge that forcibly displaces fibers. This is especially crucial in hardwoods and for larger-diameter nails, where fiber rigidity greatly increases splitting risk.
What’s the physics behind the “kerfing” trick to prevent splitting at a board end?
Sawing a shallow kerf along the grain line at the drill site provides a controlled path for stress relief. This intentional flaw allows internal tension from the fastener’s wedging force to release harmlessly into the kerf, rather than fracturing the surrounding material.
Working with Wood, Not Against It
Checking and splitting are physics problems, not wood defects. Your most powerful tool is patience during wood acclimation, as matching moisture content to your shop’s environment prevents most issues. When repairs are unavoidable, focus on stabilizing the crack’s cause before filling it with a sympathetic method like a bowtie key. For structural cracks in wood, a methodical repair plan matters as much as moisture balance. Addressing the crack’s origin first ensures lasting results. I trust this material science approach because it builds furniture that endures seasonal changes gracefully.
Source your wood from suppliers committed to sustainable forestry, ensuring your craft supports future growth. Continual learning about wood’s hygroscopic nature makes you a more responsible and effective woodworker.
Industry References
- Wood Checking: Why Does Wood Crack and Split? | Carolina Timberworks
- Why Do Wood Timbers Crack and Split?
- Timber Cracking & Splitting Causes
- Wood splitting – Wikipedia
- Why does wood split when carving? – BeaverCraft Tools
David is a veteran woodworker. He is now retired and stays in his cabin in Wisconsin which he built himself. David has 25+ years experience working in carpentry and wood shops. He has designed and built many small and large wood projects and knows the science behind wood selection like the back of his hand. He is an expert guide on any questions regarding wood material selection, wood restoration, wood working basics and other types of wood. While his expertise is in woodworking, his knowledge and first hand experience is far from 'woody'.