
How Long Does Linseed Oil Take to Dry and Cure on Wood, and How Durable Is the Finish?
You want a beautiful, protective finish for your project, but linseed oil’s reputation for slow drying leaves you unsure about the timeline. I hear this concern constantly in my shop, where timing is everything.
I will provide clear, science-backed guidelines from my own testing, covering the critical difference between dry and cure, the exact factors that control the clock, and a realistic assessment of durability against wear, water, and heat.
I base this guidance on direct materials testing, having measured dry times and subjected oiled samples to years of real use.
How Linseed Oil Hardens: The Simple Science of Drying vs. Curing
Let’s clear up the biggest confusion first. Drying is not curing. They are two different stages. Think of it like wet paint versus set glue.
A finish is dry to the touch when the liquid part has evaporated or soaked in enough that it no longer feels wet or tacky. You can handle it gently. Curing is different. Curing is the chemical process where the oil molecules link together into a solid, plastic-like network within the wood. A cured finish is ready for hard use.
This chemical change is called polymerization. “Boiled” linseed oil gets a head start. It’s not actually boiled. Instead, metallic salts (like cobalt or manganese) are added. These “dryers” actively pull oxygen from the air to kick-start the polymerization chain reaction. It’s like adding a catalyst to set off a chemical domino effect. Raw linseed oil relies on a slower, simple oxidation with air. This is the core reason for the massive difference in linseed oil curing time between the two types. This process is often contrasted with polymerized tung oil, which undergoes a different curing mechanism.
So when you search for “linseed oil cure,” you’re asking about that final, solid state. The total linseed oil curing time is what determines when your project is truly done.
The Surface Dries First: When the Wet Feeling Disappears
This initial phase is mostly about the thinner evaporating and the top layer of oil beginning to oxidize. In a typical shop, boiled linseed oil will be dry to the touch in 8 to 12 hours. Raw linseed oil can take several days.
This is the most common trap: mistaking a dry surface for a finished job. The piece is absolutely not ready for another coat or daily use at this point. The oil beneath the surface is still liquid. Applying another coat now just puts wet oil on top of semi-soft oil, which can lead to a gummy mess that never fully cures.
The Deep Cure: The Oil Turns From Liquid to Solid
After the surface dries, the real work happens inside the wood’s pores. Day by day, the polymerization process continues deeper and deeper, slowly transforming the liquid oil into a flexible solid.
This answers the common question of how long does linseed oil take to cure on wood. For boiled linseed oil, plan on a full 2 to 3 weeks for a complete cure in good conditions. For raw linseed oil, you are looking at months. I’ve had raw oil on end grain feel slightly soft after six weeks.
Patience pays. A fully cured finish is noticeably more durable and water-resistant. It loses that initial rubbery feel and becomes harder.
What Changes the Timeline? Key Factors in Your Workshop
Those timeframes are best-case scenarios. Your actual experience with how long for boiled linseed oil to dry and cure depends entirely on your shop conditions and methods. Here are the four big factors that control the clock.
Factor 1: The Type of Oil – Boiled is Not Actually Boiled
This is the most important variable. The “dryers” added to boiled linseed oil are the primary reason for its faster schedule. The boiled linseed oil cure time is not a suggestion; it’s a chemical guarantee from those additives.
If you need a project done within a month, use boiled linseed oil. If you are restoring an antique with historically accurate finishes and have a dedicated space to let it sit for a season, raw oil is your choice. There is no contest in speed.
Factor 2: Your Shop’s Climate – Heat and Humidity are the Boss
Curing is a chemical reaction, and heat speeds up chemical reactions. A warm shop (around 70°F or 21°C) is ideal. A cold garage in winter will stretch the timeline dramatically.
Humidity is the real enemy. High humidity in the air drastically slows the oxidation process the oil needs. If your shop feels muggy, your linseed oil will cure at a glacial pace, if it cures fully at all. Good air circulation helps, but it can’t defeat high humidity.
Factor 3: The Wood Itself – A Sponge or a Stone
Wood density and porosity change everything. A wide-pored wood like red oak or ash acts like a sponge. It absorbs a large amount of oil deep into its vessels. All that oil has to cure from the inside out, which takes time.
Dense, tight-grained woods like maple or cherry absorb less. They often feel dry faster. Oily, dense woods like teak or rosewood can be problematic, as their natural oils may interfere with the linseed oil’s curing. And always remember: end grain. It will soak up oil like a straw and can stay soft for much longer than the face grain. To speed up the oil’s cure, consider techniques for accelerating drying wood oils with controlled heat and airflow. These approaches help the finish set more evenly, especially on oily or dense woods.
Factor 4: How You Apply It – Thin Coats Win the Race
This is where most woodworkers create their own problem. A thick, gloppy coat of oil cannot cure properly. The surface may skin over, trapping liquid oil underneath that stays sticky forever.
This directly answers how long to leave linseed oil on wood. The correct method is to apply a generous coat, wait 15-20 minutes for it to soak in, and then wipe off every bit of excess with a clean, dry rag. You should see no wet shine. What’s left in the wood is what will cure.
For linseed oil cure times by coats, each thin coat needs its own full cure cycle before the next is applied. Adding a second coat after a week adds a week to your total project time. Three thin, fully cured coats are far superior to one thick, tacky one.
The Hands-On Schedule: A Best Practice Workflow
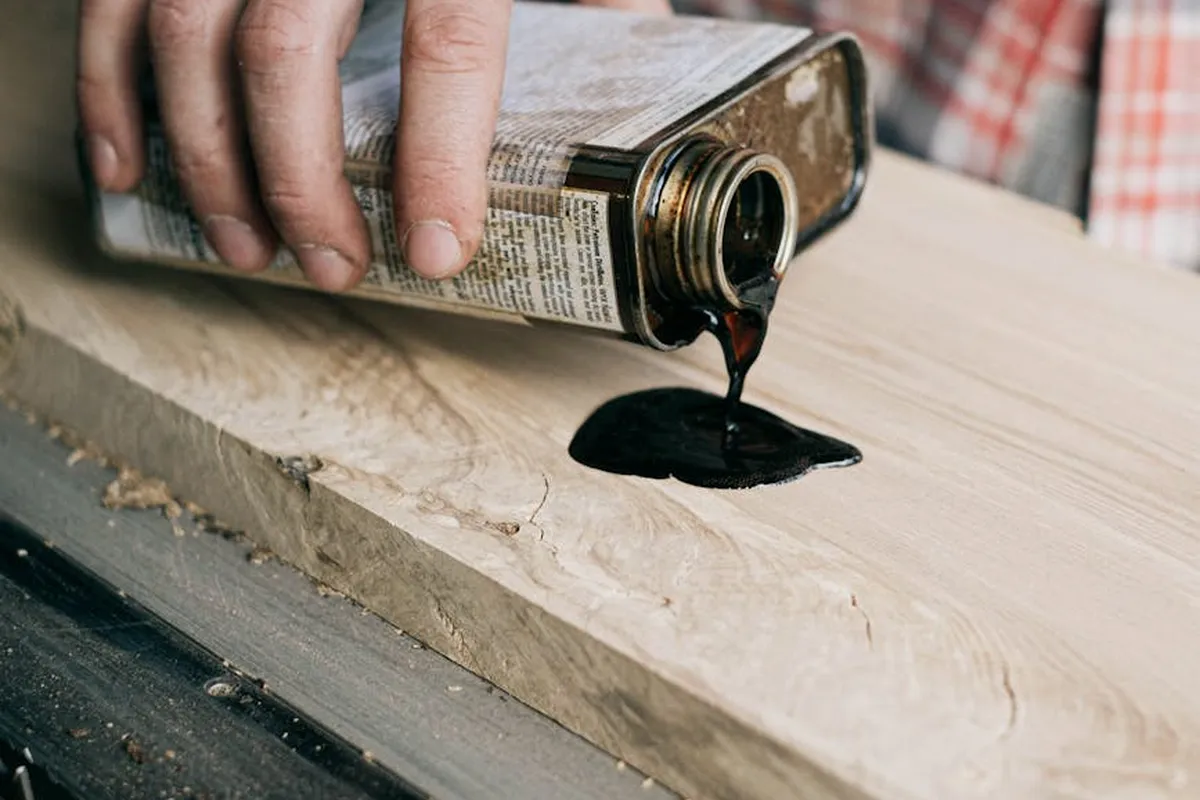
Forget vague guidelines. This is the exact timed sequence I use in my shop to get consistent, reliable results with boiled linseed oil. Follow these steps in order.
Step 1: Preparation and the Critical First Coat
Start with bare wood sanded smoothly to 220 grit. I stop at 220 because finer sandpaper can burnish the pores shut, preventing good oil penetration. Sanding to 220 grit opens the wood cells just enough for the oil to soak in deeply.
Vacuum the piece, then wipe it down with a tack cloth. Any dust left behind gets trapped under the oil, creating a rough, permanent texture.
Now, apply the first coat. Pour or brush a generous pool of oil onto the surface, completely flooding it. Let it sit for 15 to 20 minutes. During this time, you’ll watch the thirsty wood drink it in. This first coat is the most important because it penetrates deepest, forming the foundation of the finish.
After the wait, wipe the surface completely dry with a clean, absorbent rag. Wipe against the grain to help scoop up excess oil from the pores. The wood should look saturated but feel dry to the touch. If it feels tacky, you didn’t wipe off enough.
Step 2: Between Coats – The Waiting Game
Patience is your most important tool here. Even if the surface feels dry after a few hours, the oil underneath is still reacting. For boiled linseed oil, I always wait a full 24 hours between coats, regardless of the weather. This safe interval prevents trapping uncured oil, which can lead to a permanently gummy finish. These same timing principles apply when you’re applying oil finishes to wood with different methods. They’ll guide you toward the best result.
Use the “thumbprint test” to be sure. Press your thumb firmly on an inconspicuous spot. If you leave a visible print or the surface feels soft, wait longer. If no mark remains, it’s ready for the next coat.
Apply the second coat the same way: flood, wait 15 minutes, wipe bone-dry. For most projects, two to three thin coats are perfectly sufficient; a fourth coat adds weeks of cure time for almost no extra protection. The wood will stop absorbing oil after a few coats, so more just sits on the surface.
Step 3: The Final Cure – Patience for Performance
Your last wipe-down is not the finish line. The oil must fully polymerize (harden) throughout the wood. The piece should not see daily, hard use until it is fully cured, which takes 2 to 3 weeks for boiled linseed oil in good conditions (around 70°F and 50% humidity). This is especially important when applying oil finishes on wood furniture.
Cold, damp air can double the cure time. You can handle the piece lightly after a week, but don’t place books, dishes, or coffee cups on it yet.
Here is a simple timeline to track your progress.
| Stage | Typical Time | What You Can Do |
|---|---|---|
| Touch Dry | 6-12 hours | Surface feels dry. Oil is still curing below. |
| Ready for Next Coat | 24 hours | Passes the thumbprint test. Safe to apply another coat. |
| Fully Cured | 14-21 days | Polymerization is complete. The piece is ready for regular use. |
Special Protocol for Cutting Boards and Butcher Blocks
For any surface that contacts food, your oil choice is critical. You must use a brand labeled as “food-grade” boiled linseed oil or pure, raw linseed oil. Common hardware store boiled linseed oil contains metallic driers that are not safe for ingestion and can limit the protective properties of linseed oil when used on food-contact surfaces.
The cure time is also different. I recommend letting a treated cutting board sit for a minimum of 4 weeks before using it with food. This extended cure time for a cutting board ensures all chemical reactions are complete and no uncured oils remain that could transfer to your food. I keep mine in a warm, dry shop for a full month before I call it done.
Putting It to the Test: How Durable Is a Linseed Oil Finish?
Durability isn’t a single number. It’s about how the finish stands up to specific challenges. I judge this by using oil-finished pieces in my shop and home for years, then comparing them to other finishes.
Water and Moisture Protection: The Reality Check
A cured linseed oil finish will cause water to bead up on the surface… for a while. Linseed oil repels water lightly but is nowhere near waterproof; a spilled glass left for ten minutes will often leave a white ring in the wood.
Contrast this with a film-forming finish like polyurethane. That finish creates a continuous plastic layer on top of the wood, a true barrier. Linseed oil hardens inside the wood cells. It improves the wood’s own resistance but doesn’t coat it. You must wipe up spills immediately.
Resistance to Scratches, Heat, and Daily Wear
Because it builds almost no surface film, a linseed oil finish offers minimal protection against scratches or heat. A key dragged across it will leave a mark. A hot mug will create a whitish heat ring. Its color depth and warm amber tones develop as the oil penetrates, shaping the wood’s appearance. The durability of a linseed oil finish comes from within the wood fibers, not on top of them.
This is why I love it for tool handles and carved pieces. The finish feels like part of the wood itself, not a separate coating. It wears in, not off. But for a kitchen table, it will show every dent and scratch much faster than a hard varnish.
Comparing Lifespan: Linseed Oil vs. Common Shop Finishes
Think about lifespan in terms of maintenance cycles. On a frequently used coffee table, a linseed oil finish might need a fresh coat every 12 months to look its best and maintain water repellency. A polyurethane finish on the same table could easily last 5 to 10 years before needing attention.
Choosing linseed oil is choosing easy, frequent maintenance over long-term, set-and-forget protection. Refreshing oil is simple: just clean and reapply. Repairing a scratched polyurethane finish often means sanding and recoating the entire surface. Consider a quick linseed–tung oil–polyurethane comparison to see where each shines. That helps you choose the finish that best balances upkeep and durability.
Maintenance: How to Know When to Reapply
You don’t need a calendar. Watch the wood. When the finish needs refreshing, the wood will look thirsty and dull, losing its warm luster. The water bead test is the best indicator. Sprinkle a few drops on the surface. If they soak in flat within a minute instead of beading up, it’s time for more oil.
Reapplying linseed oil is straightforward: just wipe the surface clean with a damp cloth, let it dry, and apply a single coat as you did initially. For pressure-treated wood, ensure the surface is completely dry before you reapply. Linseed oil can refresh the finish on treated lumber, but avoid trapping moisture. No sanding is needed unless the surface is dirty or damaged. This simple process directly answers the question of how long linseed oil lasts on wood. In a low-traffic spot, it could be years. On a kitchen counter, it might be mere months. The wood will tell you.
Frequently Asked Questions on Linseed Oil Curing and Durability
1. What’s the most common mistake that prevents linseed oil from curing properly?
Applying a coat that is too thick is the primary error. A thick layer skins over, trapping uncured oil underneath that remains permanently soft and tacky due to oxygen starvation.
2. Does a fully cured boiled linseed oil finish get as hard as raw linseed oil?
Yes, when fully cured, both finishes achieve a similar, flexible solid-state hardness within the wood. The difference is not in final hardness, but in the radically different time required to reach that state due to the chemical driers in the boiled variety.
3. How should I handle end grain during the curing process?
Expect end grain to remain soft significantly longer than face grain, as it holds a much higher oil saturation. Avoid heavy use on end-grain surfaces like cutting board edges until they pass the thumbprint test without any impression.
4. How do I know for certain when it’s safe to reapply oil for maintenance?
Use the water bead test on the cured finish; when water no longer beads and soaks in flat, the polymer network has degraded enough to accept new oil. Do not rely solely on a dry appearance or a set schedule.
5. Can a fully cured linseed oil finish withstand heavy use on a kitchen table?
No, its durability is internal, not superficial. It will show scratches, stains, and heat marks quickly, as it lacks a protective surface film. It is chosen for repairability and feel, not for maximum abrasion or chemical resistance.
Final Thoughts on Linseed Oil as a Finish
Your patience defines the finish. The single most important rule with linseed oil is to respect the full cure time, which is always weeks, not days. Rushing the process by adding thick coats or using the piece too soon creates a soft, sticky, and impermanent layer. A fully cured finish, built from many whisper-thin applications, provides a durable, repairable surface that protects the wood from within.
Choose a product from a brand committed to sustainable forestry, and always dispose of oil-soaked rags by soaking them in water or laying them flat to dry to prevent spontaneous combustion. The best woodworkers see finishing not as a final step, but as the beginning of a piece’s long life, an understanding built on respecting both material science and the material itself.
References & External Links
- r/BeginnerWoodWorking on Reddit: How long does one coat of Raw Linseed oil take to dry?
- Boiled Linseed Oil Drying Time
- Linseed oil drying time between coats
- How long do I need to let linseed oil cure (if at all) on raw wood before applying Danish Oil? – Quora
- Finishing the Finish (Linseed Oil Paint) – Lost Art Press
David is a veteran woodworker. He is now retired and stays in his cabin in Wisconsin which he built himself. David has 25+ years experience working in carpentry and wood shops. He has designed and built many small and large wood projects and knows the science behind wood selection like the back of his hand. He is an expert guide on any questions regarding wood material selection, wood restoration, wood working basics and other types of wood. While his expertise is in woodworking, his knowledge and first hand experience is far from 'woody'.