
How Long Does Wood Stain and Polyurethane Really Take to Dry and Cure?
You need a clear timeline for your finish to avoid a sticky, soft, or damaged project. I’ve seen too many woodworkers guess this timing and pay the price.
This guide provides shop-tested, science-forward answers, covering the critical difference between dry time and cure time, how temperature and humidity control your schedule, and exact timelines for oil-based versus water-based products.
I combine hands-on woodworking with materials science, having clocked dry and cure times on hundreds of samples in my own shop.
Drying Isn’t Curing: The Shop Science You Need to Know
Rushing a finish is the fastest way to ruin a project. The biggest mistake I see is treating “dry” and “cured” as the same thing. They are completely different stages.
Drying is about solvents leaving. When a stain or polyurethane is dry to the touch, it means the carriers (water, mineral spirits, etc.) have evaporated enough for the film to be solid. You can lightly sand it. You can apply another coat. It’s the stage listed on the can for “recoat time.”

Curing is a chemical transformation. Here, the resin molecules link together into a tight, cross-linked network. This process, called polymerization, creates the finish’s final hardness, chemical resistance, and durability. It happens from the surface down and takes much longer.
Think of paint on a wall. It’s dry to the touch in a few hours. But lean a piece of furniture against it a week later, and it might stick or leave a permanent imprint. That paint was dry, but it wasn’t fully cured.
My core rule is simple: you can apply your next coat once the previous one is dry. But you cannot subject your project to use until the final coat is fully cured.
The Stain Wait: How Long After Staining Wood Can You Apply Polyurethane?
This is the moment of truth. Apply polyurethane over a stain that’s still off-gassing, and you trap solvents. The result is a permanent, cloudy haze called “blush” that looks like the wood is sweating. Waiting is your cheapest insurance.

Always follow the recoat time on your specific product’s label. As a general guide from my shop logs, here’s what you can expect:
The “thumbnail test” never lies. Press your thumbnail firmly into an inconspicuous spot. If it leaves any imprint or feels soft, the stain is not ready for polyurethane. If the surface feels hard and your nail slides off, you’re good to proceed.
Water-Based Stain: The Fast Lane
Water-based stains dry fast because water evaporates quickly. In a warm, low-humidity shop, they can be ready for a topcoat in under two hours.
I always advise waiting at least 2-4 hours, or even overnight, before applying a water-based polyurethane. This extra time ensures all the water vapor has escaped from the wood pores. Rushing can trap moisture, causing the poly to dry cloudy or with poor adhesion.
There’s a critical first step. Water raises wood grain. Always “pre-raise” the grain by wiping the sanded wood with a damp rag, letting it dry, and then sanding it smooth with 220-grit paper before you apply any stain. In the sanding sequence for wood stain preparation, this step anchors the process, helping the grain stay even before the final smoothing and stain application. Skip this, and your smooth project will feel rough after staining.
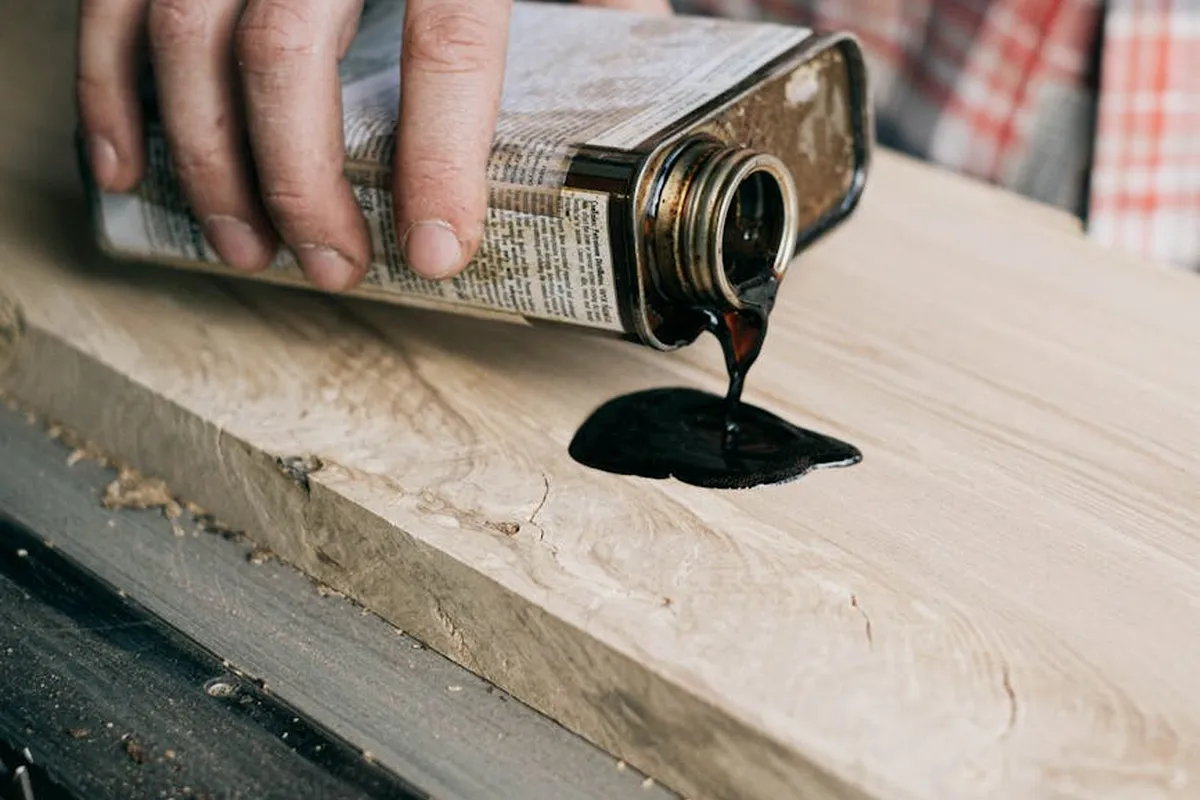
Oil-Based Stain: The Patient Path
Oil-based stains dry in two phases. First, the volatile solvents (mineral spirits) evaporate, which takes several hours. Second, the actual oils (linseed, tung) begin to slowly harden through oxidation, a reaction with oxygen in the air. This chemical process distinguishes oil-based stains from water-based stains.
For a reliable bond with polyurethane, I enforce a strict 24-hour wait after applying an oil-based stain. In cold or humid conditions, I might wait 48 hours. The extra day costs you nothing but prevents a disastrous, sticky finish.
Your application technique dictates the clock. Clean wood before staining is the foundation for even color. Wiping off all the excess stain with a clean rag until the wood looks uniform is non-negotiable. After staining, a light wipe-down and thorough drying ensure the finish bonds properly. A thick, sticky layer of leftover stain will never dry properly underneath your clear coat. A thin, wiped coat cures predictably.
Polyurethane Timelines: Between Coats and Final Cure
You need to separate two ideas in your mind: dry and cure. They are not the same. Dry means the solvents have evaporated enough for the surface to feel solid; cure means the finish has finished its chemical reaction and reached full hardness. Confusing these is why projects fail.
Everyone asks, “how long between coats of polyurethane?” I get it. You’re in the shop and want to keep moving. The answer isn’t a single number. It’s a range dictated by chemistry.
Between Coats: The Sanding Window
For water-based poly, the film sets fast. It’s usually dry to a cautious touch in about 2 hours. You can sand and recoat in 4 to 6 hours. Oil-based poly is a slower beast. Plan for it to be dry in 6 to 8 hours, but do not sand it for at least 10 hours. I often wait a full day.
Here is my shop-tested rule. If your sandpaper doesn’t create a fine, dust-like powder but instead loads up with a sticky gum, the coat is not ready for sanding. You will ruin the smooth layer you just applied.
Final Cure: The Hard Truth
This is where reality clashes with hope. A water-based poly may be dry in hours, but its full cure takes 7 to 14 days. Oil-based poly needs a long 21 to 30 days to cure completely. The molecules are still linking together long after the smell fades.
So, how long should you wait before using a table after applying polyurethane? My conservative advice is two weeks for water-based and four weeks for oil-based. You can move a dry piece, but only a cured finish will properly resist a hot coffee cup, a spilled drink, or the weight of a bookshelf.
What Controls the Clock? Factors Affecting Dry and Cure Time
If your finish is still tacky tomorrow, you are likely fighting your environment or your technique. Let’s fix that.
The Big Three: Temperature, Humidity, Airflow
Think of the ideal finishing climate as a mild spring day: 70°F (21°C), 50% humidity, with a gentle breeze across the room. Cold air dramatically slows solvent evaporation, high humidity traps water in the finish film, and still air lets solvents pool instead of venting away.
I see people try to cheat with a space heater. Do not blast heat directly on the piece. It forces the surface skin to form too quickly, trapping solvents underneath that later cause bubbles or cloudiness.
Shop Application Factors
Application technique is everything. A thick, gloopy coat takes exponentially longer to cure than a thin, even one. It is like a deep puddle versus a light mist.
The wood species matters. Dense, oily woods like teak or ipe can retard drying. The oils prevent good adhesion and slow solvent release. For these, I use a seal coat of dewaxed shellac. It creates a reliable, neutral barrier.
I prefer water-based polys for indoor projects. They have lower VOC emissions and dry faster, reducing energy use. It is a small choice that supports better indoor air quality and responsible consumption.
How to Test for Dryness in Your Shop
Forget the can label. Shop conditions dictate your schedule. Your best tools are simple, hands-on tests that tell you what’s happening at the surface.
Is the Stain Ready for Poly?
Applying poly over wet stain is a classic error. It traps solvents, creating a permanent, gummy mess. You must wait for the stain to be dry to the touch, not just surface dry.
- The Smell Test: Get close to the wood and take a deep breath. If you get a strong whiff of mineral spirits, linseed oil, or other solvents, the stain is still off-gassing. That’s trapped liquid waiting to ruin your finish. Wait until the smell is faint or gone. This is your first and simplest warning system.
- The Knuckle Test: Use the back of your knuckle, as it’s sensitive but less oily than fingertips. Lightly press it to an inconspicuous spot, like the bottom of a table leg. The wood should feel cool, not cold and clammy. A clammy feeling means residual stain solvent is still on or near the surface. Give it more time.
Is the Polyurethane Ready for Another Coat?
Polyurethane dries in stages. The surface may feel dry while the layer underneath is still soft. Sanding or recoating too soon will tear the finish.
- The Sanding Test (definitive): In a hidden area, lightly sand with 220-grit sandpaper. If the sanding dust is a fine, white powder, the coat is fully dry and ready for the next. If the dust is gummy, or if the paper gums up and drags strings of finish, the poly is still curing. Stop and wait a few more hours.
- The Fingernail Test: On a discreet edge or corner, press your fingernail firmly into the finish. If your nail leaves no impression, it’s hard enough for the next step. If you see a dent or a soft, waxy mark, the cure is incomplete. I use this as a quick check, but I always back it up with the sanding test before I commit to a full surface sanding.
The Best Practice Workflow: From Stain to Cured Poly
Rushing ruins finishes. Follow this protocol like a recipe. It builds a durable, clear film without trapping solvents or creating dust nibs.
Step-by-Step Application Protocol
-
Prepare the wood. Sand sequentially to 180 or 220 grit. Vacuum the piece, then wipe it down with a mineral-spirits-dampened rag (for oil-based) or a tack cloth (for water-based). This reveals any remaining scratches and ensures a perfectly clean surface, especially when you prepare treated wood for finishing.
-
Apply stain. Flood it on, wait 5-15 minutes (check your product), then wipe off all excess with clean, dry rags. Thorough wiping is non-negotiable; leftover stain sits on top of the wood and prevents proper poly adhesion. Start your drying clock.
-
Wait for the stain to dry. Refer to the can, but treat it as a minimum. In my 70°F, 50% humidity shop, I wait overnight. Perform the Knuckle Test. If humidity is above 70% or temperature below 65°F, add 50% more time.
-
Apply the first coat of polyurethane. Thin coats are better than thick. Use a brush, pad, or cloth to apply an even, thin layer. Do not overwork it. Start the clock for recoating.
-
Wait the full “between coats” time. For water-based poly, this is often 2-4 hours. For oil-based, 8-12 hours. Perform the Sanding Test in a corner. If it doesn’t powder, wait another few hours and test again.
-
Sand the entire surface. Use 320-grit paper or a fine abrasive pad (e.g., Scotch-Brite Maroon). Your goal is not to remove the coat, but to de-gloss it for mechanical adhesion. You should see an even, dull sheen. Vacuum and tack cloth meticulously. Any dust left becomes part of the finish.
-
Apply the next coat. Repeat steps 5 and 6 for your desired build. For tabletops, I use three coats. For decorative pieces, two often suffices.
-
Begin the cure clock. After the final coat, the finish is dry to the touch but not fully hard. For water-based poly, wait at least 7 days before light use. For oil-based poly, wait a full 21 days for a hard cure. Before that, the finish is still soft and can be easily dented or marked.
Technical Spec Sheet: Finish Timelines
These times are your baseline. They assume a perfect shop environment: 70°F, 50% relative humidity, and good airflow. In my experience, you rarely get all three. Treat these numbers as the fastest possible times under ideal lab conditions. Your real-world project will often take longer.
Dry & Cure Time Reference Table
| Product Type | Dry to Touch | Dry for Recoat/Sanding | Full Cure |
|---|---|---|---|
| Water-Based Stain | 30-60 min | 2-4 hours | 24 hours |
| Oil-Based Stain | 2-4 hours | 24 hours | 72 hours |
| Water-Based Poly | 2 hours | 4-6 hours | 7-14 days |
| Oil-Based Poly | 6-8 hours | 10-24 hours | 21-30 days |
The most common mistake is confusing “dry” with “cured,” which ruins a finish more often than any technique error. “Dry” means the solvents have evaporated enough for the next step. “Cure” is a chemical process where the finish reaches its final hardness and durability.
Think of it like concrete. It’s dry to the touch in hours, but you wouldn’t park a truck on it for weeks. That’s the difference between recoat time and full cure.
Speed vs. Strength: The Trade-Off
Water-based and oil-based finishes work on completely different principles. This is the core of the speed versus strength dilemma. A closer look at oil-based versus water-based finishes explains how each choice affects drying time and durability.
Water-based finishes dry by evaporation. The water and co-solvents simply leave the film, leaving the acrylic or urethane resins behind. It’s fast. Oil-based finishes cure by oxidation. The oils react with oxygen in the air, cross-linking to form a hard, plastic-like film. This is a slow chemical reaction.
Choose water-based polyurethane for speed and low odor on projects that won’t see heavy abuse. I use it for picture frames, bookshelves, and decorative boxes. It dries clear without ambering, which is perfect for maintaining the natural color of maple or ash. Its moderate durability is plenty for these items.
Choose oil-based polyurethane for maximum durability on surfaces that must withstand heat, moisture, and impact. My kitchen table, shop workbench, and any exterior door get an oil-based finish. The long cure time results in a thicker, more flexible, and more water-resistant film. The amber tint can also enrich woods like pine or oak.
Hybrid formulations, often called “water-based polyurethane with alkyd resins,” try to split the difference. They use water as the carrier (for faster dry and low odor) but include modified oils for better film formation. I’ve tested several. They flow on better than pure water-based poly and offer slightly better durability, but they still can’t match the deep protection of a fully cured oil-based film. They are a solid choice for interior furniture that gets daily use, like a side table.
Your project’s purpose decides the finish. Need a child’s toy done by tomorrow? Water-based is your only ethical choice for a safe, fast turnaround. Building a heirloom dining table you want to last 50 years? The patience for an oil-based cure is non-negotiable.
Frequently Asked Questions: Stain & Polyurethane Timelines
What is the practical difference between a finish being ‘dry’ and being ‘cured’?
Dry means solvents have evaporated, forming a solid film you can sand or recoat. Cure is the subsequent chemical cross-linking that achieves final hardness, durability, and chemical resistance, which takes significantly longer.
How can you definitively tell if a stain is dry enough for polyurethane?
Perform the solvent test: lightly sand an inconspicuous area with 220-grit paper. If the residue is dry, powdered pigment, it’s ready; if it’s gummy or pasty, solvents are still present and you must wait.
What is the most effective way to safely speed up polyurethane drying time?
Increase air circulation with a fan directed near, not at, the piece to promote solvent evaporation without disturbing the film. Ensure your shop environment is at the product’s ideal temperature (typically 70°F/21°C) and low humidity.
Why does a polyurethane finish require weeks to cure when it dries in hours?
Drying is physical solvent loss, while curing is a slow polymerization reaction. The resin molecules continue to cross-link from the surface inward, building the final network strength long after the film feels dry.
How long should you wait before placing objects on a newly polyurethaned table?
For light use, wait the full cure time: 14 days for water-based, 30 days for oil-based. Before full cure, the finish remains thermoplastic and is susceptible to permanent indentation from heavy or sharp objects.
Building a Durable Finish
Your finish is only as good as the time you give it. The most critical takeaway is to separate “dry to the touch” from “fully cured.” Rushing the cure is the most common reason finishes fail prematurely. Always follow your specific product’s instructions for recoat and cure times in your exact temperature and humidity. Patience here protects your work and ensures the finish reaches its advertised hardness and durability.
A quality finish is a responsibility. Properly dispose of rags and solvents to prevent fire hazard and environmental harm. Choosing finishes from companies committed to sustainable forestry and lower VOCs is a direct investment in the craft’s future.
Relevant Resources for Further Exploration
- r/woodworking on Reddit: Wood Stain – how long should I let it dry before polyurethaning?
- how long should freshly stained wood cure before applying polyurethane? | Woodworking Talk
- polyurethane – Wait how long after applying wood stain before urethane pass? – Home Improvement Stack Exchange
- Using Polyurethane 1 hour after staining. | Sawmill Creek Woodworking Community
- How Long Does Polyurethane Take to Dry? – Bob Vila
- How long does it take for polyurethane to dry after staining? – Quora
- How Long Does Wood Stain Take To Dry? | Family Handyman
- How Long Does It Take Wood Stain to Dry? – Bob Vila
David Ernst
David is a veteran woodworker. He is now retired and stays in his cabin in Wisconsin which he built himself. David has 25+ years experience working in carpentry and wood shops. He has designed and built many small and large wood projects and knows the science behind wood selection like the back of his hand. He is an expert guide on any questions regarding wood material selection, wood restoration, wood working basics and other types of wood. While his expertise is in woodworking, his knowledge and first hand experience is far from 'woody'.